FALL CLASS SCHEDULE

IMG_4608

Just a quick note to let you know that the Fall Class Schedule has been updated on the 'paint + classes' page of the website and I will post it here as well.

I am getting ready for a booth at this weekend's Carlton Crush Festival, as well as tending to my sick baby girl and recovering from a yucky flu bug…so I probably won't  do a fun blog  post this week.  But next week I will be back 'on my A game'!

Have a great week!!

fall class schedule copy

BEFORE & AFTER || a sewing table

A few weeks ago I picked up this darling little sewing table at Goodwill.  It was only $8 and I was looking for a little table for our master bedroom.

Now I forgot to take a 'BEFORE' picture, but I took one shortly after I started.  I think it's even better than a true 'BEFORE' because it shows how the first coat of white paint looks.  It looks bad and if you haven't painted with Chalk Paint® or Milk Paint, you may get nervous or discouraged after the first coat.  Fear not, the second coat always looks great!

IMG_4552

IMG_4553

A majority of the table is painted with PURE WHITE Chalk Paint®.  It took two coats, and then I distressed the edges.  This is an old piece and I want it to look old and full of character.

I then painted the doors and the fluted detail on the legs with TROPHY MMS Milk Paint.  After one coat of the Milk Paint, I sanded the doors, I still wanted to see the beautiful (but damaged) wood underneath.  The entire piece received one coat of clear wax and it was tucked into the little corner in my bedroom that afternoon!

IMG_4591

IMG_4594

IMG_4596

One of the many things I love about both of these paints is the fast drying time.  I can finish a piece in one day and have it decorated or functioning that evening!!  I am an instant gratification kind of girl and this paint works perfectly for refinishing a piece quickly!  Love it!

BEING THANKFUL AMONG THE MESSINESS

IMG_4563

IMG_4566

IMG_4559

I am learning to embrace the way I am 'wired'.  Creative, orderly, energetic, hard working, sympathetic and a lover of beauty.  But, I also struggle with not letting these things demand how I will live each day.  Living with people is messy, both physically and emotionally.  I can choose to love on the people around me or get frustrated because they don't allow me the time or the ability to keep things orderly, clean, organized, etc.  I can easily loose perspective!

Everywhere I look we have un-finished and half finished projects.  The chickens are crammed into a little pen with a shanty of a home.  The excavator will break ground this week for Matt's barn.  The basement looks like somebody started construction and then walked away.  And those are all such trivial complaints!   All around me friends are hearing hard medical diagnoses, family and friend's marriages are falling apart, people are loosing jobs, and I can hardly even think of the heartache happening in the Middle East.

IMG_4555

IMG_4557

But, I am learning to embrace the messiness of life and enjoy the beauty in the little moments.  Life is hard and when I start to feel overwhelmed by it all, I kiss my babies and thank God for the goodness around me!

IMG_4568

IMG_4569

IMG_4572

IMG_4575

IMG_4580

PAINTED CERAMIC TILE

Every time I talk to one of you lovely ladies (or gentlemen) who reads the blog, you always say how much you love seeing pictures of our home projects.  Matt and I both love working on our home, so it's fun for me to share pictures and projects!  We have A LOT of 'un-finished' projects, as 'one things leads to another'.  The beauty of this is that all of the sudden a lot of projects will be wrapped up at the same time ;-)

I am slowly working on making changes to our powder room.  I hope to wallpaper within the next couple of weeks and I just finished painting the ceramic floor tile last week.  I thought I would share a few photos and my thoughts on painting tile.

IMG_4513

Here is the 'BEFORE' photo.

Now, let me start by saying my approach with painting the floor tile was that if it didn't turn out, we could rip it out and replace it with new tile.  That wouldn't be ideal, but I knew it was an option.  **I may not have been so brave as to paint the floor tile if I didn't know that we could replace it if it was a total bomb.**  Also, we had some extra floor tile stored in the basement.  I tried painting and sealing several pieces before actually painting the floor.

IMG_4523

IMG_4525

IMG_4524

I began by scrubbing the floor with TSP. I let the floors completely dry and made sure they were clean before I moved onto taping the trim and plumbing fixtures.  Once everything was clean and taped, I painted the entire floor with 'Country Grey' Chalk Paint® decorative paint.  As you know, I love (and sell) Annie Sloan's paint.  I love it and use it on everything!  I have used it on concrete floors, and was curious as to how it would paint and hold up on a tile floor.

After two coats of the 'Country Grey', I cut in the alternating squares with 'Pure White'.  'Pure White' is the bright white offered in the line up of beautiful colors.  I used an artist brush to cut in.  I probably could have used tape to tape off the squares, but I didn't want to risk the tape pulling off the freshly painted grey paint.

IMG_4528

IMG_4527

I cut in (two coats) of 'Coco' Chalk Paint® over the grout lines.  I wasn't loving the look because the grout lines were not straight.  I just looked like painted tile, but not necessarily in a good way.  My sweet and well intentioned husband kept making suggestions and I knew he was trying to think of a polite way to say it look a bit tchotchke.

IMG_4544

IMG_4545

So, I took my own advice…..keep working on it until you love it!  You can always change something to make it more of what you like.  I lacquered the floor with the Annie Sloan Lacquer.  It's an awesome product.  It seals and protects and has a beautiful matte finish.  Not to mention it's water based for easy clean up!

After two coats of lacquer, I applied a light coat of dark wax.  The dark wax provided just the bit of aging and distressing I needed to make the imperfect grout lines look worn and a bit more authentic.  I kept everyone off of the floor tile during this entire process and followed the instructions on the lacquer container.  I also kept everyone off of the finished floor for a week, this little powder room gets a lot of foot traffic and I wanted to give the floor a fighting chance!  So far it looks really great and has held up very well.  And for those of you who know my husband, he is a tough critic!  He likes it and said it looks great ;-)

The last picture makes the wallpaper and floor tile color look a little off.  It actually matches perfectly and looks really good against the oak wood floor which is right outside of the bathroom door.  Hopefully I will have pictures to post soon of the new wallpaper!  Until then, I am off to paint the ceiling of the dining room and living room.  Not super fun but I love what a fresh coat of paint does to a room!!

If you have questions about painting tile, don't hesitate to shoot me an email or ask in the comments section.

xoxo~

Darci

REPURPOSING CABINET DOORS || painted signs

As you may already know, I love to use cabinet doors to hand paint signs.  I love that they are already 'cut and framed'.  No building or prep work, just paint and hang!

IMG_3057

I made these these two last summer and hung them in our covered outdoor space.  Matt used old square-head nails to hang them, they were my favorite.  When we sold our home, we sold it furnished, these two signs were included in the sale.

IMG_3060

Since we have moved, I haven't taken the time to make any new signs.  Last week a friend/client gave me some extra cabinet doors from a kitchen remodel she had done years ago.  She was keeping the doors for a future project, but was finally ready to just clean and purge.  I know that feeling well ;-)  Anyways, she sent me home with four large cabinet doors…..

IMG_4533

IMG_4539

IMG_4537

Simple little reminders.  And they just cost me an afternoon and a little bit of paint!  My kind of project!!

**For any of you who might want to make a similar sign, here are some very technical instructions {wink}…

I painted the cabinet door with two coats of French Linen {Chalk Paint®}.

Typed the wording than printed the wording in black.

Cut the words than traced over them firmly with a ball paint pin.

Used an artist brush and painted the letters with Graphite {Chalk Paint®}.

Distressed with 180 grit sandpaper.

Waxed the entire sign with clear wax.

Happy painting!!

ONE PROJECT LEADS TO ANOTHER || the joys of remodeling your own home

We are loving this sunny, warm weather!  What about you?

We have been working hard, but balancing it out with some fun play too.  Matt is just finishing up a couple bathroom remodels and starting to build the cabinetry for a client's home library, it's going to be a beauty!!  (I hope to get pictures of the bathrooms soon, they turned out really nice.) On the weekends and some evenings, we have been working on our basement.  The playroom is progressing….

IMG_4522

IMG_4519

And one thing always leads to another….Matt has to rebuild the stairs leading to the basement, which leads to new trim work, which leads to 'why not add paneling to the wall', which leads to ' let's make some changes in the powder room since you see the wall and stairs from the powder room'….we have a sickness.  Seriously.  And the worse part is, we feed off of each other!

So, now with all of my other half finished projects, I am going to start on the powder room.  Below is a quick sample board I threw together and a few pictures of the powder room as it sits now.

haneyprm copy

IMG_4513

IMG_4516

IMG_4514

We are going to cover the existing wall paper with a neutral buffalo check wallpaper, add new doors and new trim to the current built-in and then paint it blue, new lights and plumbing fixtures and I am going to attempt to paint the tile.  I am thinking a black and white check?!?  I have seen a lot of painted tile projects online, so I am going to try my hand at it!

In the mean time, I am off to make paper chains with my sweet pea!

Happy Summer!!

THE PLAYROOM || progress

So the 'to-do' list is never ending, as well as the grocery list, the 'project' list, the 'friends we would like to have over for dinner' list and so on.  I have always been a list maker.  But, shortly after we moved in February, I realized the lists had a bit too much control over my mind and my attitude.  What's with that?  That's not how I wanted to live.  I wasn't leaving room in the margins, and if someone or something came between me and crossing off an item on my list, I was snappy.  Not so fun to be around!

All of our house projects are taking a lot longer than we anticipated.  We have hit some speed bumps with the house, but that is just part of any remodeling project!  But you know what?  I have let go of the lists (not all of them ;-))) and it doesn't bother me that the house projects are taking longer.  A lot of things don't bother me like they use to.  This 'letting go' business turns out to be really good for my heart.  And my family appreciates a wife/mama who isn't so project oriented all.of.the.time.

I thought I would post a few photos of the play room.  It's taken quite a while to get to this point, and it will still take me at least another month to get it finished.  But, it's further along than it was when we moved in {wink}.

IMG_4505

IMG_4509

IMG_4508

IMG_4506

IMG_4511

There is no natural light in this space, so it's hard for an amateur like me to get decent photos!  You can see I still have a lot to do!

I am curious to see how the door knobs turn out.  They don't lock, they act as a handle to open the doors.  Once I paint the oak doors, I will wax the doors and the door knobs, I will let you know how it turns out.

The flooring all comes up soon so I am trying to paint everything now while it doesn't matter if paint gets on the floor.  In the mean time, the girls love playing in the space and I can't wait to get it finished for them.  There is something so sweet about siblings playing together, even if it only lasts for 30 seconds at a time ;-)

SUMMER GARDENING || favorite garden recipes

I starting my hand at gardening the first year Matt and I were married.  I was so happy to have my own little house.  A place where I could create a home, love on people and try my hand at 'domestic' things'.  My first attempt at gardening wasn't too successful!  But, once I realized that I was over-complicating it, things seemed to grow!  You put a seed in the dirt, water it and watch it grow.  AMAZING.

IMG_4496

IMG_4494

IMG_4493

IMG_4499

For the past 10 years, I have been gardening out of raised beds.  I am learning how I need to approach things a bit differently when gardening on a large, flat plot of dirt.

 The weeds are killing me!  Definitely using ALOT more mulch next year.  But what a sense of accomplishment to enjoy the fruits of our labor!

IMG_4497

IMG_4483

IMG_4487

Most Saturday mornings, Addilyn helps me in the garden while Savanna naps.  What a joy to listen to her chat, build mud pies, look for worms, pick fruits and veggies and just get dirty in the garden.  It takes 10 times longer to pull weeds and work when she is with me, but it is a special time for us.

I thought I would share a few of our favorite summer recipes, so far this summer.  I am trying to be creative with food we typically don't eat, but are growing in the garden {kale, cabbage, leeks, etc}.  We do a lot of grilling in the summer, and a lot of 'winging it' when it comes to summer meal planning.  I love having a few favorite recipes and then tweaking them a bit according to what I have on hand.

3eb46095b4d31e508011fecf2b9676da

warm kale salad

fff7e3366dcffe0eab7f9af31b0235a5

kale salad with warm garlic and raisin vinaigrette 

cc5e22619e753ea403dde60102ccbd34

grilled roasted corn salad

0f806f1b4c523d553ca535b95608d694

lemon basil pizza with spinach and mozzarella

28e1251b3832f65b679c93663ca9634a

pizza with summer squash and feta

d6111818012aa512d636eb448d4668f4

Mediterranean baked chicken

Enjoy!

4th of JULY || and savoring the little moments

Ever since Addilyn was born, we spend most of the Fourth of July at Cannon Beach.  It's a sweet little tradition that we look forward to every summer.  The bakery, the shops, the darling parade, the sweet smell of the ocean air, it's one of my favorite things about summer.

IMG_4461

I am definitely learning to savor the time I spend with my little family.  The girls are growing so fast.  I want to pour into them and love on them.  And honestly, some days are just hard.  I loose my patience too many times to count.  I snap and nag, and these sweet little ones love on me anyway.

We slowed down for the day.  We sat and enjoyed the parade.  We enjoyed each other's company.  We were present and it was just what this tired mama/wife needed.

IMG_4463

IMG_4458

Little Miss loves to savor everything around her.  Truly.  She inspires me to constantly look at things through a child's perspective.

IMG_4465

IMG_4455

IMG_4473

IMG_4471

After a long {but so great} day at the beach, we headed to my parent's for a BBQ and got to spend more time with family.

Sometimes I can be so overwhelmed with motherhood.

Am I spending enough time with my babies? Am I working too much? Am I teaching them enough? Am I pouring into them enough? How do I carve out time for my handsome husband?

I love my work and I love being with my kiddos at home.  It's a hard balance between loving your job and loving on your kids.  I am working on letting go of the guilt and learning to celebrate the sweet little moments.  I am finally finding peace with my work/home schedule.  Not balance, I don't know that I will ever find that, but peace.  God can fill in the spots where I am lacking, and believe me, there are plenty.

I hope you will be encouraged to let go of the guilt and fill up on God's peace!

A LITTLE GREEN || adding new {magnolia} life to an old wreath

When we moved {a few months ago} I did a lot of purging.  It felt so good.  We accumulate so much stuff!  I don't know if you are like this, but when we moved and lived out of boxes for the first few weeks, I realized how little we needed.  As we remodel our home, I am working at cleaning and organizing as we go.

As I am slowly starting to decorate some of the rooms, I am working hard at re-purposing items I already own.  It's so easy to go buy new {which I seem to do a little too often}.  I am really going to push myself to be creative with what I already own!

IMG_4415

I was cleaning the storage shed last week and just about tossed this wreath into the burn pile.  It survived the 'purge and move' but it was just taking up space and I was ready to toss it.

IMG_4416

I changed my mind set and tried to think of how I could fall in love with this little darling of a wreath.  So, I loaded the girls into the car and we ran to the store in search of some artificial flowers….which can be tough since some look we too artificial.  Especially when I didn't want to have to leave our little town of McMinnville in search of   fake greens.

IMG_4443

Believe it or not, I found some decent magnolia stems and leaves at Wal-Mart.  I directed the flower stems, and hot glued the leaves and one of the  flowers to the wreath. It gives it a little personality, and I spent $10 and less than 10 minutes on the project.

IMG_4442

We are looking at tile to resurface the fireplace.  My top two contenders are...

contemporary-tile

and

Tile

both are from Pratt and Larson.  If you haven't been to Pratt and Larson and you are thinking of adding tile in your home, it is my absolute favorite place to purchase tile.  They have a 'seconds' store which is fabulous for smaller projects.  Their tile is hand made and B.E.A.U.T.I.F.U.L!

IMG_4449

I am slowly adding accessories here and there.  I have a few bigger projects I want to tackle for the living room, but I need to steal doors from the house and a dresser that's being used to hold our tv.  So, I will wait until my new doors are installed and the basement is finished.  All in good time….at least that is what I keep telling myself ;-)

Have a lovely weekend!

MONSTER COOKIES || a sweet treat recipe

This weekend my sweet hubby pressure washed the garage roof for me.  It's a really steep roof, and it was really dirty, so it was a really big deal to me.

I love to pressure wash!  It's instant gratification....from yucky to clean, in just a matter of minutes.  Matt won't let me get up on a ladder to pressure wash {he is smart man}.  By the time he got the harness, his big ladder, and had pressure washed the roof, the afternoon was gone.  He spent his entire weekend afternoon doing a yucky chore for me.  Such a sweet man.  Anyways, I made sure to have cookies baking in the oven when he walked in the door.

IMG_4417

They may be our new favorite cookie.  And we LOVE our chocolate chip cookies around here.

IMG_4421

There is something so special about the yummy smells coming from the kitchen.  Bread, cookies, dinner, whatever is cooking, it just makes a home cozy.

IMG_4424

Go bake these cookies soon.  Your family, especially your sweet little babies, will love you for these!!

IMG_4438

There is something about warm, baked goodness.  It makes hearts happy and makes your home a little extra cozy and sweet.

These cookies take less than 5 minutes to make, and the oven does the rest of the work.  Make them today, and maybe give away half because they make a big batch...and who doesn't love fresh cookies?!?

IMG_4431
MONSTER COOKIE RECIPE::
Pre-heat oven to 325.
Mix 1 cup butter softened, 1 cup sugar, and 1 cup packed brown sugar.
Add 2 eggs and 1 ½ tsp vanilla, mix blend.
In separate bowl: mix 2 cups flour, 1 tsp baking soda, 1 tsp salt.
Combine all ingredients and then ADD:
1 cup choc chips, 1 cup walnuts(or pecans), 1 cup peanut butter chips, and 3 cups quick oatmeal.
Mix all ingredients by hand and drop large, rounded spoonfuls onto baking sheets.
Bake at 325 for 10-12 minutes.
Take them out before they fully cooked.
Enjoy!!

VANITY AND CHAIR || before + after

You know how there are certain things you think will just never happen to you?  For no reason, other than you just don't think they will happen.  Well, my computer crashed last week and of course the only thing I ever backed up was Quickbooks (which is good since I would be in a deep state of depression if I had to muddle my way through re-entering accounting for our personal and two business accounts....ugg.) Anyways, I am slowly getting applications re-installed on my computer and now have a fancy-smacny external hard drive attached at all times.  Lesson learned!

I had some great before + after photos of this darling vanity and chair.  Of course I lost all of those photos and haven't yet re-installed my photo editing program.  But, I still thought I would show a few 'after photos'!

IMG_4405

I picked up this darling vanity and chair at a garage sale a few weeks ago.  It was orange and had IMG_4405

I picked this darling duo at a garage sale a few weeks ago.  It was orange, brown and white.

IMG_4408

I used OLD WHITE {Chalk Paint®} for the vanity with one coat of CLEAR WAX. I sanded the edges lightly because this piece had A LOT of paint layers.  I wanted to add to the history of the piece, not make is look like it was brand new.

IMG_4406

I used LUCKETT'S GREEN {MMS MILK PAINT} without the bonding agent.  I sanded the edges and applied a CLEAR WAX.

IMG_4410

I sell fun knobs at the studio.  I snagged this darling white flower knob for a bit of a feminine touch.  Right now this cutie sits in my bedroom.  I am not sure if it will stay there, but it's the perfect spot to keep my planner and journal.

In other news, I thought I would show a few photos of the basement progress.....

IMG_4411

Matt is busy modifying the cabinet so it can house the TV.  He moved windows and doors so we are changing the layout a bit.  He is going to re-purpose the mantel {taken from a job years ago} and then paint all of the cabinet and woodwork white....

IMG_4412

It's a bit of a mess, to say the least, but we are almost ready to start cleaning up and prepping for paint {walls,ceiling and cabinetry}.  Yahoo!

IMG_4413

The play room is right off of the great room.  I am getting ready to paint the walls and then remove the flooring.  Addilyn already loves cozy-ing up in their soon to be book nook.  Love that girl!  And so fun to create a room just for the girls!  I can't wait to start getting some work done in there!

OK, I am off to work on my computer a bit more, super fun.

xoxo~Darci

BEFORE + AFTER || a few more 'AFTERS'

Matt is doing some work at a home he remodeled two years ago.  We never snapped pictures of the completed project with the landscaping in place.  I asked him to snap a few yesterday and I thought I would share them.

before

This is what the home looked like when the owners contacted us.  They brought the property for the amazing views and the established vineyard.  When they talked to us, their intention was to demolish the existing house and build brand new.  Matt explained how they could still get the house of their dreams while saving the existing home (and saving money on permits, septic, etc).

Framing

When we worked up the design for this home, there were several factors that had to be considered.  I won't bore you with those details!  But, the homeowners wanted a MODERN home with a NORTHWEST/LODGE vibe.    And, they homeowners were, and still are, the best people ever!  They are so kind and were so fun to work with!!

IMG_4384

Now the home completely functions for them and their growing family (and business).  It blends into hills and trees, yet still has some personality.

IMG_4381

This is the new front door and entry.  Looks a little different, right?

IMG_4386

The back side of the home has more of a MODERN look and captures the AMAZING valley and vineyard views.  They are just getting ready to add stone to the bottom level of concrete and that will look really sharp.

IMG_4383

One of these days I will post photos of the interior!

In the mean time, enjoy your week!  I am hoping to wrap up a lot of 'half finished' projects, both for myself and for clients.  I should have a lot of 'AFTER' photos to bomb you with in the next few weeks ;-)

KID'S PLAYROOM || my list of necessities

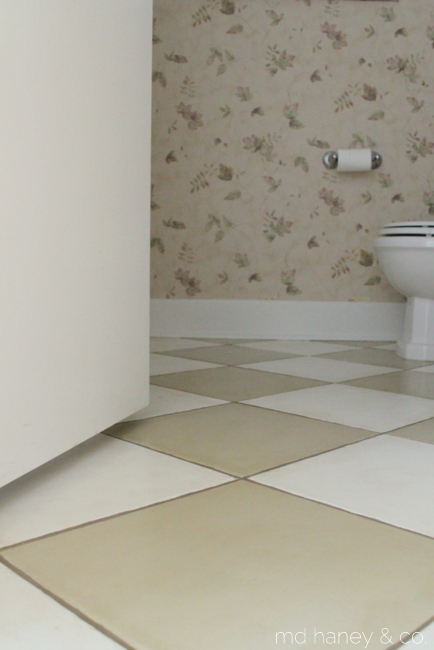
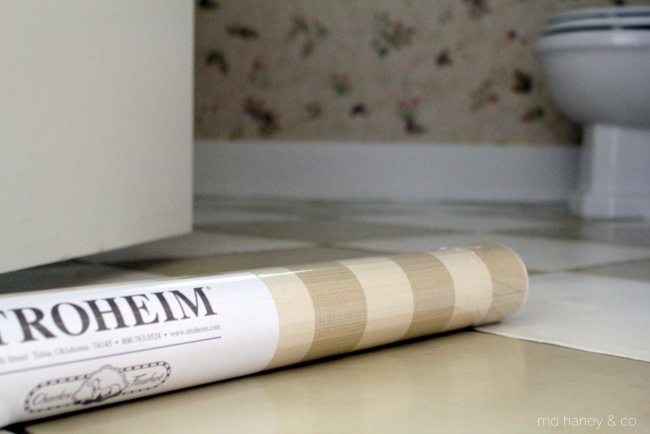
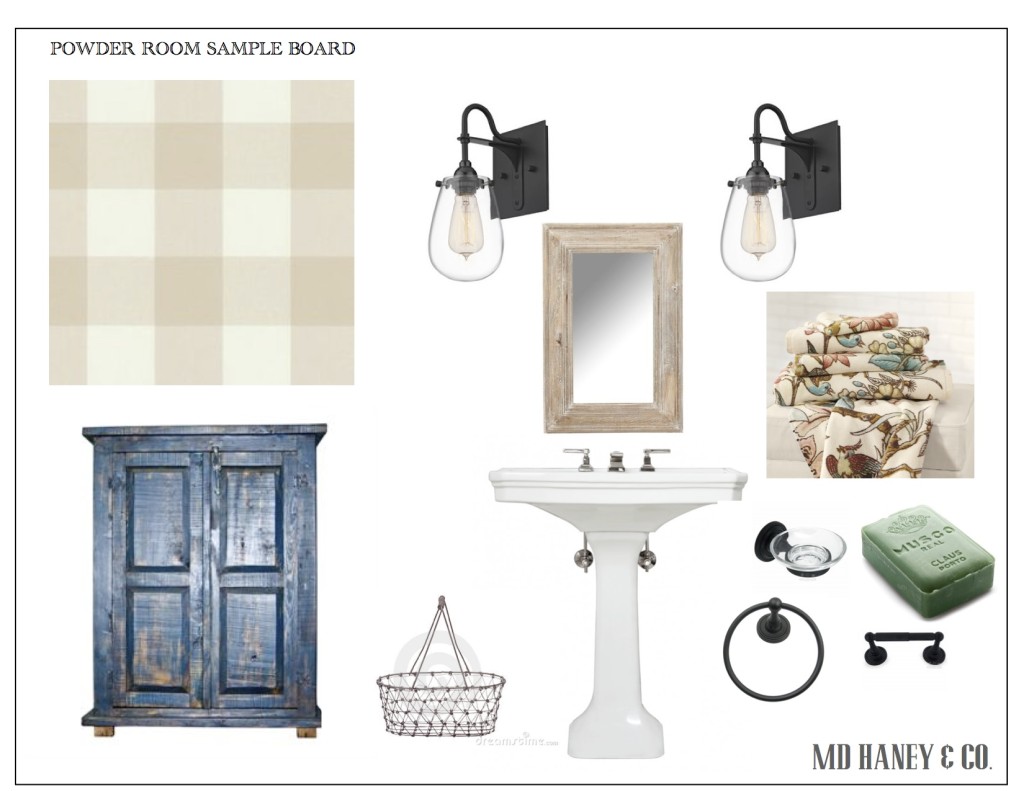
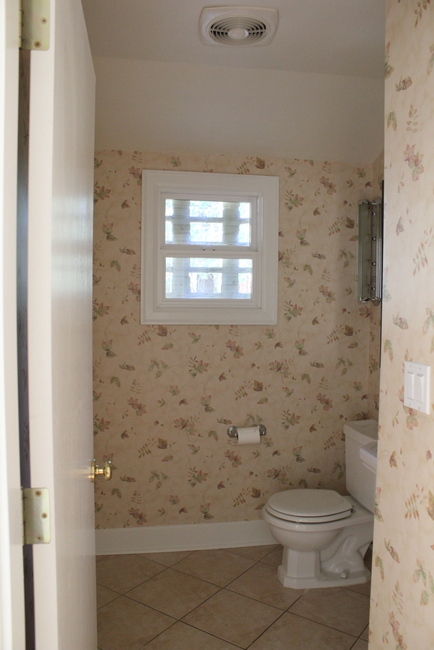
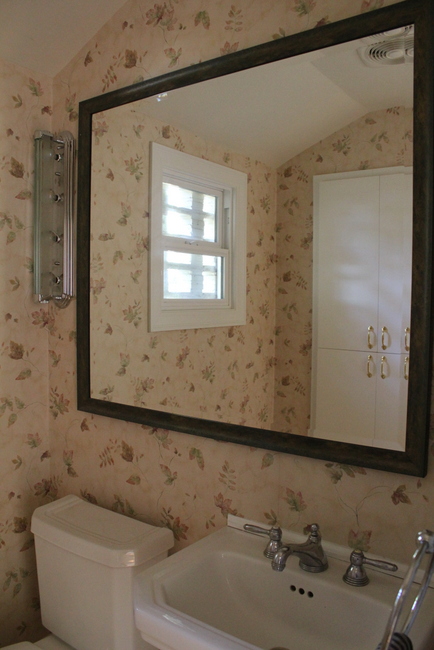
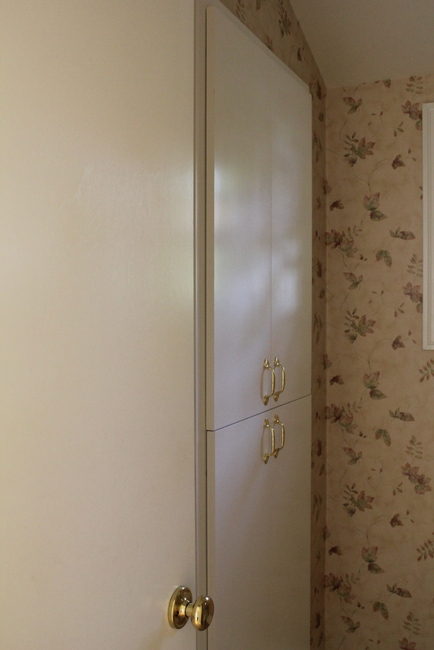
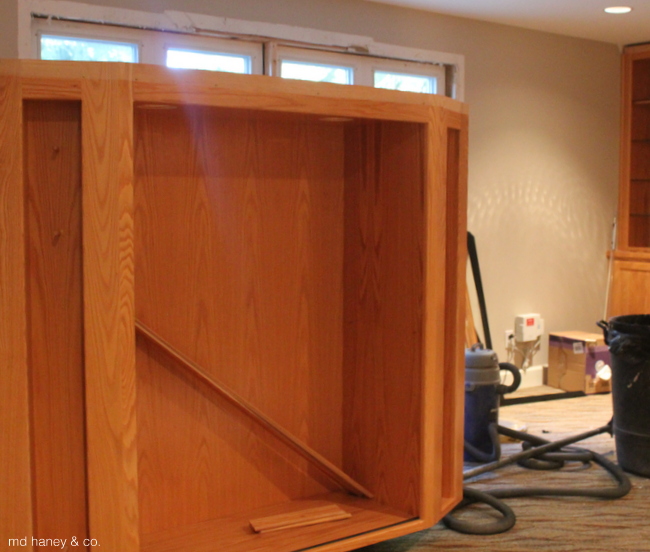
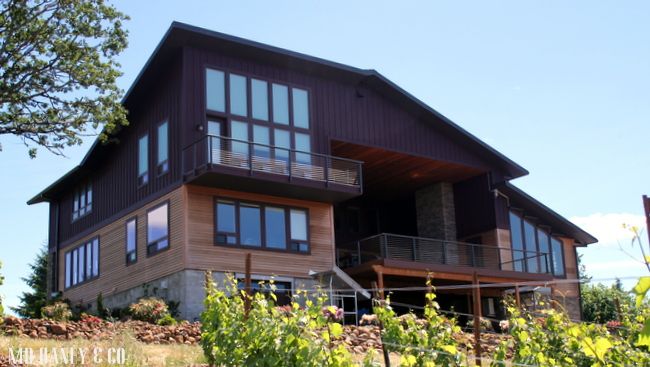
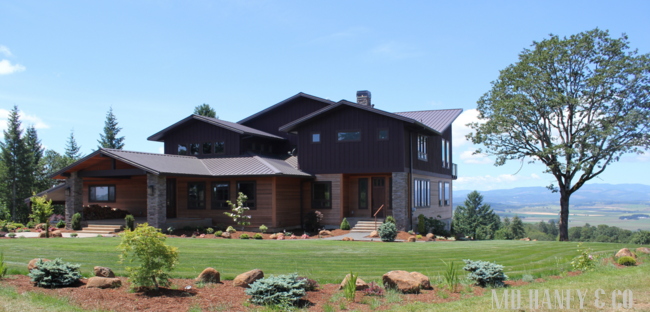
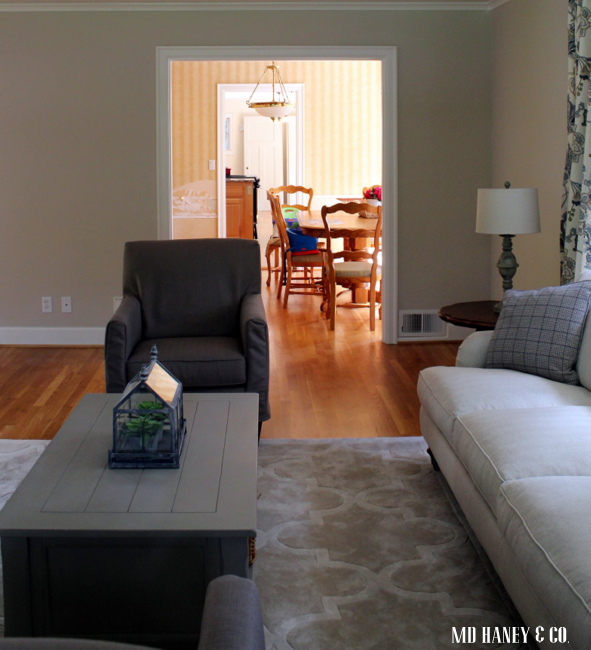
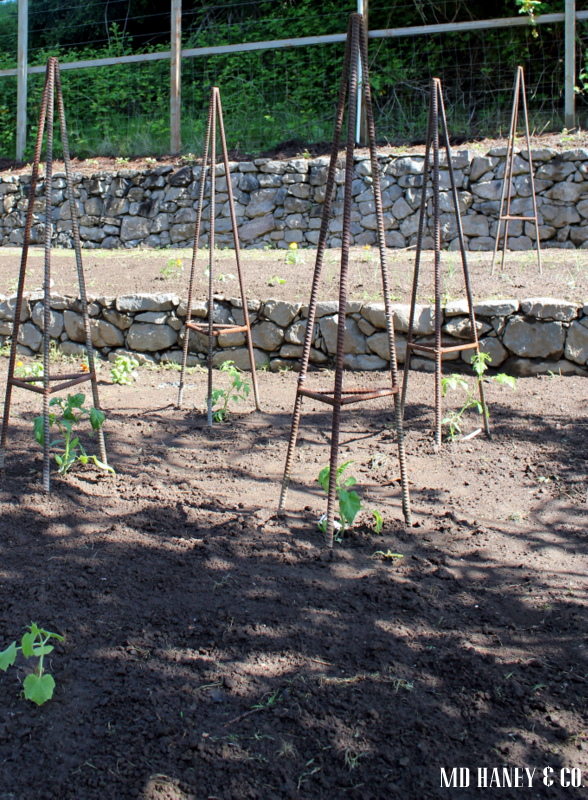
Last weekend,  Matt passed the 'point of no return' with our home remodel.  He started moving windows and doors, pulling down drywall and lighting and more.  It's definitely a series of 'one thing leads to another'.  I feel like we continue to change our mind the longer we live here!  We always recommend clients live in their space for a while before we start designing and remodeling.  It's really hard to take my own advice, but I really believe it pays off!

IMG_4376

One of the bigger projects on my summer TO-DO list, is to turn this room in the basement into a kid's playroom.  It's a long space and it's perfect for a playroom.  It's tucked away from the rest of the living space, which translates in YOU DON"T SEE THE MESS ALL OF THE TIME.

IMG_4377

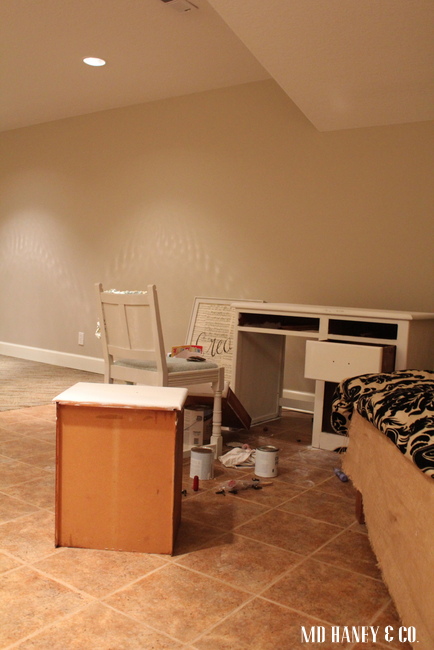
The only 'big' things we will be doing in this room, are painting and new flooring.  For flooring, we still haven't decided on carpet or vinyl/marmolium.  I continue to agonize.  I have such sympathy when I am helping clients in their home, it can be so hard to decide on a material/paint color/layout/etc.!  We all want to make the right choice the first time.  Right?  Definitely don't want to waste time and money re-doing something!  Uggg.

IMG_4378

So, before I get my paint brush out, I am working on a list of play room necessities.  Creative areas that I think are necessary for our play room.  I want to inspire my girls to be creative and imaginative.  A space where kids can go play and I don't worry about safety or messes.  I guess that's what we all want in a playroom!

b3f1825bbd1fc35605aa580144b86acb

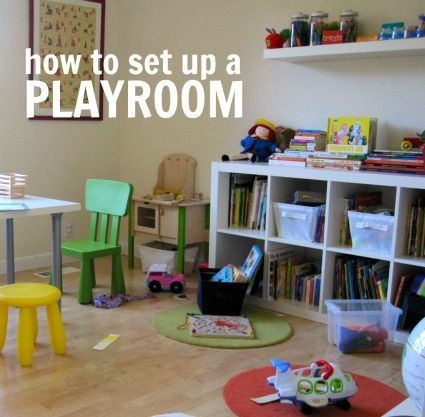
I found this GREAT blog post on how to set up a playroom.  It's written by a teacher and has super tips and ideas!

16cf5b982820ee5f1d78e1eb4db2ba2f

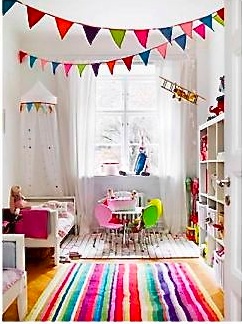
I am loving the bright colors in this room!  Doesn't it just make you happy?  I am definitely going for bright colors and a good dash of whimsey in our playroom!

8cfe998237f1916ada153b1e79070793

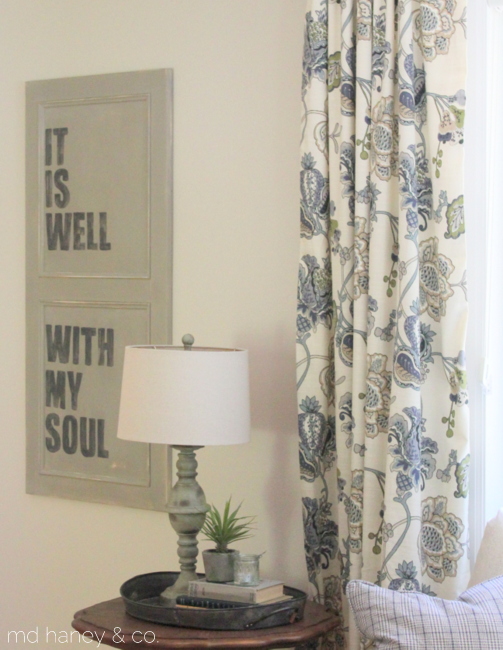
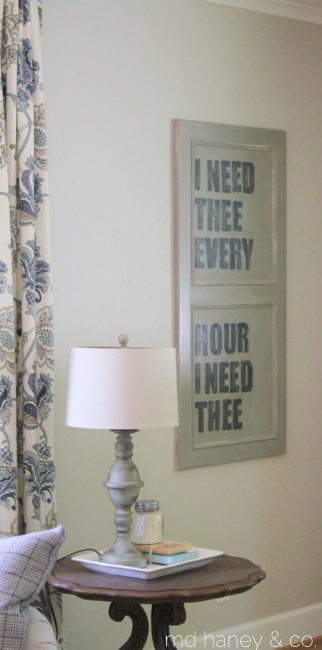
Love this darling sign.  I am finding some great art work to order from Etsy.  Sometimes it's just better to order things instead of trying to make everything ;-)  Says the girl who has a hard time taking her own advice…..

c1dc7f011184fef348ba872c138e5cf6

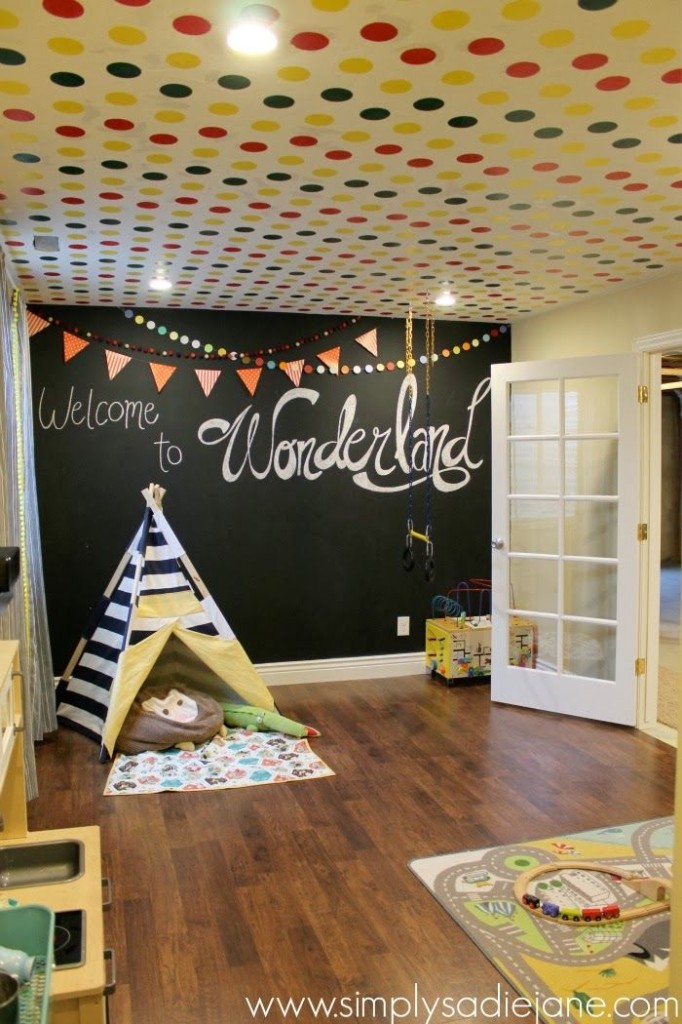
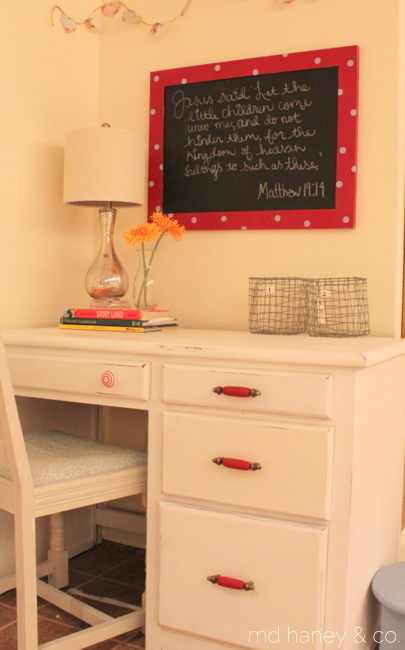
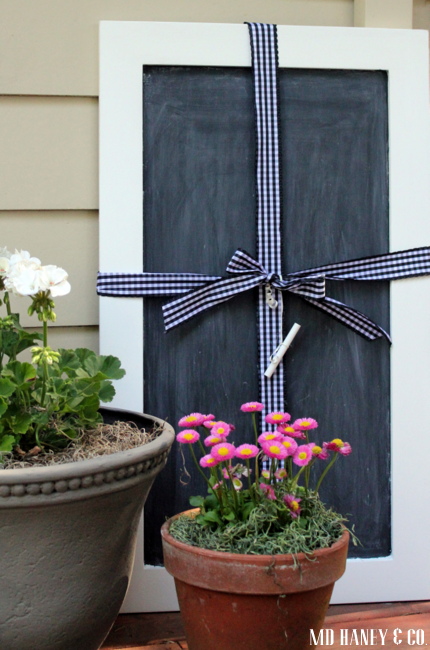
Of course I love the chalkboard wall in this room!  As well as every other detail.  Can you believe those polka-dots on the ceiling?  I am about to break out in hives just thinking about painting polka-dots on the ceiling, but they sure are darling!

00c5d63e62bbed01538b8e6021620522

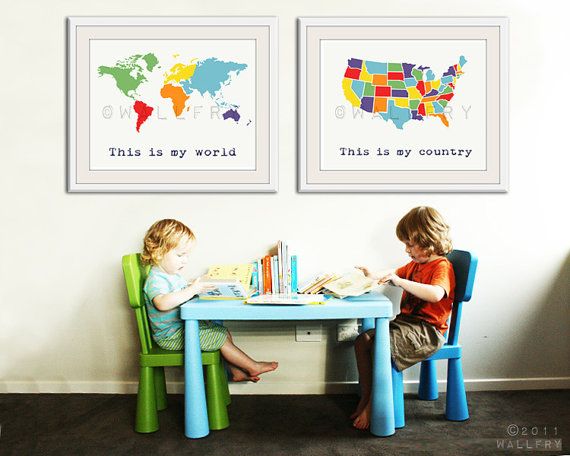
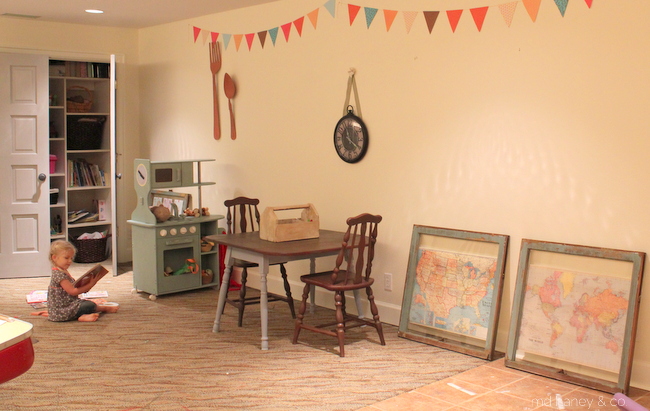
Love the maps and definitely want to add those to the wall (Etsy).

1a862c2f70dd33e35f787fdb92fb2a37
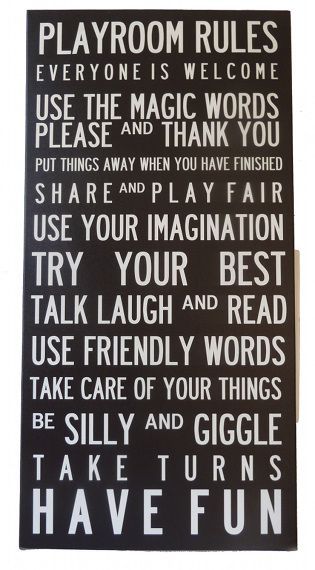
Who doesn't love all of the fun subway style signs?!?

9704780cff65a588e6b921459d13f570

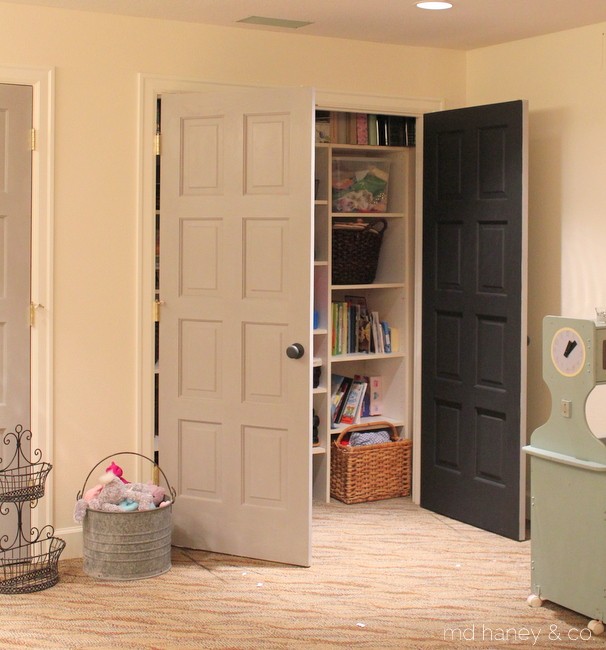
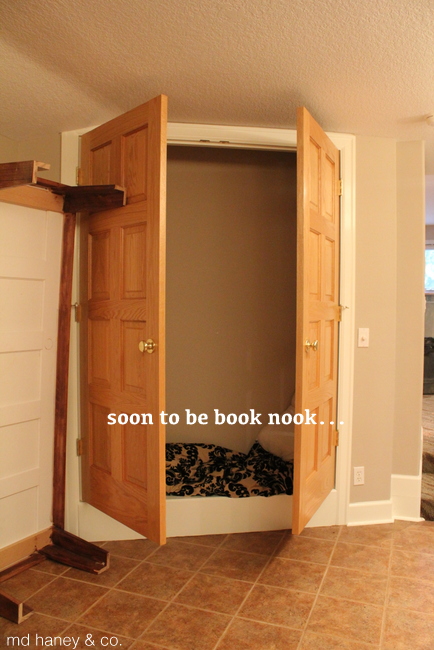
We have a perfect closet to create a fun reading nook.  I think that is one of the things I am most excited about for this space!  I will probably kick the girls out and cozy up in there by myself.

b86ac9d7aecb3378988694babd3cd9eb

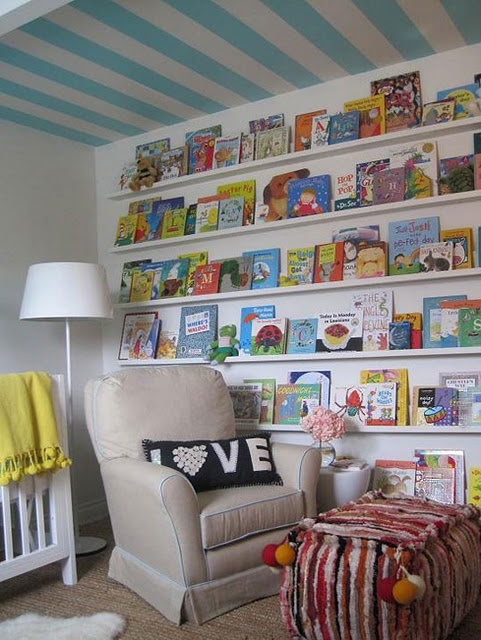
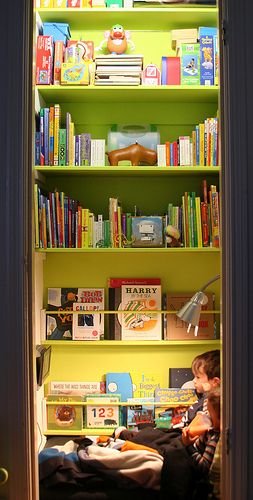
I just love walls with books.  Both girls love to be read to, and look at books.  I definitely want to cultivate that love for reading.  A wall and/or book nook sure seems like a great way to do that ;-)

74b10c4f7cf27e5103318879c63d1834

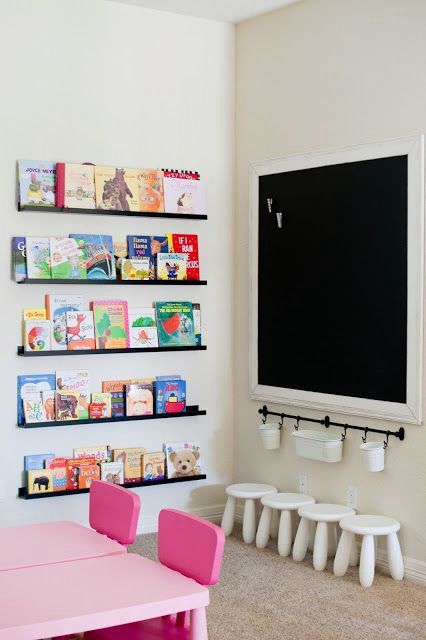
Another combination of my two favorite things….chalkboards and books!

20a53452a5bce8eb18e7ca351685de72

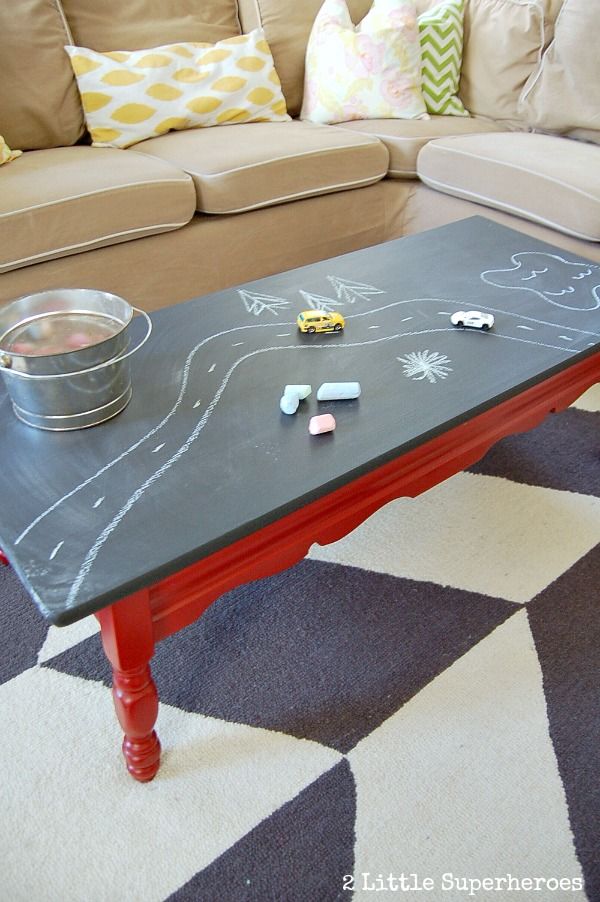
Look at this great idea for a coffee table top.  How great is that?

e6c63f861ac59fd4f55b2feed7d363a0

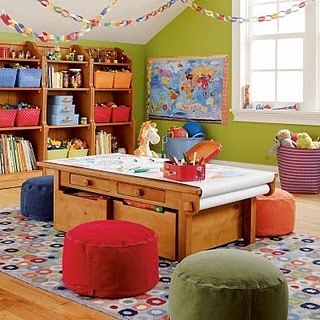
And I will stop here, I could go on and on.  Don't you just love the bright colors in this room?  So fun!

I promise to post pictures as I progress.  It will probably take all summer as I am busy with clients, Chalk Paint® customers and my own sweet family.  But, it's a space I am really excited to tackle, hopefully just in time for the change in weather that comes with Autumn!

All of these pictures are from my Pinterest page 'Kid's Playroom'.

PAINTING FLOWER POTS

IMG_4088

The sun started to make a more regular appearance a few weeks ago.  It was just the inspiration I needed to start sprucing up the outside of our home!  We have a lot of projects for this summer so I didn't want to rush out and buy new flower pots when I don't yet have an overall plan together.  So, I thought I would rummage through what I already have and just make some improvements ;-)  I have painted flower pots with Chalk Paint® before.  It's such an  easy way to spruce up an old pot!

First, I cleaned my pots and set them up outside to start painting.

IMG_4090

I used COCO.  My pots already had some texture, so I was going for a concrete/stone look.  After two coats, I realized they looked to 'clean and even', I wanted the pots to look a little aged…..like me ;-)

IMG_4091

I started with making a wash with the GRAPHITE (adding water to the paint to thin it a bit) but I didn't like that look so I repainted the section with COCO.

IMG_4093

I ended up making a wash with OLD WHITE and I like the results much better.  I dipped the paint brush is the paint, them into a bowl of clean water.  There are a couple of different approaches when it comes to color washing, but this approach worked great for what I was doing!

IMG_4353

Now all of the pots look a little better grouped together and it only cost me an afternoon and a small amount of paint!

IMG_4356

I don't wax any of my outside pots.  Just paint, plant and set them out.  All of my painted pots (I have painted my flower pots for the last two years) have held up perfectly!

IMG_4355

Now you know what to do with all of those mis-matched flower pots you have laying around!

IMG_4357

With the weather being sooooo perfect (sunny and 70's) we have been spending a lot of time outside.

IMG_4318

The girls love exploring and helping me outside.

IMG_4331

We have this amazing (huge) front yard.  Hopefully in a few years we will fence part of it and add sheep and goats to our little family.  I am pulling for a few goats now, but I can't quite convince Matt of how great they will be.  Hmmmmm.

IMG_4327

Oh and there is a lot of 'this' that happens outside after the big guy gets home from work.

Melts my heart to have such a sweet guy who loves his three girls so fiercely!

IMG_4314

Have a great day friends…...and enjoy the sunshine!!!

HAND MADE CHALK BOARDS

I bet most ladies love chalk boards as much as I do!

They are so fun and come in every shape, size and color.  Perfect for menus, quotes, directions….anything looks a little sweeter when written on a chalk board.  I love to make chalk boards!  If you haven't made one, here are a couple of easy tips to make your own chalkboard….on virtually any surface!

IMG_4340

I usually use cabinet doors for my chalkboards (mostly because we always have a few extra lying around).  But, I have seen some darling chalkboards made on serving trays, platters, windows, walls and more.  Just use what you have (or find at Goodwill)!

IMG_4337

I usually have 1-2 quarts of chalkboard paint on hand.  You never know when the inspiration might strike ;-)  I typically paint the frame of the cabinet door.  I use Chalk Paint® and wax.  It's super easy and I know it will cover beautifully.  I sand whatever I am painting, and then give it a good wipe down.  You don't want any dust in your paint!

IMG_4339

After I have painted the frame, I tape the edges.  It's so hard to get a straight line without taping.  It usually takes 2-3 coats of the chalkboard paint.  Each brand of chalkboard paint has their specific directions, the brand I had requires 4 hours dry time before re-coating.

IMG_4340

Once the chalkboard paint is completely dry, you will need to prime the chalkboard.  Rub the chalk in both directions to completely cover the chalkboard surface.  This ensures that the writing will not stay imprinted into the chalkboard.  Here is a picture of when I primed Savanna's chalkboard wall.

IMG_4347

I have a lot of chalk boards scattered through out the house, and a few for sale at every event. I am out of 'extra' cabinet doors so I am going to have to start getting creative!  This one is for a customer's granddaughter's room….so fun for a little girl to have her own little space to create!

Have a great week!!

BOSTOM CREAM PIE CUTIES || mine aren't so 'cute' but they taste really good

IMG_4306

Last Friday night we came home from a friend's house to find a little plate of these Boston Cream Pie Cuties at our front door.  My mom had made some for a friend and dropped a few extra by.  Would you believe that my tummy was still quite full from dinner AND dessert and I managed to have two of these cuties??  They are so good!

IMG_4309

I made a batch a few days ago and that was a bad decision!  Mine don't look nearly as cute as my mom's did, but these little cuties taste soooo good!  Hopefully you have better self control than I do ;-)  Either way, here is the recipe!

IMG_4304

INGREDIENTS
1 pkg.  (2-layer size) yellow cake mix
1 pkg.  (3.4 oz.) JELL-O Vanilla Flavor Instant Pudding
1 cup  cold milk
1-1/2 cups  thawed COOL WHIP Whipped Topping, divided
1 pkg.  (4 oz.) BAKER'S Semi-Sweet Chocolate
DIRECTIONS
HEAT oven to 350ºF.

PREPARE cake batter and bake as directed on package for 20 cupcakes. Cool completely.

BEAT pudding mix and milk with whisk 2 min. Let stand 5 min. Meanwhile, use serrated knife to cut cupcakes horizontally in half. Whisk 1/2 cup COOL WHIP into pudding; spoon onto bottom halves of cupcakes, using about 1 Tbsp. for each. Cover with cupcake tops.

MICROWAVE remaining COOL WHIP and chocolate in small microwaveable bowl on HIGH 1-1/2 min. or until chocolate is almost melted, stirring after 1 min. Stir until blended. Let stand 15 min.; spread onto cupcakes. Refrigerate 15 min.

TIPS::

ONLY MAKE 20 CUPCAKES (instead of 24)

HOW TO CUT CUPCAKES IN HALF~Use a serrated knife to easily cut the cupcakes in half.

SPECIAL EXTRA~Serve frosted cupcakes in colorful paper muffin cups.

IMG_4303

Enjoy!!!

A LIVING ROOM UPDATE

I thought I would post a few photos of the living room.  It's slowly coming together and I am loving everything about it!!

IMG_4291

Our living room furniture arrived a few weeks ago.  I still have  A LOT I want to do in this room.  I am amazed how fast time flies!  Kiddos and moving seem to make me realize it even more. :0) When I would tell someone that we moved 2, 3 and now almost 4 months ago, I realize how time is gone in the blink of an eye!!  And it doesn't seem like we have done much to our new space….the to-do list is long and we better get cracking!  With little people in our lives, we spend a lot more time playing and adventuring than just working on the house {like we use to}.  But, I wouldn't have it any other way!

IMG_3826

This was the living room when we moved in.  Clean, and great natural light.

IMG_4294

I painted the walls a soft gray, and added blue and green floral curtains and the room looked quite different with just those changes.  The bay window had an great upholstered cushion, however, the fabric didn't go with my new color scheme.  I knew I couldn't sew one, so I tried painting it with Chalk Paint!  It took three coats, but it covered beautifully! It isn't soft, I would compare the feel to that of an outdoor furniture cushion. But it doesn't crack when you sit on it and it serves is purpose beautifully!

IMG_4298

I am in love with the new sofa and chairs.  The cushions are down and super comfy, and the fabric is a soft linen color with a subtle herringbone pattern.  It has enough pattern that I don't worry about noticing every bit of dirt, but it's still light and keeps the room feeling lighter.

IMG_4197

Remember our beautiful cherry mantel?  Matt really loved it but it was just a bit too dark for me.  While he was gone at work one day, I painted it with Chalk Paint®.  That's one of the beauties of Chalk Paint®…..I painted 3 coats of paint and waxed it in one day.  I didn't need to prime or prep the existing wood…..I love this stuff!!  I painted the mantle COUNTRY GREY, a soft grey with a bit of green.

IMG_4296

Matt wants to replace the stone and I want to add some art work above the mantel, we will see when that happens!

IMG_4300

I bought two matching oak tables from this little hole-in-the-wall space.  They were in great shape, but very dated with a yellowed varnish- very 80's oak.  I wanted more of a chocolate brown color to compliment the oak floor.  I used MMSP MILK PAINT to act as a wash/stain.  I sill wanted the wood to show, I just didn't want to go through the hassle of stripping, sanding and refinishing the oak tables.  I used the color CURIO.  I applied one coat and sealed it with furniture wax.  It was done in less that one hour….love that!

IMG_4297

And we still have A LOT of work to do in the house!  This is the view into the dining room and kitchen.  You can see all the way through that we have all of our new interior doors stacked in the kitchen.  Matt needs a place to spray all of them, so they just wait.  We both really enjoy having projects. but there comes that time with every project that you just want to be done!  We haven't reached that point yet, hopefully we are a lot further along before we do ;-)

Enjoy the sunshine friends!!!!

THE GARDEN IS PLANTED || and some garden fresh recipes

The weather has been gorgeous for the last 4-5 days!  Oh it makes me super excited for summer!!  On Mother's Day, my sweet hubby and girls treated me to a trip to the garden center {Kreamers-for you local ladies.  They are soooo helpful and knowledgable and the girls love it there because of the fish.}  And after a day of being spoiled, Matt spent all afternoon roto-tilling the garden for me….such a gem!

IMG_4280

At our old house, I had an entire raised bed full of strawberries.  We will miss those this year!  But, my mom gave me a box of strawberry starts and I got those planted a few weeks ago.

IMG_4276

The terraced and fence garden {that was already built when we bought the property} is A.M.A.Z.I.N.G.  And, it has automatic sparklers!  For 11 summers of my married life, I have hand watered my gardens.  This little gardener was doing the happy dance the first morning the sprinklers turned on-by themselves-while I was still sleeping!

IMG_4277

I planted most of our favorite summer fruits and vegetables.  Below I will link to some of my favorite 'garden fresh' recipes.

IMG_4279

Last summer, Matt welded together these great tomato cages.  He used rebar so they are super sturdy, and I love the way they look.

IMG_4282

And, as soon as you walk out of the garden, you see this.  I am trying to tackle the blackberries.  I never understood how crazy blackberries were until I have now clipped and sprayed them, only to see them still grow back in a matter of weeks!  Next summer we are getting some goats for sure!

IMG_4284

And then there is this view from the garden as well.  Pretty awesome, right?

Here are a few of my favorite summer salads and veggie dishes….

92a77cd1cbd7a6ffd55823fec2567ccd

BLACKBERRY & ARUGULA SALAD

ea4cdd3c11f14701c4650fd9968b5843

TOMATO & AVOCADO SALAD

da9f931ebe870687b63a9bbbf2c29176

CABBAGE & MANGO SLAW

51c53edeec5ba01e0c8fea5cbe76d28c

FRESH CORN & TOMATO SALSA

6b0a7e62caeb8de8c7bfa646ba45eef1

FRESH CUCUMBER & TOMATO SALSA

b2fcb6bfeea006f58da224288d9e4660

GRILLED GARLIC & ZUCCHINI

24ad17acb77f118e69447280c7a7211b

STUFFED TOMATOES

bb710b833852cc2fac238c41ad9d5bab

GREEN BEANS & ALMONDS

All the recipes are here.

Happy gardening!!