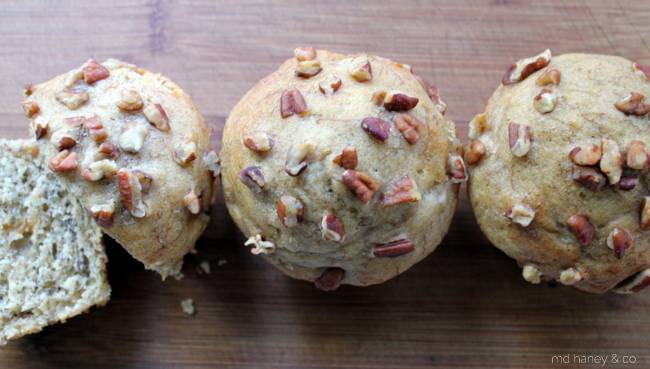
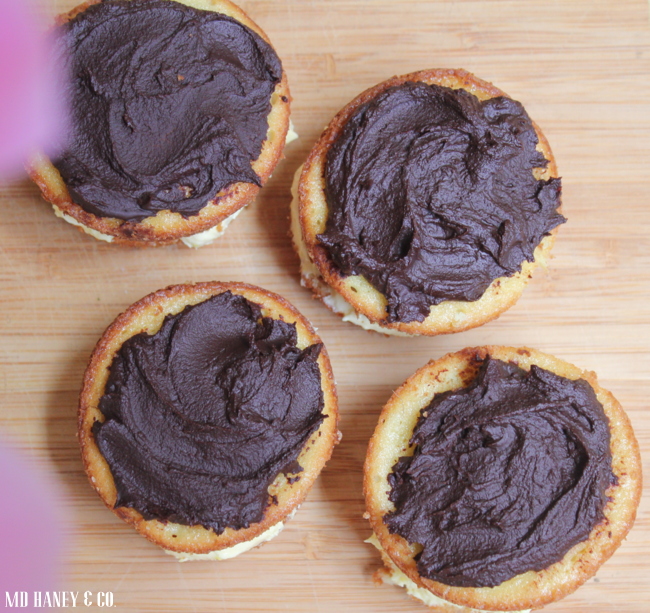
APPLE BREAD || a sweet recipe

apple bread

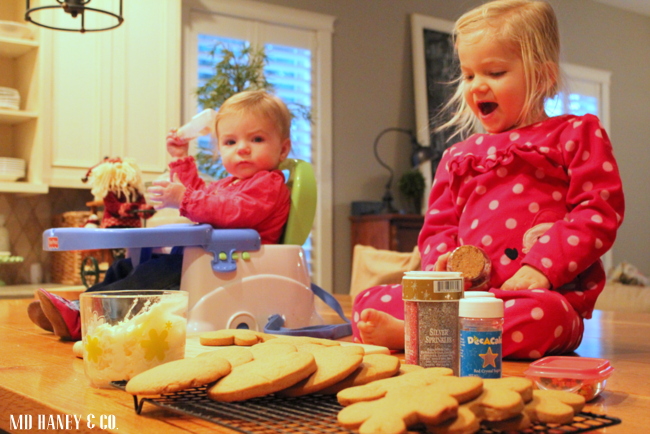
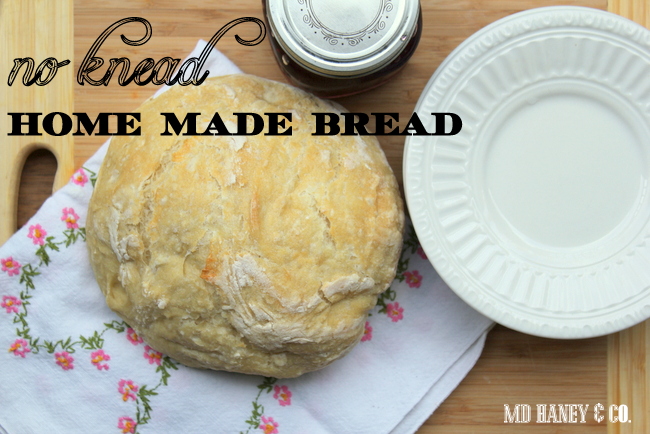
A couple of days ago, the girls and I took a dear friend out to pick apples at my grandparent's old farm.  We picked a big basket full of beautiful, tart, green apples.  I plan to make some applesauce, but sweet apple bread was calling my name :)

apple bread

One of my favorite resources for tried and true recipes is Jenny Hobick's blog, Everyday Occasions.  I have been following her blog for years and every recipe turns out so good!  I made a couple of modifications to her recipe....I only had 1 cup of granulated sugar so I used 1 cup of brown sugar and 1 cup of granulated, and I baked my bread for longer!

APPLE BREAD

4 small or 2 large loafs

2 Eggs
2 cups Sugar (or 1 cup Brown Sugar and 1 cup Sugar)
1 stick of Butter (melted)
2 teaspoons Vanilla
2 Apples, peeled and diced
2 cups Flour
1 teaspoon Salt
1 teaspoon Baking Powder
1/2 teaspoon Cinnamon
Powdered Sugar

Preheat oven to 350 degrees.  Prepare loaf pans by lining them with parchment paper, or greasing with butter.

In a mixer, combine eggs, sugar, butter and vanilla.  In a separate bowl, stir together flour, salt, baking powder and cinnamon.  Add flour mixture into the butter and sugar mixture slowly.  Add apples in and stir just until combined.

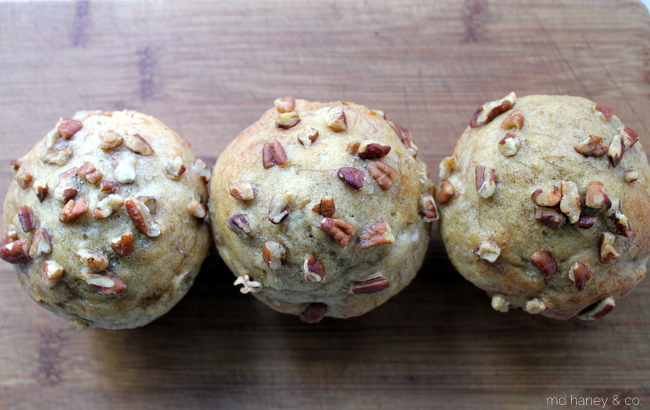
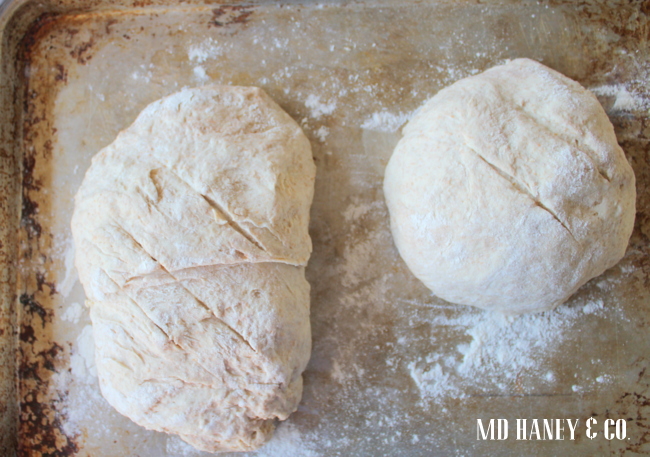
Pour batter in the pans.  

Bake for 30 minutes, or until tester comes out clean.  Cool in pan for 15-20 minutes, then move to wire rack.

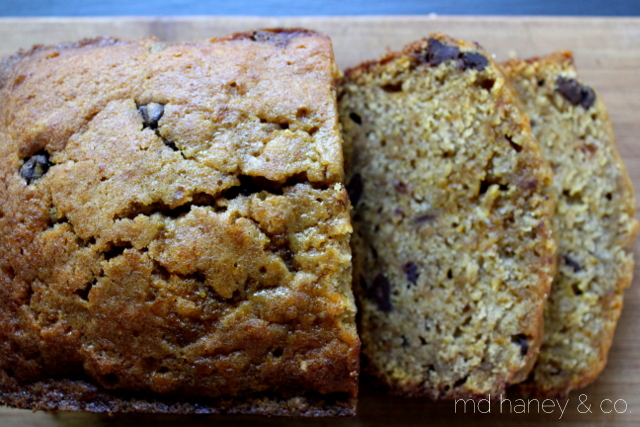
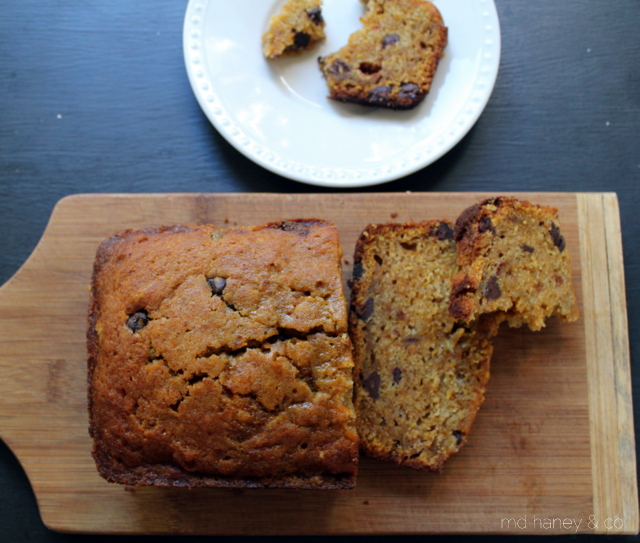
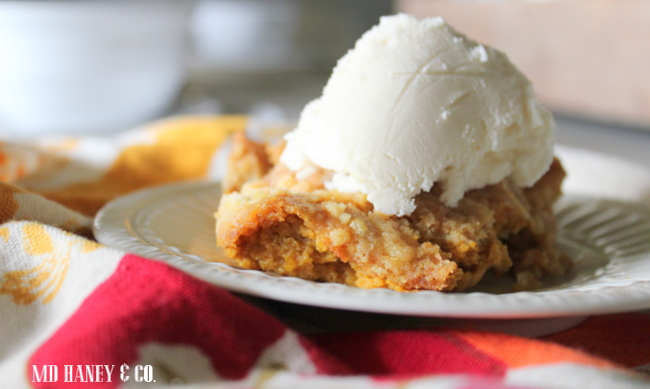
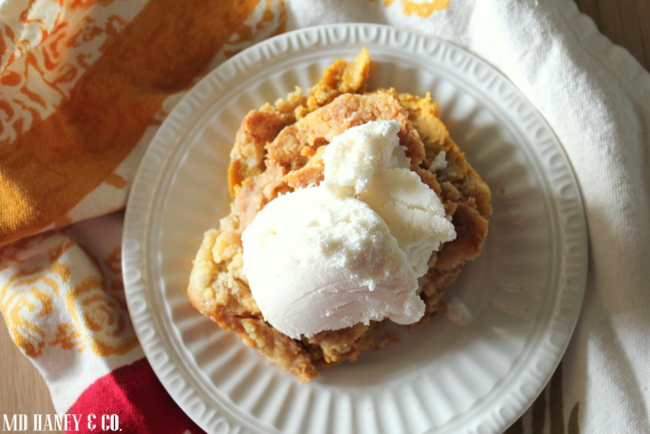
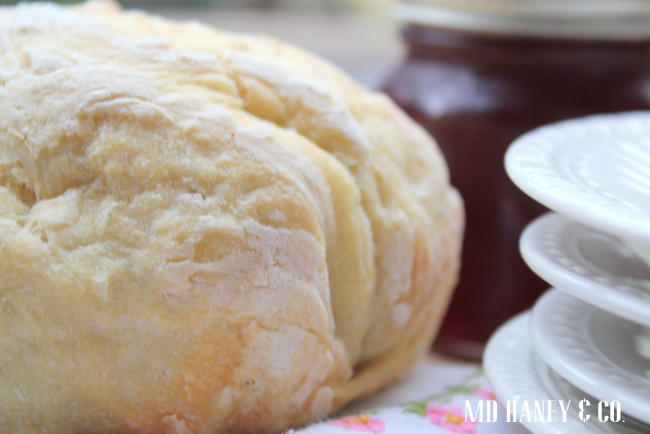
I love that it makes 2 large loafs, 1 to enjoy warm out of the oven and the other to give away!

bread packaged

This is the best sweet bread I have had in a while, it's so good and so easy!!!!!  The perfect after school snack or lazy Saturday morning breakfast bread :)

Enjoy!!!

lemon thyme shortbread cookies | recipe

It's been a while friends!  We are starting to adapt to our new routine (with the shop) and it feels so good to be back to baking and cooking, tending to the yard and cleaning my home!  Last Friday night I hosted an Herb Gardening Class.  We planted container gardens, shared tips and tricks and enjoyed rosemary + grapefruit water and lemon thyme shortbread cookies. herbclass

The lemon thyme shortbread cookie were so good!  Something about the hint of sweetness with the lemon thyme.....yummy!  I thought I would share the recipe!  And FYI, I made a double batch so that we could enjoy some at home and they freeze beautifully.

cookies

Lemon Thyme Shortbread Cookies

Ingredients 2 c All-purpose flour 1 c Butter, unsalted, room temp. ½ c Powdered sugar 1 Tbsp Thyme, finely chopped 1 Tbsp Lemon zest ½ tsp Vanilla extract ½ tsp Lemon extract ¼ tsp Salt Lemon Icing 1 lbs Powdered Sugar 2.5 Tbsp Meringue powder 1 - 2 tsp Lemon extract ¼ - ½ c Water 3 - 4 drops Yellow food coloring Get Ingredients Instructions Lemon Thyme Shortbread Cookies Preheat oven to 350 °F. In your mixing bowl beat room temperature butter until it is creamy. Add the sugar and mix thoroughly. Add thyme, lemon zest, vanilla extract, lemon extract, and salt and continue to mix until ingredients combine. Add the flour 1 cup at a time until the mixture just starts to come together. Create a ball of dough and flatten it slightly before wrapping it in plastic wrap and chilling it for 1 hour. Remove dough from refrigerator. Lightly flour your surface and roll the dough out to ¼ inch thick. Use cookie cutter to cut out cookies. Place cookie cut-outs on a parchment paper covered baking sheet. Place cookies in the refrigerator for 20 minutes. Remove from refrigerator and bake for 8 - 10 minutes, or until cookies are golden brown. Let the cookies cool completely and then ice them. Let icing harden before serving. Lemon Icing In a mixer combine powdered sugar, meringue powder, and slowly add water while mixer is on low until you reach the consistency you want. Add lemon extract and food coloring and mix thoroughly. recipe from www.homemadeinterest.com

Enjoy!!!

PUMPKIN CHOCOLATE CHIP BREAD || a sweet recipe

bloggirls

The other day the girls "got" to join me for a color consultation.  Typically they play with Grandma when I meet with clients, but that wasn't going to work, so they tagged along.  My client was SO sweet.  She turned what could have been a totally draining morning (shushing and nagging little girls while trying to be professional and have a meeting) and turned it into a fun and productive time.  A great reminder of how I want to treat those around me!  When we headed out into the alley way to look at all of the different colors she had tried painting on the building, she started to snap some photos of the girls.  This one is my favorite!

That evening, the girls and I decided to do some baking.  It seems fitting to bake all things pumpkin in October, so we started our baking spree off with pumpkin chocolate chip bread.

2015-10-22 00.07.49

This is a new recipe (to me) and the bread turned out so good!

CHOCOLATE CHIP PUMPKIN BREAD

2 loaves

3 cups flour 
2 tsp cinnamon 
1 tsp salt 
1 tsp baking soda 
1 tsp baking soda 
4 eggs 
2 cups sugar 
2 cups canned pumpkin 
1 1/2 cups canola oil

Preheat oven to 350. 
In stand-up mixer, beat eggs, sugar, pumpkin and oil. Gradually add in dry ingredients until just combined.  Pour in chocolate chips. 
Pour evenly into two greased loaf pans (4x8). Bake for 60 minutes or until a toothpick inserted comes out clean. Cool on wire racks. 
Slice and serve.  It also freezes really well!

2015-10-22 00.09.53

 Enjoy!!

BANANA + PECAN MUFFIN || a recipe

So I leave tomorrow for California.  A two day paint training workshop for Miss Mustard Seed Milk Paint retailers.  I will miss my little family dearly, but I am really excited to have a few days to myself, and get my creative juices flowing!  In the mean time, I have been filling the freezer and refrigerator with meals and treats.  I made these easy and yummy banana + pecan muffins and I thought I would share the recipe!

bananamuffin

IMG_4985

IMG_4987

BANANA + PECAN MUFFINS

INGREDIENTS

  • 4 (1 1/2 to 2 pounds) ripe bananas, plus 1 for garnish (more if making mini muffins)
  • 1 cup packed light-brown sugar
  • 1/2 cup canola oil
  • 1 large egg
  • 1 cup all-purpose flour
  • 1 cup whole-wheat flour
  • 1 teaspoon baking powder
  • 1 teaspoon baking soda
  • 1/2 teaspoon salt
  • 1/2 cup sour cream
  • 1 tablespoon pure vanilla extract
  • 1/3 cup of toasted pecans, for topping
  1. Preheat oven to 350 degrees. Line a muffin pan, regular or mini, with paper liners. Lightly toast pecans.

  2. Peel four bananas, and place them in the bowl of a mixer fitted with the paddle attachment. Beat until mashed, about 1 minute. Add brown sugar, oil, and egg; beat until smooth. Reduce speed to low. Add flours, baking powder, baking soda, and salt; beat until smooth. Add sour cream and vanilla; beat until combined.

  3. Fill muffin liners three-quarters full. Slice remaining banana into 1/8-inch-thick rounds; place a slice on each muffin. Top each muffin with toasted pecans. Bake until tester inserted into center comes out clean, about 25 minutes for regular muffins and 20 for mini, rotating pan halfway through. Transfer to wire rack to cool. Store, covered, at room temperature.

CHOCOLATE CUPCAKES WITH CINNAMON CREAM CHEESE FROSTING

When Fall rolls around, I love everything 'pumpkin' and 'spice'.  I wanted to make some cupcakes and was going to resort to spiced cupcakes, but decided to add a 'Fall" twist with frosting instead.  We ended up with chocolate cupcakes with cinnamon cream cheese frosting….perfectly chocolate with just a hint of spice!

IMG_4702

IMG_4701

IMG_4698

When I make cupcakes, I usually use a box mix-just being honest.  I love the texture and you can't beat the ease of adding a handful of ingredients and turning on the mixer!  I almost always have cream cheese on hand, so these little babies took no time at all!  Below is the recipe, if you can even call it that…..Enjoy!!

IMG_4698

RECIPE

Chocolate Fudge cake mix-prepare cupcakes per box instructions.

Cinnamon Cream Cheese Frosting-

8 oz. package of cream cheese, room temp.

1/4 cup of unsalted butter, room temp.

1 1/2 tsp. ground cinnamon

1 tsp. of vanilla

2-3 cups of powered sugar, depending on desired consistency.  

With a hand held, or stand mixer, mix cream cheese and butter together until smooth.  Add remaining ingredients and mix until smooth. Garnish with dried cranberries or anything else that sounds good!

MONSTER COOKIES || a sweet treat recipe

This weekend my sweet hubby pressure washed the garage roof for me.  It's a really steep roof, and it was really dirty, so it was a really big deal to me.

I love to pressure wash!  It's instant gratification....from yucky to clean, in just a matter of minutes.  Matt won't let me get up on a ladder to pressure wash {he is smart man}.  By the time he got the harness, his big ladder, and had pressure washed the roof, the afternoon was gone.  He spent his entire weekend afternoon doing a yucky chore for me.  Such a sweet man.  Anyways, I made sure to have cookies baking in the oven when he walked in the door.

IMG_4417

They may be our new favorite cookie.  And we LOVE our chocolate chip cookies around here.

IMG_4421

There is something so special about the yummy smells coming from the kitchen.  Bread, cookies, dinner, whatever is cooking, it just makes a home cozy.

IMG_4424

Go bake these cookies soon.  Your family, especially your sweet little babies, will love you for these!!

IMG_4438

There is something about warm, baked goodness.  It makes hearts happy and makes your home a little extra cozy and sweet.

These cookies take less than 5 minutes to make, and the oven does the rest of the work.  Make them today, and maybe give away half because they make a big batch...and who doesn't love fresh cookies?!?

IMG_4431
MONSTER COOKIE RECIPE::
Pre-heat oven to 325.
Mix 1 cup butter softened, 1 cup sugar, and 1 cup packed brown sugar.
Add 2 eggs and 1 ½ tsp vanilla, mix blend.
In separate bowl: mix 2 cups flour, 1 tsp baking soda, 1 tsp salt.
Combine all ingredients and then ADD:
1 cup choc chips, 1 cup walnuts(or pecans), 1 cup peanut butter chips, and 3 cups quick oatmeal.
Mix all ingredients by hand and drop large, rounded spoonfuls onto baking sheets.
Bake at 325 for 10-12 minutes.
Take them out before they fully cooked.
Enjoy!!

BOSTOM CREAM PIE CUTIES || mine aren't so 'cute' but they taste really good

IMG_4306

Last Friday night we came home from a friend's house to find a little plate of these Boston Cream Pie Cuties at our front door.  My mom had made some for a friend and dropped a few extra by.  Would you believe that my tummy was still quite full from dinner AND dessert and I managed to have two of these cuties??  They are so good!

IMG_4309

I made a batch a few days ago and that was a bad decision!  Mine don't look nearly as cute as my mom's did, but these little cuties taste soooo good!  Hopefully you have better self control than I do ;-)  Either way, here is the recipe!

IMG_4304

INGREDIENTS
1 pkg.  (2-layer size) yellow cake mix
1 pkg.  (3.4 oz.) JELL-O Vanilla Flavor Instant Pudding
1 cup  cold milk
1-1/2 cups  thawed COOL WHIP Whipped Topping, divided
1 pkg.  (4 oz.) BAKER'S Semi-Sweet Chocolate
DIRECTIONS
HEAT oven to 350ºF.

PREPARE cake batter and bake as directed on package for 20 cupcakes. Cool completely.

BEAT pudding mix and milk with whisk 2 min. Let stand 5 min. Meanwhile, use serrated knife to cut cupcakes horizontally in half. Whisk 1/2 cup COOL WHIP into pudding; spoon onto bottom halves of cupcakes, using about 1 Tbsp. for each. Cover with cupcake tops.

MICROWAVE remaining COOL WHIP and chocolate in small microwaveable bowl on HIGH 1-1/2 min. or until chocolate is almost melted, stirring after 1 min. Stir until blended. Let stand 15 min.; spread onto cupcakes. Refrigerate 15 min.

TIPS::

ONLY MAKE 20 CUPCAKES (instead of 24)

HOW TO CUT CUPCAKES IN HALF~Use a serrated knife to easily cut the cupcakes in half.

SPECIAL EXTRA~Serve frosted cupcakes in colorful paper muffin cups.

IMG_4303

Enjoy!!!

THE GARDEN IS PLANTED || and some garden fresh recipes

The weather has been gorgeous for the last 4-5 days!  Oh it makes me super excited for summer!!  On Mother's Day, my sweet hubby and girls treated me to a trip to the garden center {Kreamers-for you local ladies.  They are soooo helpful and knowledgable and the girls love it there because of the fish.}  And after a day of being spoiled, Matt spent all afternoon roto-tilling the garden for me….such a gem!

IMG_4280

At our old house, I had an entire raised bed full of strawberries.  We will miss those this year!  But, my mom gave me a box of strawberry starts and I got those planted a few weeks ago.

IMG_4276

The terraced and fence garden {that was already built when we bought the property} is A.M.A.Z.I.N.G.  And, it has automatic sparklers!  For 11 summers of my married life, I have hand watered my gardens.  This little gardener was doing the happy dance the first morning the sprinklers turned on-by themselves-while I was still sleeping!

IMG_4277

I planted most of our favorite summer fruits and vegetables.  Below I will link to some of my favorite 'garden fresh' recipes.

IMG_4279

Last summer, Matt welded together these great tomato cages.  He used rebar so they are super sturdy, and I love the way they look.

IMG_4282

And, as soon as you walk out of the garden, you see this.  I am trying to tackle the blackberries.  I never understood how crazy blackberries were until I have now clipped and sprayed them, only to see them still grow back in a matter of weeks!  Next summer we are getting some goats for sure!

IMG_4284

And then there is this view from the garden as well.  Pretty awesome, right?

Here are a few of my favorite summer salads and veggie dishes….

92a77cd1cbd7a6ffd55823fec2567ccd

BLACKBERRY & ARUGULA SALAD

ea4cdd3c11f14701c4650fd9968b5843

TOMATO & AVOCADO SALAD

da9f931ebe870687b63a9bbbf2c29176

CABBAGE & MANGO SLAW

51c53edeec5ba01e0c8fea5cbe76d28c

FRESH CORN & TOMATO SALSA

6b0a7e62caeb8de8c7bfa646ba45eef1

FRESH CUCUMBER & TOMATO SALSA

b2fcb6bfeea006f58da224288d9e4660

GRILLED GARLIC & ZUCCHINI

24ad17acb77f118e69447280c7a7211b

STUFFED TOMATOES

bb710b833852cc2fac238c41ad9d5bab

GREEN BEANS & ALMONDS

All the recipes are here.

Happy gardening!!


A LITTLE UPDATE || and a sweet treat recipe

So sorry for the leave of absence last week!

It was a busy week with design clients, getting the cottage ready for a long term guest, and life with my two little ladies and one big man!  But, I thought I would post a few photos of the latest happenings here at our home.  And a cream puff recipe that is so easy, you will want to whip up a batch 'just because'!

IMG_4123

I finally ordered furniture for the living room!  We have about 4 weeks until it arrives so I am hoping to have the living room painted and ready when the furniture arrives.

IMG_4124

Matt is patching cracks and repairing an old ceiling leak.  The bonus of living with a contractor who is also a perfectionist…..the cracks get fixed before painting.

I am more of a 'i-just-want-paint-in-the-walls' kind of girl. I would have this room painted during one nap time.  Now, it wouldn't look nearly AS  good, but I would feel good about having paint on the walls.  Matt's approach is more along the lines of….puddy every hole, patch + texture every crack, cut in perfectly, paint the ceiling…..you get the picture.  I am slowly {after almost 12 years of marriage} learning that his approach is actually better than mine and always results in a great finished product.  So, the living room may actually take me closer to 4 weeks to paint ;-)

IMG_3972

There are some built-ins in the hallway.  They provide excellent storage!  They all had brass knobs that were in great shape.  I painted the knobs black and I love how a simple change can make such a big impact!

IMG_4131

See what I mean??

IMG_3974

The bedrooms are all connected by this great {long} hallway.  I have been busy touching up paint, caulking and scrubbing.

IMG_3976

Won't this hall look beautiful with all of our new black doors?!?  Matt is ordering the doors this week, I will keep you posted!  Matt replaced the lights for me and it instantly changed the look and feel of the hallway.

IMG_4133

Here it is now with the new lights, painted hardware and some plates on the walls.

IMG_4128

I am working on some family photos to hang on another wall in the hallway.

IMG_4137

So, as you can see, the list of projects is pretty long.  But, we love having little projects and we really love our new home!

Now, to keep my sweet husband going with the list of projects seems too long, I often bake him something sweet.  A couple of weeks ago I made a batch of chocolate cream puffs.  A friend reminded me how easy {and tasty} they are, so I found an old recipe I had and give them a try.  Sure thing….they are so good!!

IMG_4121

Chocolate Cream Puffs

Ingredients

1 cup water 1/2 cup butter (one cube) 1 cup all-purpose flour 4 large eggs Bavarian pastry cream Melting chocolate

IMG_4111

Directions

  1. Mix the dough.  In a medium saucepan on medium-high heat, place one cup of water and one stick (1/2 cup) of butter.  After the butter is melted, turn off heat and add one cup all-purpose flour all at once.  Stir until the dough forms a ball and flour is absorbed.
  2. Place dough ball in your stand-type mixer with the paddle attachment and mix on low speed until the dough starts to cool, 1 to 2 minutes.  Add the eggs all at once and mix on low speed until the dough absorbs the eggs and the dough becomes very sticky. This will take about 8 to10 minutes.
  3. Bake the cream puffs.  With a large spoon or ice cream scoop (1/4 cup), spoon mounds of evenly spaced dough onto a greased cookie sheet.  Bake at 400 degrees for 20 minutes and then turn the oven down to 350 degrees for another 10 minutes. You can also use a small cookie scoop as shown in the pictures. You'll just need to lower the baking time to 15 minutes at 400 degrees and then turn down to 350 for another 7 minutes.
  4. Fill the cream puffs with Bavarian cream.  If you are using a scratch recipe, make a horizontal slit in the edge of each cream puff and slip a large spoonful of cream into each cream puff.  If you are using professional Bavarian cream, insert the tip of the plastic bag into the edge of each cream puff and squeeze.

IMG_4117

Melt the chocolate.  Melt your chocolate in the microwave for 20 seconds at a time until melted.  Do not overheat the chocolate.  You can either dip the tops of the cream puffs into the chocolate or spoon chocolate over the cream puffs.  Let the chocolate set before serving.

Enjoy!

IMG_4121

{savory} CHEDDAR & DILL SCONES || a recipe

I just thought I would pop in to share this easy and delicious savory scone recipe!  I love it when a food can serve two purposes.  You too??  These scones were perfect with our beef stew last night, and then equally perfect with our bacon and eggs this morning!

IMG_3950

Ingredients 4 cups plus 1 tablespoon all-purpose flour, divided 2 tablespoons baking powder 2 teaspoons salt 3/4 pound cold unsalted butter, diced 4 extra-large eggs, beaten lightly 1 cup cold heavy cream 1/2 pound extra-sharp yellow Cheddar, small-diced 1 cup minced fresh dill 1 egg beaten with 1 tablespoon water or milk, for egg wash Directions Preheat the oven to 400 degrees F.

Combine 4 cups of flour, the baking powder, and salt in the bowl of an electric mixer fitted with a paddle attachment. Add the butter and mix on low speed until the butter is in pea-sized pieces. Mix the eggs and heavy cream and quickly add them to the flour-and-butter mixture. Combine until just blended. Toss together the Cheddar, dill, and 1 tablespoon of flour and add them to the dough. Mix until they are almost incorporated.

Dump the dough onto a well-floured surface and knead it for 1 minute, until the Cheddar and dill are well distributed. Roll the dough 3/4-inch thick. Cut into 4-inch squares and then in half diagonally to make triangles. Brush the tops with egg wash. Bake on a baking sheet lined with parchment paper for 20 to 25 minutes, until the outside is crusty and the inside is fully bake.

This recipe is one of Ina's recipes.  She is one of my favorite cooks!  Her recipes are so approachable….and so good!

IMG_3956

In other news, I took some pictures of the guest room progress.  But, it's too rainy and gray outside, my pictures just didn't turn out well.  When the sun shines again I will show the progress of the guest room!

Next on my list…..ordering a sofa, and furnishing Matt's office!  Fun!!

SOFT GINGERBREAD COOKIES :: a sweet treat recipe

Soft Ginger Bread Cookies  ||  a winter treat

I have tried numerous ginger bread cookie recipes over the years.  I finally found a keeper!!  I promise, you will love these cookies!  You might even do a happy dance when you realize how easy they are!

Last night I baked the cookies while we enjoyed spending time with my in-laws.  This morning, both girls were up earlier than usual, so we decided to frost and decorate the rest of our gingerbread cookies.

IMG_3585

When we move, I will definitely miss our huge island!  It's the perfect spot for both girls to sit and help in the kitchen.

IMG_3600

I have really been working on letting go of the inner-perfectionist in me, at least when it comes to activities with the girls.  I don't want them to feel like they can never measure up.  I want them to be brave, and try new things, even if at first, they fail.  And I definitely want to be their biggest cheer-leader, not a nagging voice in their ear!

IMG_3591

I want them to enjoy spending time with me, and doing activities with me.

So, when it comes to working in the kitchen, I give Addilyn her own cookies to decorate, or bread to roll into a ball, or her own cheese to grade.  She enjoys helping in the kitchen, and I can relax and not hover over her the entire time.  It's a win-win ;-)

IMG_3601

So, back to the cookies.

We baked them last night and frosted a hand full of them after they had completely cooled.  That's the trick, don't try to frost them when they are still warm, I promise you will be disappointed and maybe even frustrated (I know that from personal experience).

IMG_3582

I prefer mine with a tall glass of cold milk.

 Although, in the morning, I am sure I will prefer my little gingerbread man with a hot cup of coffee!

IMG_3604

The frosting has a hint of lemon, a perfect accompaniment to the gingerbread.

IMG_3606

These can be made any time of year, but they sure make the best little gingerbread men!!

the

Soft Gingerbread Cookies with Lemon Frosting

Ingredients

  • 3/4 cup butter, room temperature 
  • 1 cup granulated sugar
  • 1 egg plus 1 yolk
  • 1/4 cup molasses
  • 1 tsp baking soda
  • 1/2 tsp salt 
  • 2 1/2 tsp ground ginger
  • 1 tsp cinnamon
  • 1/2 tsp ground cloves
  • 2 1/4 cups flour
  • 1/3 cup additional sugar for rolling

Lemon Frosting ~  Add the juice of one lemon, and 1 tsp. of lemon zest to a mixing bowl.  Add 3-4 cups of powered sugar and mix (with a mixer) until the frosting is smooth.  Add more powered sugar to achieve the desired consistency.

Directions

  1. Preheat oven to 350°
  2. Line a baking sheet with parchment paper, set aside.
  3. In bowl of stand mixer beat butter and sugar together for 2 minutes.
  4. Add in molasses and mix until incorporated.
  5. Beat in egg plus additional yolk, baking soda, salt, ginger, cinnamon and cloves. Mix until smooth.
  6. Turn mixer to low and add in flour until dough comes together.
  7. Refrigerate for 1 hour, or longer.
  8. Roll dough and cut into desired shapes.
  9. Bake for 9-11 minutes until edges are golden.
  10. Allow to cool on baking sheet for 3 minutes and then transfer to wire rack to cool completely.  Once cooled, frost with lemon frosting.

Notes

Store airtight at room temperature for up to 3 days….and enjoy!!!

HOME MADE PEPPERMINT OREOS :: a holiday treat

IMG_3510  

I thought I would share my cookie contribution for the cookie exchange tonight.

HOME MADE PEPPERMINT OREOS.

The website I found the recipe from has much prettier pictures, but they sure taste good!!

HOME MADE PEPPERMINT OREOS

****

Ingredients

  • {batter}
  • 1 box devils food cake
  • 1 egg
  • 1 stick of butter softened
  • {frosting}
  • 1 sticks unsalted butter, at room temperature
  • 2 cups powdered sugar
  • 1 TB milk, or heavy whipping cream
  • 1/4 teaspoon Vanilla extract
  • 1/2 teaspoon Peppermint extract
  • Andi's crushed peppermints

Instructions

  1. Combine egg and butter in a large bowl. Mix until combined. Pour in devil's food cake and mix until the batter is smooth (about 2 min). Roll dough into a ball and push flat onto a lined cookie sheet. Bake at 350 for 6-8 minutes. Remove to cooling rack and allow cookies to completely cool.
  2. For frosting: Mix together butter. Next add milk, vanilla and peppermint extract. Then slowly add powdered sugar and beat until fluffy.
  3. Frost one cookie on the BOTTOM and then sandwich another cookie on top. I like to use a lot of frosting (make sure it's coming out the sides). Then dip the sides of the cookie into crushed peppermint andis.

Enjoy!!!!!  I prefer mine with a tall glass of cold milk ;-)


PUMPKIN PIE ICE CREAM :: a sweet {FALL} treat + some gratitude

So, I have two things for you on this fine Tuesday afternoon....

#1~ the best pumpkin pie ice cream EVER,

and #2 ~ a little note on gratitude.

I found a great blog via Pinterest.  I pinned the kitchen, and then enjoying looking through the blog.  She just wrote a post titled '20 little attitudes for gratitude.'   And since I am really working towards focusing on being thankful this holiday season, I was inspired to write my own 20-little-attitudes-for-gratitude.  Maybe it will inspire you to write your own list?!?


20 Little Attitudes of Gratitude

  1. Mind your manners. Say please, thank you and excuse me.
  2. Smile when you see your friends and family, look them in the eyes when you are talking.
  3. Always take the time to listen.
  4. Notice when others do kind things for you, show gratitude by action or words.
  5. Gives hugs and kisses freely through out the day.
  6. Extend grace.
  7. Don’t worry about tomorrow. No ounce of worry can change a thing about tomorrow.  Be grateful for right now.
  8. Create gratitude journals to keep track of daily blessings.
  9. Encourage strangers with a smile.
  10. Leave love notes in unexpected places like lunch boxes and under pillows.
  11. Encourage someone with a compliment.
  12. Instead of complaining, verbalize what you are thankful for.
  13. Bake extra of everything, strive to always give away a freshly baked treat.
  14. Remember to thank God for blessings each day.
  15. Surprise your family (or friends) with little gifts or treats to show you thought of them.
  16. No grumbling about minor annoyances around the house.
  17. Do special things to cherish time with your family.
  18. Reflect on happy memories regularly. Make inspiration boards of special times.
  19. Always remember, no one is perfect, have grace with yourself.
  20. Be grateful you have a house to clean.

“Gratitude unlocks the fullness of life. It turns what we have into enough, and more.” –Melodie Beatty

IMG_3439

One of the many things I am grateful for, is my awesome ice cream maker.  It is sooooo easy to make ice cream with this little guy.  Seriously.  It's the best!

This ice cream is really rich.  I think it would also make a great ice cream pie filling....maybe a graham cracker crust?  I will try it and let you know!

IMG_3441

Pumpkin Pie Ice Cream

Ingredients:

  • 1 can (15 ounces) pure pumpkin puree or 1-3/4 cups homemade cooked pumpkin puree, well-draiined
  • 1-1/2 cups heavy whipping cream
  • 1/2 cup brown sugar
  • 1/2 teaspoon salt
  • 1 teaspoon ground cinnamon
  • 1/4 teaspoon ground ginger
  • 1/4 teaspoon ground nutmeg
  • 1/4 teaspoon ground cloves
Place pumpkin puree into a strainer lined with cheesecloth for 15 minutes to drain any excess water.Gently heat heavy cream and brown sugar until small bubbles form around the edge of the pan, stirring often. Add pumpkin puree and spices.  Do not boil. Remove from heat and whisk until the sugar is dissolved. Let cool to room temperature.

Pour mixture into ice cream machine as per your machine's instructions.

Enjoy!!

PUMPKIN DUMP CAKE :: a sweet treat recipe

IMG_3350

I thought I would share one of the easiest dessert recipes E.V.E.R.  Most of the desserts I make are easy, I don't do complicated!  Takes too much time, and I would rather be spending my time eating the desserts instead of baking them ;-)

If you have never heard of dump cake before, it was a recipe that became popular in the 80′s by church cookbooks and potlucks.  You basically dump a few cans of fruit in a pan, cover it with cake mix and butter and bake it.

This is the same idea, only I used pumpkin instead of fruit!

IMG_3348

Pumpkin Dump Cake

 Ingredients
  • 1 15 oz can Pumpkin Puree
  • 1 10 oz can Evaporated Milk
  • 1 cup light brown sugar
  • 3 eggs
  • 3 tsp pumpkin pie spice
  • 1 box yellow cake mix
  • 1 cup (2 sticks) butter melted
  • 1 cup coarsely crushed graham crackers or pecans
  • 1/2 cup toffee bits (optional)

How to Make

  1. Preheat oven to 350
  2. Spray a 9×13 baking pan lightly with cooking/baking spray
  3. In a large bowl combine the pumpkin, evaporated milk, sugar, eggs and pumpkin pie spice. Stir to combine.
  4. Pour into your prepared pan.
  5. Sprinkle your entire box of cake mix on top, followed by your nuts or graham crackers and toffee chips.
  6. Pour your melted butter evenly on top.
  7. Bake for 45-50 minutes until center is set and edges are lightly browned.

** serve with sweetened whip cream or ice cream, I served mine with my vanilla honey ice cream **

'NO KNEAD' FRENCH BREAD :: a bread recipe

bread

I love baking bread!

I love the way my home smells while it is in the oven.....I love a warm piece slathered with butter for a late afternoon snack.....and I love teaching my little sweet pea how to bake and navigate her way around the kitchen.

I have a few recipes that are my standbys.  This recipe is one of them!!  With the weather changing and soup season upon us, I thought I would share this recipe.  Seriously, you will see that it is so easy to make home made bread any time!!

bread dough

It's as easy as mixing the ingredients in a large bowl, letting the dough rise, shaping it and baking it.

bread

I usually make two loaves.  A large one for us to eat right out of the oven, and a smaller one to give away or freeze.

bread

No Knead French Bread From Artisian Bread in 5 Minutes a Day via The Ivory Hut


3 cups of lukewarm water 
1 1/2 tablespoons active dry yeast 
1 1/2 tablespoons coarse salt
 6 1/2 cups all-purpose flour

Grab a very large mixing bowl, or a large container that you can cover. In it, mix the water, yeast, and salt. You don’t have to heat up the water to a precise optimal temperature for the yeast. I’ve even used just regular tap water, and it’s worked well for me. Just let that sit together for a while (you don’t have to wait for the yeast to dissolve completely), then dump the flour all at once and stir with a wooden spoon. You don’t need to knead this, and you’re not looking to make it come together into a dough ball. You just want everything mixed well, with no streaks of flour left, and you’re done.

Leave it in your container, covered (but not airtight, or it’ll pop), for a few hours. When it has risen and then deflated a bit, your dough is done. It’s ready to be used or stored in the refrigerator.

To bake the bread, just grab a chunk of dough, about the size of a grapefruit. Dust your hands with flour to help prevent sticking, and gently pull the sides of the dough toward the bottom, rotating the dough, until you get a roundish shape with a smooth surface. It should only take you about a minute or less to do this. The dough won’t be entirely in the bottom, where it may look bunched up, but don’t worry about it.

Put it on a cutting board that’s been dusted with cornmeal to prevent sticking, and let it rest for at least 40 minutes. No need to cover it. If the dough has been refrigerated, it helps to let it rest a little more, until it’s no longer chilled.

Twenty minutes before you are ready to bake, put a cast iron skillet (or a pizza stone) in the middle rack of your oven, and put a broiler pan (I used a cookie sheet) in the bottom rack. Preheat your oven to 450 degrees. Dust some flour on the top of your loaf, and slash the top, about 1/4-inch deep.

After twenty minutes of preheating, it’s time to bake. (You can put the bread in after 20 minutes, even if your oven hasn’t reached 450 degrees yet.) Slide the loaf onto the baking stone, and then quickly pour 1 cup of hot tap water into the broiler pan. Then quickly shut the oven door to keep the steam inside. Bake for 30 to 40 minutes, until you get a nice brown crust. Remove and let cool completely, if you can wait that long.

A FEW FAVORITE :: cookbooks

the-four-season-farm-gardeners-cookbook-85ab183827903735.jpg

Now that sweet baby is one month old, I figure I should get back into the routine of preparing dinners for my little family.   I do enjoy meal planning and preparing meals.....not all of the time......but for the most part, it's something I look forward to.

I find about half of my recipes online.  The other half are from some of my favorite cookbooks....

farm chicks in the kitchen cookbook

The Farm Chicks cookbook is full of easy, and tasty recipes for breakfast, lunch, dessert and appetizers.

33_barefoot_foolproof

I was just given this cookbook by a sweet friend.  I love Ina!  I read through the cookbook in one afternoon and can't wait to start trying some recipes.

pwc2

I love cooking from Ree's cookbook.  I usually cut the recipe in half, but she makes reading a recipe super easy!

the-four-season-farm-gardeners-cookbook-85ab183827903735The Four Season Farm is my "go to" cookbook.  I try to cook seasonally and with a lot of garden-grown-goodness.  This cookbook not only has great recipes, it is a great source of inspiration when you have an abundance of anything in the garden.

What are your favorite recipe resources?  Blogs? Pinterest?  Cookbooks?

HERBED RICOTTA :: an easy recipe

One of the recipes I made for the SPRING ENTERTAINING CLASS , was an herbed ricotta on toasted baguette.  I would venture to say it was everyone's favorite thing to eat that night.

IMG_2670

 The ladies all went home with the recipe, but I thought I would be sure to share it here.

IMG_2673

HERBED RICOTTA

  • 4 cups whole milk
  • 2 cups heavy cream
  • 3 tablespoons white wine vinegar
  • 1 teaspoon sea salt
  • 1 teaspoon cracked pepper
  • 3 tablespoons chives, chopped
  • cheesecloth
  • baguette, crackers, toast {and olive oil and garlic to rub on the baguette or toast}

In sauce pan, heat milk and cream until boiling.  Remove from heat and stir in vinegar.  Let sit for 2 minutes. Drape cheesecloth over large glass bowl, pour milk mixture into cheesecloth.  Allow the liquid to drain, leaving the cheese curds.  Let it drain an additional 30 minutes.  Transfer cheese to a clean bowl, discard whey or save for use in other recipes.  Add chives, salt and pepper to cheese, mix.  If spreading on baguette or toast, heat broiler to high. Drizzle baguette or toast slices with olive oil.  Toast on baking sheet 1-2 minutes, just until it browns.  Remove from oven and rub with garlic clove, serve with dolloped with ricotta.  It will keep 3-4 days, covered, in the refrigerator.

Enjoy!

IMG_2674

xoxo~Darci