
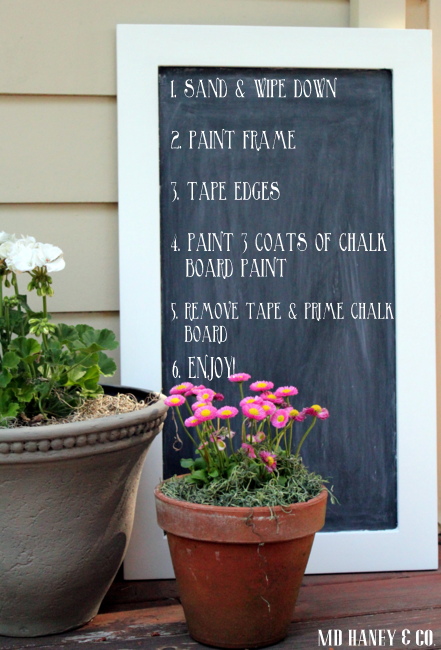
HAND MADE CHALK BOARDS
/I bet most ladies love chalk boards as much as I do!
They are so fun and come in every shape, size and color. Perfect for menus, quotes, directions….anything looks a little sweeter when written on a chalk board. I love to make chalk boards! If you haven't made one, here are a couple of easy tips to make your own chalkboard….on virtually any surface!
I usually use cabinet doors for my chalkboards (mostly because we always have a few extra lying around). But, I have seen some darling chalkboards made on serving trays, platters, windows, walls and more. Just use what you have (or find at Goodwill)!
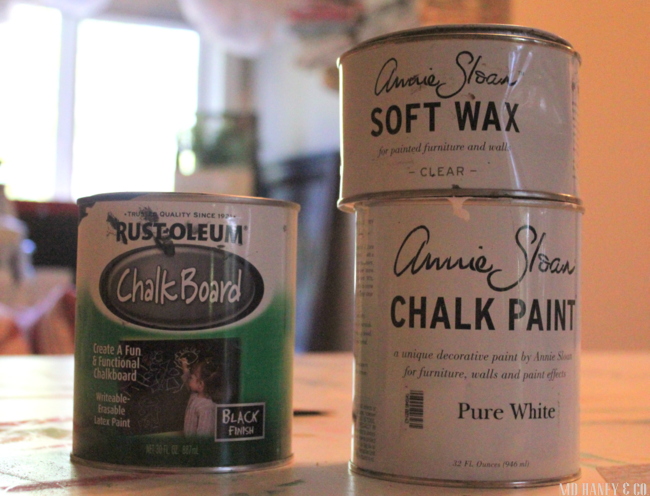
I usually have 1-2 quarts of chalkboard paint on hand. You never know when the inspiration might strike ;-) I typically paint the frame of the cabinet door. I use Chalk Paint® and wax. It's super easy and I know it will cover beautifully. I sand whatever I am painting, and then give it a good wipe down. You don't want any dust in your paint!

After I have painted the frame, I tape the edges. It's so hard to get a straight line without taping. It usually takes 2-3 coats of the chalkboard paint. Each brand of chalkboard paint has their specific directions, the brand I had requires 4 hours dry time before re-coating.

Once the chalkboard paint is completely dry, you will need to prime the chalkboard. Rub the chalk in both directions to completely cover the chalkboard surface. This ensures that the writing will not stay imprinted into the chalkboard. Here is a picture of when I primed Savanna's chalkboard wall.
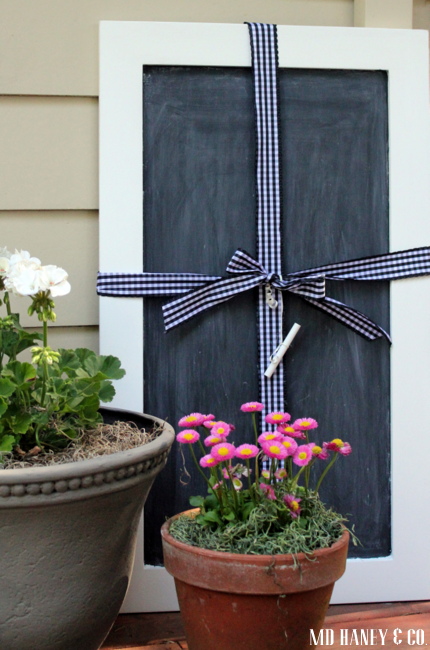
I have a lot of chalk boards scattered through out the house, and a few for sale at every event. I am out of 'extra' cabinet doors so I am going to have to start getting creative! This one is for a customer's granddaughter's room….so fun for a little girl to have her own little space to create!
Have a great week!!