fall entertaining class || a creative class at the cottage

A few weeks ago I hosted my 3rd annual FALL ENTERTAINING CLASS.  It was such a fun evening and I think the ladies had fun too!  The weather held out and it was a cool, cloudy Fall evening.  Just perfect for a night of friendship, food and creativity!

blogcottage1 blofcottage2 blogcottage3

The girls and I decorated the front porch with colorful pumpkins and different squash, as well as a few mums and ornamental kale.

blogcottage7

Each lady received a SWAG bag to take home.....just a fun little bag full of goodies and another way to say THANK YOU!

blogcottage8 blogcottage9 blogcottage10 blogcottage6 blogcottage5 blogcottage4 blogcottage10

blogcottage11 blogcottage12 blogcottage13 blogcottage15 blogcottage14 blogcottage16 blogcottage17

We made new friends, created pumpkin succulent centerpieces, enjoyed yummy food and drinks.  I think it's safe to say that each and every one of the beautiful ladies that attended, walked away with a full heart and a head full of fun and easy entertaining and decorating ideas!

Thank you to Brittany Rossman Photography for capturing the evening in photos!

Thank you to each and every one of the ladies who attended!

And thank you to my mama who helped me serve the ladies that evening....

Happy Thanksgiving friend!!

xoxo~Darci

sea salt hand scrub || home made

I am absolutely loving this Spring weather!  The warm sunny days have me itching to work outside!  The girls are now 5 and 3 and they are at a fun age where I feel we can actually do (and for the most part) enjoy activities together.  One we all enjoy, is working/playing in the garden! IMG_6692

My lavender is just starting to bloom.  This year I want to be intentional about using more herbs and flowers from the garden.  One way to do that is to make home made scrubs!

IMG_6681

IMG_6660

IMG_6661

IMG_6653

Sea Salt Hand Scrub

Supplies

1 cup coarse sea salt 1/2 cup liquid coconut oil 5 to 7 drops lavender essential oil

Equipment Dry measuring cups 10-ounce glass container (I used a canning jar) Fork

Instructions

  1. Grab your supplies. You'll need 1 cup coarse sea salt, 1/2 cup liquid coconut oil, 5 to 7 drops of lavender essential oil, and a 10-ounce glass container.
  2. Add the salt. Pour 1 cup of salt into the empty glass container.
  3. Add the oil. Pour 1/2 cup of coconut oil over the salt.
  4. Add essential oil. Add 5 to 7 drops of essential oil to mixture.
  5. Stir the mixture. Stir all ingredients until well combined.
  6. Seal and gift. Seal the jar and affix a label or gift tag to the top.

Recipe Notes

  • Use scrub sparingly — about once or twice a week — by spooning a small amount into your hands, gently rubbing it in, rinsing it off with warm water, and drying your hands thoroughly.
  • This makes a sweet gift, especially with Mother's Day right around the corner.  You can easily affix a label, add a tea towel and you have a sweet, hand made Mother's Day gift that any lady in your life would like!
  • I adapted this "recipe" from www.thekitchn.com.

PUMPKIN CHOCOLATE CHIP COOKIES || a sweet treat recipe

Since pumpkin is the go-to ingredient right now, we are baking anything and everything pumpkin!  Last night the girls and I made a batch of pumpkin chocolate chip cookies.  They were so soft and cake like, I had to share the recipe!!

2015-11-19 05.00.19

2015-11-19 05.04.20

2015-11-19 21.01.17

2015-11-19 21.01.39

My girls love to bake.  It always takes a little longer, and they make a bigger mess than I might, but I love that time that we have together!  Plus, it's created this desire in them to want to create and experiment in the kitchen.

Ingredients
  • 1 cup butter, softened
  • 3/4 cup sugar
  • 3/4 cup packed brown sugar
  • 1 egg
  • 1 teaspoon vanilla extract
  • 2 cups all-purpose flour
  • 1 cup quick-cooking oats
  • 1 teaspoon baking soda
  • 1 teaspoon ground cinnamon
  • 1 cup canned pumpkin
  • 1-1/2 cups semisweet chocolate chips
  • 1/2 cup chopped walnuts

Directions

  1. In a bowl, cream butter and sugars until light and fluffy. Beat in egg and vanilla. Combine the flour, oats, baking soda and cinnamon; stir into creamed mixture alternately with pumpkin. Fold in chocolate chips. 
  2. Drop by tablespoonfuls onto greased baking sheets. Bake at 350° for 12-13 minutes or until lightly browned. Remove to wire racks to cool. Yield: 4 dozen. 
*This recipe is adapted from Taste of Living

house updates + thanksgiving treats

I am sure enjoying these days leading up to Thanksgiving, it's one of my favorite holidays!  We are really trying to wrap up some projects around our home before the first of the year.  Come January, we both have some larger work projects and it would sure be nice to have some things finished around here ;-) You know how I showed pictures of our painted kitchen cabinets a couple of weeks ago?  Well, the blue that I painted my little office area just wasn't working for me.  I tried to like it, but I couldn't.  So, one afternoon I just started re- painting it and I am much happier.  It isn't permanent, but now I don't cringe every time I look at it!  I painted the desk with Chalk Paint® {OLD WHITE} and I painted the office chair with Miss Mustard Seed Milk Paint {KITCHEN SCALE}.  I lightly sanded the chair to distress it, and added a little antiquing wax to darken it.

IMG_5026

IMG_5021

IMG_5020

IMG_5035

IMG_5031

deskchair

Matt finished modifying the basement entertainment center and now it's my turn to paint it!  It will take me a while, but I love to see things starting to change in the basement!  Carpet for the play room is scheduled for December 16th, so we now have a deadline...

IMG_5047

And the barn is progressing!  Siding and roofing should happen within the next two weeks!  We keep changing material selections and colors, it really is such a process to build and remodel.  Having an endless budget would make it a lot more fun, but we don't, so we are trying to make smart decisions and still have a barn that has a bit of character.

IMG_5051

And here is the neighbor's barn across the street, I love it!  So fun to get to view both barns out of our windows!!

IMG_5049

And we are celebrating Thanksgiving with Matt's family.  I really love Thanksgiving and the slow paced day of reflecting on all we are thankful for.  We have some intense family situations on Matt's side and mine, but still so much to be thankful for!  Our contribution for the feast is home made rolls and then these fun sweet treats...

pumpkin-pie-640-dm-600x400

favorite pumpkin pie recipe

RecipeImage.ashx

seven layer bars

exps135372_TH132104D07_02_2b

acorn treats

Wishing you a blessed and memorable Thanksgiving with family and friends!

xoxo

HOLIDAY CENTERPIECE WORKSHOP

It's so hard to believe that we are already 5 days into November!

I love this time of year!  The change in seasons, the busy-ness of holiday activities, warm and cozy nights at home with my peeps, it really is a sweet and special time of year.

Next month, my sweet friend Anne and I are going to host a holiday-centerpiece-making-workshop.  For the past few years I have hosted wreath making classes, and those are a lot of fun.  But this year, I thought I would change things up and bit and offer a centerpiece making class!

partyinvitejpeg2

I haven't ventured into the storage shed {I may never come out alive….it's that bad} to get down my Christmas decorations.  But, I thought I would play around with a few fresh greens to give you an idea of some different centerpiece options!  Disclaimer: please ignore the ripped wallpaper in the background, Matt hopes to have paneling installed on the walls by Thanksgiving….wahoo!

IMG_4898

IMG_4894

IMG_4892

IMG_4884

We will provide hand made wooden boxes {that can be decorated for any holiday or season} and at the workshop you will choose paint color and  finish.  We will be using both Chalk Paint® and Milk Paint to finish our boxes.   We will teach how to apply a solid paint color or a washed/stained finish.  We will have numerous fresh greens, pinecones, various ornaments, candles and all sorts of embellishments to add your own touch!  And let's not forget the festive drinks and snacks!    It's going to be a fun time!  Plus, you will go home with a beautiful, unique and fresh centerpiece, and inspiration to create a memorable Christmas season for you, your friends and family.

Please email {info@mdhaneyco.com} or call {5033857.8176} to reserve your spot!

A FEW {more} FALL TOUCHES

We leave this morning for Crater Lake.  A few nights away with my little family is always so good for my soul!

I thought I would post a few photos of a bit more Fall decorating around the outside of our home.

Have a lovely weekend friends!

IMG_4651

IMG_4647

IMG_4650

IMG_4644

IMG_4658

IMG_4660

**corn stalks and pumpkins from our garden

**fire wood delivered and stacked

**our front door dolled up for Fall

**our new barn is ready for the concrete foundation

A FEW FALL TOUCHES || using what I already have to decorate for fall

This time of year always gets so busy for me (and I know for so many others!)  The tourism is so seasonal here and our vacation rental reaches the peak of busy-ness in August and September.  For me that means a lot of cleaning, gardening and paper work.  But, even during the busy-ness of life, it's so important to make time for family and friends.  Saturday was spent hosting a booth at Carlton Crush ( a darling, local festival ).  It was a long, fun, successful and exhausting day, but the good kind of exhausting!  Sunday we spent the day at Pacific City with Matt's parents….celebrating his dad's birthday.  Pacific City is one of our favorite places to spend the day.  We drive the truck down onto the sand and set up camp for the day.  Football, fire, food and lots of sand and salt water….the best kind of day! IMG_4613

IMG_4620

IMG_4616

And today has been our first 'slow' day at home in a while.  So, the girls and I have been cleaning and slowing adding touches of Fall.  When decorating for Fall, I like to go 'all natural' and use things from nature.  Mostly branches, berries, pumpkins and gourds.  It's easy, cheap and looks great.  A couple of years ago I painted all of my fake orange pumpkins white and light green.  I used Chalk Paint to paint my pumpkins, but I am sure any paint would work just fine.

IMG_4621

IMG_4626

IMG_4642

IMG_4637

IMG_4630

IMG_4627

As you can see by the dining room photos, the room is in progress.  When Matt starts paneling the stairway to the basement, he is going to add an opening to the dining room and panel the entire room.  We contemplated wall papering but we would need to tear off of the layers of wall paper and it honestly would be easier to panel the room than to try to remove the wallpaper, patch the holes and hang wallpaper.

The girls and I are planning on adding some Fall touches to the their bedrooms and the outside of the house later today, I will post pictures later in the week!

xoxo

4th of JULY || and savoring the little moments

Ever since Addilyn was born, we spend most of the Fourth of July at Cannon Beach.  It's a sweet little tradition that we look forward to every summer.  The bakery, the shops, the darling parade, the sweet smell of the ocean air, it's one of my favorite things about summer.

IMG_4461

I am definitely learning to savor the time I spend with my little family.  The girls are growing so fast.  I want to pour into them and love on them.  And honestly, some days are just hard.  I loose my patience too many times to count.  I snap and nag, and these sweet little ones love on me anyway.

We slowed down for the day.  We sat and enjoyed the parade.  We enjoyed each other's company.  We were present and it was just what this tired mama/wife needed.

IMG_4463

IMG_4458

Little Miss loves to savor everything around her.  Truly.  She inspires me to constantly look at things through a child's perspective.

IMG_4465

IMG_4455

IMG_4473

IMG_4471

After a long {but so great} day at the beach, we headed to my parent's for a BBQ and got to spend more time with family.

Sometimes I can be so overwhelmed with motherhood.

Am I spending enough time with my babies? Am I working too much? Am I teaching them enough? Am I pouring into them enough? How do I carve out time for my handsome husband?

I love my work and I love being with my kiddos at home.  It's a hard balance between loving your job and loving on your kids.  I am working on letting go of the guilt and learning to celebrate the sweet little moments.  I am finally finding peace with my work/home schedule.  Not balance, I don't know that I will ever find that, but peace.  God can fill in the spots where I am lacking, and believe me, there are plenty.

I hope you will be encouraged to let go of the guilt and fill up on God's peace!

GRAHAM CRACKER SWEET TREAT || a made up snow day treat

Day #6 of snow.

It's beautiful!  We haven't gotten cabin fever yet.  Probably because we are all fighting colds and just wanting to lay low and relax.

Yesterday we were running low on groceries, and activities.  So, we made GRAHAM CRACKER SWEET TREATS. A wing-it-figure-it-out-as-you-go-can't-have-many-ingredients kind of treat.  We love them.especially frozen!

IMG_3887

The recipe is very technical.  Your 3 year old will feel very confident in their culinary skills after making this!

IMG_3876

Open 1 sleeve of graham crackers.  Line them on a baking sheet.

IMG_3878

Melt butter and brown sugar.  Pour over graham crackers and top with sprinkles, chocolate chips, nuts, dried fruit, whatever your heart desires!

IMG_3884

Fun, easy and they definitely satisfy the sweet tooth craving!

IMG_3881

GRAHAM CRACKER SWEET TREAT

Ingredients ::

1 sleeve of graham crackers

1/2 cup butter

3/4 cup brown sugar

assorted toppings {sprinkles, chocolate chips, nuts, dried fruit, etc.}

Directions ::

Spread graham crackers on baking sheet.  Melt butter and brown sugar in microwave for 4-6 minutes.  Stir every 2 minutes.  {this will be hot!!}  Pour over graham crackers and top with topping.  Wait 1 hour, or until topping has hardened.  Break into bite size pieces.  Store in airtight container at room temperature or in the freezer.

SOFT GINGERBREAD COOKIES :: a sweet treat recipe

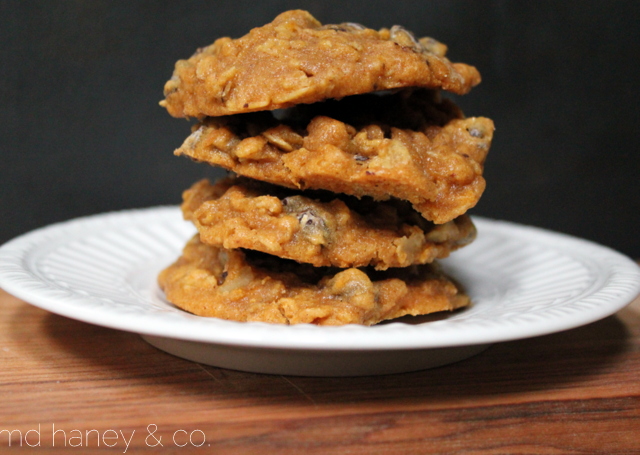
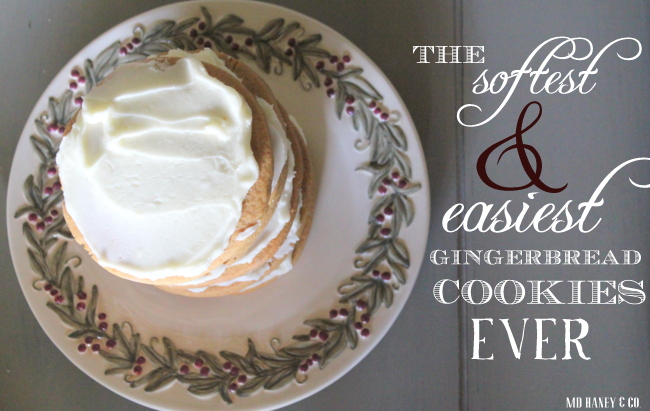
Soft Ginger Bread Cookies  ||  a winter treat

I have tried numerous ginger bread cookie recipes over the years.  I finally found a keeper!!  I promise, you will love these cookies!  You might even do a happy dance when you realize how easy they are!

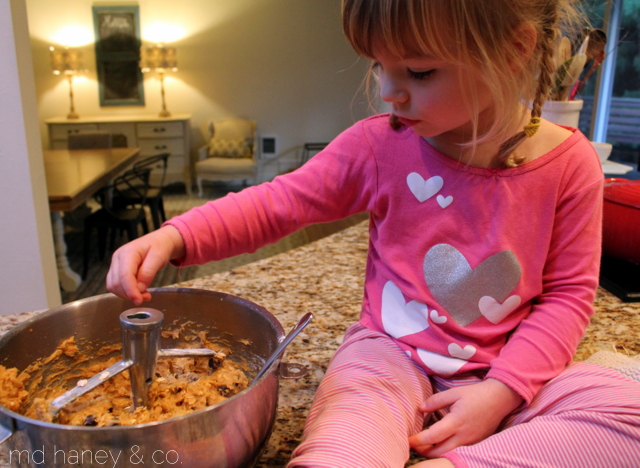
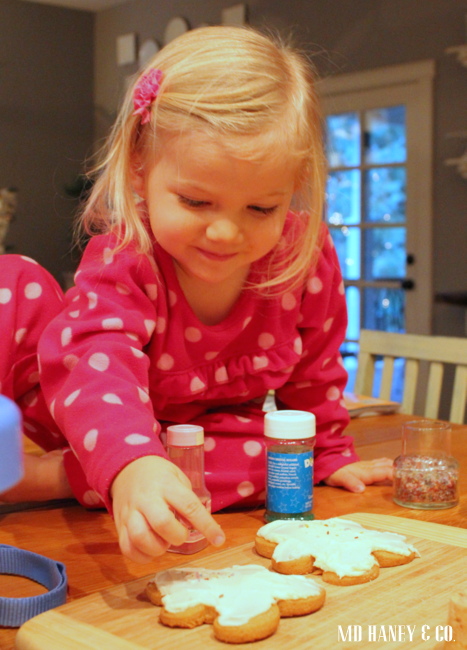
Last night I baked the cookies while we enjoyed spending time with my in-laws.  This morning, both girls were up earlier than usual, so we decided to frost and decorate the rest of our gingerbread cookies.

IMG_3585

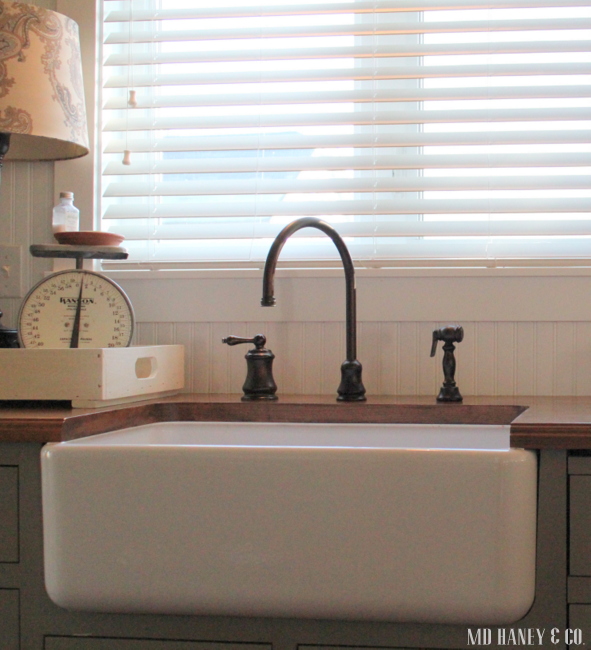
When we move, I will definitely miss our huge island!  It's the perfect spot for both girls to sit and help in the kitchen.

IMG_3600

I have really been working on letting go of the inner-perfectionist in me, at least when it comes to activities with the girls.  I don't want them to feel like they can never measure up.  I want them to be brave, and try new things, even if at first, they fail.  And I definitely want to be their biggest cheer-leader, not a nagging voice in their ear!

IMG_3591

I want them to enjoy spending time with me, and doing activities with me.

So, when it comes to working in the kitchen, I give Addilyn her own cookies to decorate, or bread to roll into a ball, or her own cheese to grade.  She enjoys helping in the kitchen, and I can relax and not hover over her the entire time.  It's a win-win ;-)

IMG_3601

So, back to the cookies.

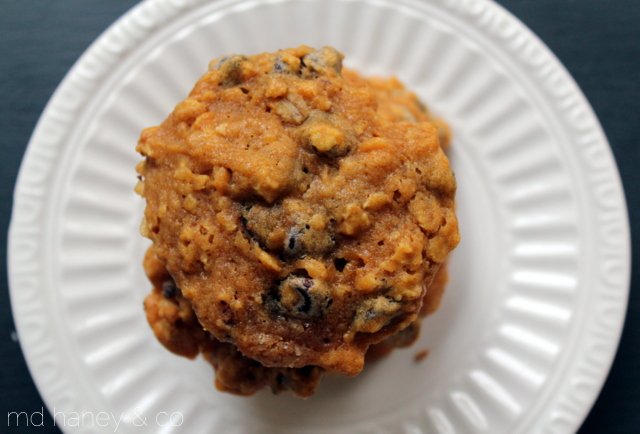
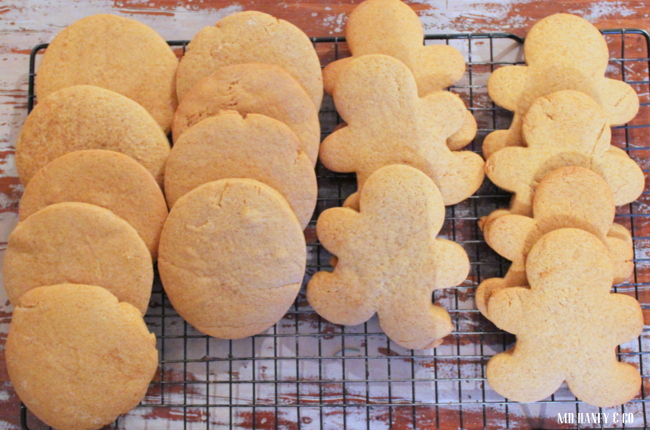
We baked them last night and frosted a hand full of them after they had completely cooled.  That's the trick, don't try to frost them when they are still warm, I promise you will be disappointed and maybe even frustrated (I know that from personal experience).

IMG_3582

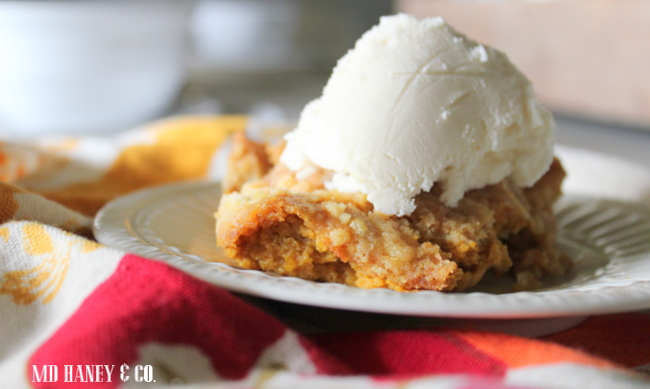
I prefer mine with a tall glass of cold milk.

 Although, in the morning, I am sure I will prefer my little gingerbread man with a hot cup of coffee!

IMG_3604

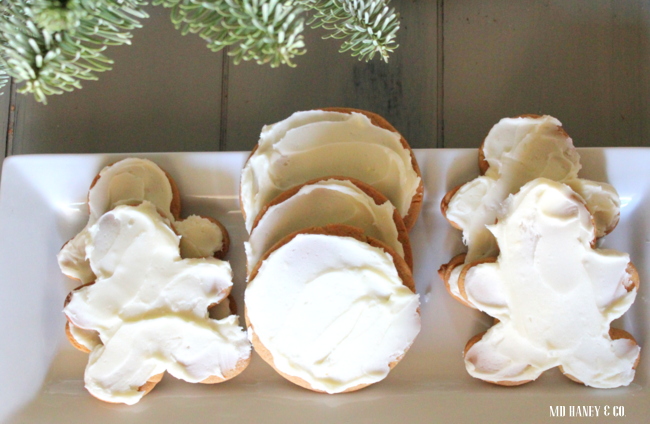
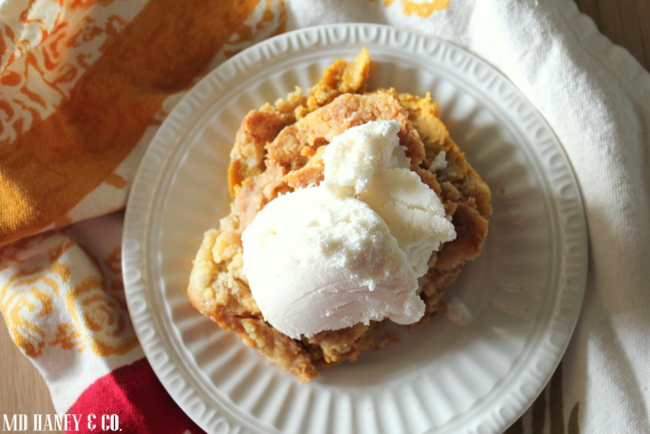
The frosting has a hint of lemon, a perfect accompaniment to the gingerbread.

IMG_3606

These can be made any time of year, but they sure make the best little gingerbread men!!

the

Soft Gingerbread Cookies with Lemon Frosting

Ingredients

  • 3/4 cup butter, room temperature 
  • 1 cup granulated sugar
  • 1 egg plus 1 yolk
  • 1/4 cup molasses
  • 1 tsp baking soda
  • 1/2 tsp salt 
  • 2 1/2 tsp ground ginger
  • 1 tsp cinnamon
  • 1/2 tsp ground cloves
  • 2 1/4 cups flour
  • 1/3 cup additional sugar for rolling

Lemon Frosting ~  Add the juice of one lemon, and 1 tsp. of lemon zest to a mixing bowl.  Add 3-4 cups of powered sugar and mix (with a mixer) until the frosting is smooth.  Add more powered sugar to achieve the desired consistency.

Directions

  1. Preheat oven to 350°
  2. Line a baking sheet with parchment paper, set aside.
  3. In bowl of stand mixer beat butter and sugar together for 2 minutes.
  4. Add in molasses and mix until incorporated.
  5. Beat in egg plus additional yolk, baking soda, salt, ginger, cinnamon and cloves. Mix until smooth.
  6. Turn mixer to low and add in flour until dough comes together.
  7. Refrigerate for 1 hour, or longer.
  8. Roll dough and cut into desired shapes.
  9. Bake for 9-11 minutes until edges are golden.
  10. Allow to cool on baking sheet for 3 minutes and then transfer to wire rack to cool completely.  Once cooled, frost with lemon frosting.

Notes

Store airtight at room temperature for up to 3 days….and enjoy!!!

HOME MADE PEPPERMINT OREOS :: a holiday treat

IMG_3510  

I thought I would share my cookie contribution for the cookie exchange tonight.

HOME MADE PEPPERMINT OREOS.

The website I found the recipe from has much prettier pictures, but they sure taste good!!

HOME MADE PEPPERMINT OREOS

****

Ingredients

  • {batter}
  • 1 box devils food cake
  • 1 egg
  • 1 stick of butter softened
  • {frosting}
  • 1 sticks unsalted butter, at room temperature
  • 2 cups powdered sugar
  • 1 TB milk, or heavy whipping cream
  • 1/4 teaspoon Vanilla extract
  • 1/2 teaspoon Peppermint extract
  • Andi's crushed peppermints

Instructions

  1. Combine egg and butter in a large bowl. Mix until combined. Pour in devil's food cake and mix until the batter is smooth (about 2 min). Roll dough into a ball and push flat onto a lined cookie sheet. Bake at 350 for 6-8 minutes. Remove to cooling rack and allow cookies to completely cool.
  2. For frosting: Mix together butter. Next add milk, vanilla and peppermint extract. Then slowly add powdered sugar and beat until fluffy.
  3. Frost one cookie on the BOTTOM and then sandwich another cookie on top. I like to use a lot of frosting (make sure it's coming out the sides). Then dip the sides of the cookie into crushed peppermint andis.

Enjoy!!!!!  I prefer mine with a tall glass of cold milk ;-)


HOME MADE PEPPERMINT OREOS :: a holiday treat

IMG_3510  

I thought I would share my cookie contribution for the cookie exchange tonight.

HOME MADE PEPPERMINT OREOS.

The website I found the recipe from has much prettier pictures, but they sure taste good!!

HOME MADE PEPPERMINT OREOS

****

Ingredients

  • {batter}
  • 1 box devils food cake
  • 1 egg
  • 1 stick of butter softened
  • {frosting}
  • 1 sticks unsalted butter, at room temperature
  • 2 cups powdered sugar
  • 1 TB milk, or heavy whipping cream
  • 1/4 teaspoon Vanilla extract
  • 1/2 teaspoon Peppermint extract
  • Andi's crushed peppermints

Instructions

  1. Combine egg and butter in a large bowl. Mix until combined. Pour in devil's food cake and mix until the batter is smooth (about 2 min). Roll dough into a ball and push flat onto a lined cookie sheet. Bake at 350 for 6-8 minutes. Remove to cooling rack and allow cookies to completely cool.
  2. For frosting: Mix together butter. Next add milk, vanilla and peppermint extract. Then slowly add powdered sugar and beat until fluffy.
  3. Frost one cookie on the BOTTOM and then sandwich another cookie on top. I like to use a lot of frosting (make sure it's coming out the sides). Then dip the sides of the cookie into crushed peppermint andis.

Enjoy!!!!!  I prefer mine with a tall glass of cold milk ;-)


OH CHRISTMAS TREE

Matt is working on a remodel for a sweet couple outside of Dayton.  After his first meeting with them at their property {they just bought the home}, Matt started to convince me that we needed acreage. {wink}  Their setting is really neat....private and surrounded by farms.  The front of their property is full of Christmas trees.....

IMG_3454

And they were gracious enough to allow us to cut our tree {s} from their property.  Friday {after Thanksgiving} we headed over to pick out our Christmas tree, Addilyn even got her own darling little tree for her bedroom.

IMG_3459

Aren't those trees beautiful?

IMG_3455

Now, having grown up on a Christmas tree farm, it was never a big deal for our family to get a tree.  My mom would usually just grab one, while my dad was gone at work.

No big deal.

But, since our little family of 4 doesn't live on a Christmas tree farm, it's fun to make a big deal of it!  You know....loud Christmas music, hot chocolate and cookies......

IMG_3477

Can you believe it has taken us over 4 days to decorate our tree?  And we still are not done!  See that rogue baby under the tree?  She is one of the reasons it takes so long to decorate ;-)

IMG_3478

And there she is again, under the tree skirt.....

IMG_3482

Addilyn and I made a paper chain for the tree.  A 10' tree requires a lot of paper chain!!

IMG_3484

Our beautiful tree provided extra fresh greens for a little decorating around the house.

IMG_3483

I actually snagged the cedar from our of our Cedar trees.  I love fresh cedar!!

IMG_3489

A wood crate filled with greens {and a few magnolia sprigs}, flameless candles and a white bird.

IMG_3485

A basket filled with greens, books and birds for our outside dining table.

IMG_3497

Window boxes filled with greens and ornaments {on Matt's wood shop}.

IMG_3492

And a few greens for the front porch!

I have a feeling it may take me all month to decorate for Christmas.....but that is part of the fun!!

PUMPKIN PIE ICE CREAM :: a sweet {FALL} treat + some gratitude

So, I have two things for you on this fine Tuesday afternoon....

#1~ the best pumpkin pie ice cream EVER,

and #2 ~ a little note on gratitude.

I found a great blog via Pinterest.  I pinned the kitchen, and then enjoying looking through the blog.  She just wrote a post titled '20 little attitudes for gratitude.'   And since I am really working towards focusing on being thankful this holiday season, I was inspired to write my own 20-little-attitudes-for-gratitude.  Maybe it will inspire you to write your own list?!?


20 Little Attitudes of Gratitude

  1. Mind your manners. Say please, thank you and excuse me.
  2. Smile when you see your friends and family, look them in the eyes when you are talking.
  3. Always take the time to listen.
  4. Notice when others do kind things for you, show gratitude by action or words.
  5. Gives hugs and kisses freely through out the day.
  6. Extend grace.
  7. Don’t worry about tomorrow. No ounce of worry can change a thing about tomorrow.  Be grateful for right now.
  8. Create gratitude journals to keep track of daily blessings.
  9. Encourage strangers with a smile.
  10. Leave love notes in unexpected places like lunch boxes and under pillows.
  11. Encourage someone with a compliment.
  12. Instead of complaining, verbalize what you are thankful for.
  13. Bake extra of everything, strive to always give away a freshly baked treat.
  14. Remember to thank God for blessings each day.
  15. Surprise your family (or friends) with little gifts or treats to show you thought of them.
  16. No grumbling about minor annoyances around the house.
  17. Do special things to cherish time with your family.
  18. Reflect on happy memories regularly. Make inspiration boards of special times.
  19. Always remember, no one is perfect, have grace with yourself.
  20. Be grateful you have a house to clean.

“Gratitude unlocks the fullness of life. It turns what we have into enough, and more.” –Melodie Beatty

IMG_3439

One of the many things I am grateful for, is my awesome ice cream maker.  It is sooooo easy to make ice cream with this little guy.  Seriously.  It's the best!

This ice cream is really rich.  I think it would also make a great ice cream pie filling....maybe a graham cracker crust?  I will try it and let you know!

IMG_3441

Pumpkin Pie Ice Cream

Ingredients:

  • 1 can (15 ounces) pure pumpkin puree or 1-3/4 cups homemade cooked pumpkin puree, well-draiined
  • 1-1/2 cups heavy whipping cream
  • 1/2 cup brown sugar
  • 1/2 teaspoon salt
  • 1 teaspoon ground cinnamon
  • 1/4 teaspoon ground ginger
  • 1/4 teaspoon ground nutmeg
  • 1/4 teaspoon ground cloves
Place pumpkin puree into a strainer lined with cheesecloth for 15 minutes to drain any excess water.Gently heat heavy cream and brown sugar until small bubbles form around the edge of the pan, stirring often. Add pumpkin puree and spices.  Do not boil. Remove from heat and whisk until the sugar is dissolved. Let cool to room temperature.

Pour mixture into ice cream machine as per your machine's instructions.

Enjoy!!

A SEASON OF THANKFULNESS

Wednesday night I was hit hard with a stomach bug.  Oh it was bad.  Maybe worse than childbirth?!?  Not sure.  Regardless, it's been several years since I was so sick.  As I laid in bed Wednesday night, I prayed that my little ones wouldn't get sick.

They didn't.

And I was reminded once again that I have so much to be thankful for!

sava2

Thankful that I get to squeeze this face every.single.day.

addi2

Thankful that I get to tuck this one into bed every.single.night.

IMG_3415

Thankful for the luxury of grocery shopping and the ability to fill my refrigerator on a regular basis.

IMG_3406

Thankful for a little chunk of earth to grow a garden.....even in the winter.

IMG_3409

Thankful for a child healthy enough to play outside.

IMG_3422

The door leading to our garage is right next to our kitchen.  I painted part of the door with Chalk Board paint, it's a fun place to right messages and notes.

Every day for the month of November, I have seen this reminder on my kitchen door ~ 'today we are thankful for....'

I often forget that this is the season of intentional gratefulness.  I sometimes have to stop myself in my busy tracks and say thank you.  I take so much for granted.  Motherhood has taught me to be intentional.  To stop and pay attention.    To notice the simple joys in life, because I might not have tomorrow.... 

HOLIDAY SCHEDULE & THE COOKIE EXCHANGE :: updates

Hello friends!

Below is an updated HOLIDAY SCHEDULE for happenings at the design studio.  I will be around this week and next week for appointments if you would like to stock up on Chalk Paint®!  The studio won't be open this Friday {11/22} or next Friday {11/28}, but just call/text/email and I will gladly meet you there!

winterschedule copy

So, the upcoming COOKIE EXCHANGE is going to be a lot of fun!!  I know the holidays can get busy, but I thought this would be a fun way to get together with friends and neighbors.

img_plan-cookie-exchange_1

Here are the details ~

DATE ::  Sunday, December 8th, 2013

TIME ::  6:30-7:30

LOCATION  ::  543 West Main Street, Carlton {the design studio/cottage}

WHAT TO BRING  ::  3 dozen cookies ~ 1 dozen to share and 2 dozen to exchange

I will have drinks, appetizers, a packaging station for your sweet treats and a warm, cozy fire ;-)

Hope you can come!!

THANKSGIVING DECORATING :: some inspiration

Don't you just love this time of year?!?  I do!  The hustle and bustle, the reasons to celebrate with friends and family, and a time to reflect on all of our abundant blessings!

I am always amazed at how Thanksgiving seems to sneak up on me.  Especially now with little ones in tow!!  We still don't have our Thanksgiving plans finalized, but I thought I would post a few of my favorite inspiring Fall/Thanksgiving spaces and decorating ideas!

1-thanksgiving-table-setting-how-to-set-a-formal-place-setting-diagram

 source

FallDecor-PumpkinTabletopDisplay_zpsf815a286

source

FallDecor-WhiteandBlueGrayPumpkins_zpsb30cb968

source

dreamywhitesfalldecorating_zpsa3d0712f

source

pumpkintopiaries_zpsbe490f44

source

stonegablewhitepumpkins_zpsa509e401

source

So pretty!

Have a great weekend!!  Oh and I hope to have some BEFORE + AFTER photos for you next week!

xoxo~Darci

PUMPKIN DUMP CAKE :: a sweet treat recipe

IMG_3350

I thought I would share one of the easiest dessert recipes E.V.E.R.  Most of the desserts I make are easy, I don't do complicated!  Takes too much time, and I would rather be spending my time eating the desserts instead of baking them ;-)

If you have never heard of dump cake before, it was a recipe that became popular in the 80′s by church cookbooks and potlucks.  You basically dump a few cans of fruit in a pan, cover it with cake mix and butter and bake it.

This is the same idea, only I used pumpkin instead of fruit!

IMG_3348

Pumpkin Dump Cake

 Ingredients
  • 1 15 oz can Pumpkin Puree
  • 1 10 oz can Evaporated Milk
  • 1 cup light brown sugar
  • 3 eggs
  • 3 tsp pumpkin pie spice
  • 1 box yellow cake mix
  • 1 cup (2 sticks) butter melted
  • 1 cup coarsely crushed graham crackers or pecans
  • 1/2 cup toffee bits (optional)

How to Make

  1. Preheat oven to 350
  2. Spray a 9×13 baking pan lightly with cooking/baking spray
  3. In a large bowl combine the pumpkin, evaporated milk, sugar, eggs and pumpkin pie spice. Stir to combine.
  4. Pour into your prepared pan.
  5. Sprinkle your entire box of cake mix on top, followed by your nuts or graham crackers and toffee chips.
  6. Pour your melted butter evenly on top.
  7. Bake for 45-50 minutes until center is set and edges are lightly browned.

** serve with sweetened whip cream or ice cream, I served mine with my vanilla honey ice cream **

THE DESIGN STUDIO :: a few Fall touches

I have added a few Fall touches to the cottage, and am just now getting around to posting a few photos.

I would categorize my holiday decorating style as simple.

IMG_3330

I found these 'carve-able pumpkins' at Joanne's Fabric.  They were bright orange, and I wanted something a little more muted.  I slapped on two coats of 'VERSAILLES' Chalk Paint®, buffed them with wax, and called it good.  I think it took less than 30 minutes!

IMG_3328

They sit proudly on the kitchen countertop, next to the sink.

IMG_3343

Last winter we painted the fir hutch 'CHATEAU GREY' {Chalk Paint®}.  It adds a warm touch to the room and looks great with the bold colors of the paint samples.

IMG_3344

This winter I plan on painting the inside of the hutch.  I can't decide if I should add some fun color, or just stick with the 'CHATEAU GREY'.

IMG_3342

I did have cute little pumpkins scattered on this trunk, but I just realized my little helper must have moved them ;-)

1021_514321011998048_1383990635_n

And a few Fall touches outside!

Now I am off to go bake a pumpkin dump cake!  I will post the recipe and photos tomorrow!!

xoxo~Darci

EASY HALLOWEEN NIGHT MENU :: easy home made dinner

IMG_2674.jpg

I love to host parties and have friends and family over for any occasion.  Sometimes I have the time to prepare food and decorate, other times I don't.  I always want my focus to be on just spending time together, now how perfect everything looks or tastes!  I have found the more complicated I make food and entertaining, the more I am stressed and tired, and the food typically doesn't even turn out that good! We are having a few friends over for a quick Halloween dinner.  We all have littles to take trick-or-treating, so it will be a quick dinner, a stop in between the Halloween festivities!

I know we all have our 'go-to' easy-peasy meals, but I thought I would share a couple of my favorites!  These dishes have to pass the test of easy, tasty and can-be-made-in-advance!

Here is our Halloween menu ::

home made HERBED RICOTTA with pita chips

IMG_2673

This home made herbed ricotta is so good....and so easy!!!  {I use the ricotta for the lasagna.}

EASY LASAGNA

Easy-Lasagna

I love this lasagna because it is easy and versatile.  I can make it the night before and just keep it in the refrigerator until an hour before dinner!

CRANBERRY & AVOCADO SALAD

Cranberry-Almond-Salad2

 PW CHEESY GARLIC BREAD {half with garlic and half without garlic for the kiddos}

3321945944_bafae2f8ac_o

And for drinks :: HOT COCOA and HOT APPLE CIDER

I figure we won't have any dessert since we will probably be eating too much candy ;-)

I hope have a great Halloween!!