THE BABY IS 1 || & I painted the high chair

My sweet baby turned 1 last week and we had a little party on Sunday to celebrate.

IMG_4230

This little one is sweet and spunky and getting easier by the day.

IMG_4235

I had an old wooden high chair my mom gave me a few years ago.  It had a great shape, but the finish was worn and yucky {think 70's-yellowed-stain}.  I had wanted to paint it, but it fell low on the priority list.  With the birthday party coming up, I figured it would be a good excuse to paint it!

IMG_4264

I used Chalk Paint® {of course;-}.

I mixed Antibes Green and Old White…..3 parts Antibes Green to 1 part Old White.  By adding the Old White, it softens the green.  It's cheerful but not too bright.

IMG_4266

I distressed the edges a bit and 'dipped' the feet in Old White.

IMG_4270

I waxed it with Clear Wax and called it finished!

IMG_4271

For the 'dipped feet', I taped with masking tape for a crisp edge.

IMG_4261

I set the monkey in the high chair and tried to capture some cute poses.  I took a lot of photos, but none really seemed to capture her personality.  Next time!

You have probably noticed, but I am really getting hooked on mixing colors of the Chalk Paint® and Milk Paint.  Both lines of paint come in beautiful colors, but it really opens the door to color when you start mixing….so fun!


A LITTLE BREAK || and a lot to be thankful for

You may {or may not} have noticed that I haven't been as regular at posting as I usually try to be.

We have been sick, injured and I have just been a little burnt out.

IMG_4216

And then the trees and flowers began to bloom.  The sunshine appeared and I am gently reminded that the seasons come and go.  The seasons in our lives {the good and the bad} are short lived in light of eternity.  The last couple of months have been a little rough.  I am ready for this season to pass, but I know that the trials bring me closer to God.  And, they remind me that I have so much to be thankful for! {That is our neighbor's barn in the background, isn't it cool?!?}

IMG_4218

To add a little sweetness to our home, we brought home 6 new chicks.  They are darling.  I haven't had luck introducing new girls to the old girls, but I am determined that they will all get along.  This whole 'pecking order' is so disturbing.  Hens can be so mean!  Matt still needs to build them a chicken coop, hopefully by the end of summer they will have a beautiful new home!

IMG_4213

My mom made this quilt for Savanna.  Isn't it darling?  It's so bright and cheerful.  She just dropped it by last week!  I am not a quilter, but I sure appreciate the time that goes into it.  And what is better than snuggling with a baby swaddled in a beautiful blanket?!?

IMG_4209

She made Addilyn's quilt for her when she was born.  Isn't it darling?

IMG_4219

And there is nothing like chocolate to cheer a girl up!  Do you know my secret ingredient to box-mix brownies? Sour cream!  About a half cup of sour cream makes all of the difference {thanks for the tip Candice!}  Toppings don't hurt either...

IMG_4221

I added marshmallows, coconut, pecans and chocolate chips.  It took less than 5 minutes to prepare.  The house smells amazing and the other people instantly think I am amazing and the best cook in the world.  I am telling you, boxed mixes to wonderful things for my family!

IMG_4225

I have a lot of fun projects in the works.  Both for clients, and in our home.  I can't wait to post pictures!!  In the mean time, go make some brownies ;-)

A NEW 'BASICS' CLASS || and a few projects

I hosted our first BASICS class this week and it seems to be a very popular class!

I had to turn a few ladies away {which I felt really bad about!} but I promised to host 1-2 BASICS class each month.

IMG_4203

The next BASICS is Wednesday, May 14th, 7-8:30pm.  I have 4 spots left if you want to join!

IMG_4204

The tuition is $45. At the class, we learn two different gorgeous finishes with chalk paint® and soft wax by annie sloan that you will use to transform your furniture, fixtures, cabinets and walls:  distressed and washed method.  You will leave armed with samples you’ve created of each finish, a notebook full of ideas,  and the confidence to tackle all your projects.  

IMG_4206

And, in other news, I have A LOT of half finished projects going on around the house.  The girls have been sick, Matt still isn't healthy and back to himself, and it's been so rainy…..to say the least, I haven't been too motivated to work on projects!

IMG_4197

While Matt was gone one day, I did paint the mantle. Matt loved the Cherry mantle.  It is beautiful!  But, I ordered darker furniture and I really want the room to feel light.  So I painted it ;-)  I think it looks really pretty, I will post pictures soon.  Matt actually likes it too!  There are some projects I just have to tackle when he is gone….then he can't stop me!  Ha….does anybody else have that problem?!?  I know there are other ladies out there who do the same thing ;-)

IMG_4200

I also started painting in the entry way.  I am painting the railing to match our new, black, glossy doors.  I am thinking of wallpapering or hang in fabric on this big, blank wall leading to the basement.  Thoughts?  I have always wanted to hang wallpaper in my home.  I have chosen wallpapers for different clients, but never been able to commit for my own home.  I will let you know!

BEFORE + AFTER || a darling dresser

A few weeks ago I bought a darling dresser at a thrift store.  It wasn't necessarily a screaming deal, but I loved the lines of the piece.  I decided to purchase it and it has been sitting in the garage waiting for a little makeover.

IMG_3981

It is a heavy one, so pardon the picture of it on it's side!

IMG_4164

And here she is all painted and cleaned up.

IMG_4174

I painted the inside of the drawers ANTIBES GREEN {Chalk Paint®}.  I know it takes extra effort to paint the insides of the drawers, but I love how it really finishes a piece off.

IMG_4171

The pretty blue is actually a mix of three different Chalk Paint® colors.

2 parts Louis Blue

2 parts Provence

1 part Florence

IMG_4159

I finished it off with a coat of clear wax.  I am starting to work on pieces for my little Spring Sale, but it will be listed for $345 if you are interested in purchasing earlier ;-)

IMG_4168

And this was the scene outside while I was painting.  Little Miss was playing in the pond and my sweet hubby was recuperating from spending his birthday in the hospital.  Poor thing.  He had an accident with his table saw first thing in the morning.  The girls and I piled into the car to take him to the ER.   I didn't know how bad it was {he kept his hand wrapped in a towel}.  He ended up having surgery and finally coming home around 10pm.  It was a rough day but we are so thankful for great friends who stepped into help and for God's provision!

BEFORE + AFTER

Hello!

I thought I would show a few BEFORE + AFTER photos of a remodel Matt did this winter.  He did a remodel for a sweet couple  who bought some property outside of McMinnville.  After seeing this property for the first time, Matt totally got the 'acreage bug' and wanted to move to the country ;-)

beforekitchen

Here is a BEFORE of the little kitchen.

IMG_4150

And here is the AFTER.

IMG_4153

The owners kept the cabinets.  Matt took down some cabinets and soffit, they replaced the floor and got new appliances.

beforeentry

The entry/living room BEFORE.

Matt re-worked the living room walls to make for a more spacious master suite.  With that came painting, new lighting, new flooring and a beautiful paneled wall.

IMG_4139

The living room AFTER.

IMG_4143

Don't you love her decorating style?  Their home is so inviting and colorful!

beforebedroom

Master bedroom BEFORE.

IMG_4145

I didn't snap any photos of the master bedroom.  However, I did get a few of the new master bathroom

IMG_4149

Everything in the master bathroom is brand new.

IMG_4147

Don't you love how light and bright it is?!?

There were a lot of 'little projects' done at this house.  New front door, new entry, new laundry room…..later this summer I will go snap some more photos!

Don't you feel inspired to go add some color to your living room now?  I sure do!!

Thanks Mike and Kelsey!  It was a pleasure working with you!

A LITTLE UPDATE || and a sweet treat recipe

So sorry for the leave of absence last week!

It was a busy week with design clients, getting the cottage ready for a long term guest, and life with my two little ladies and one big man!  But, I thought I would post a few photos of the latest happenings here at our home.  And a cream puff recipe that is so easy, you will want to whip up a batch 'just because'!

IMG_4123

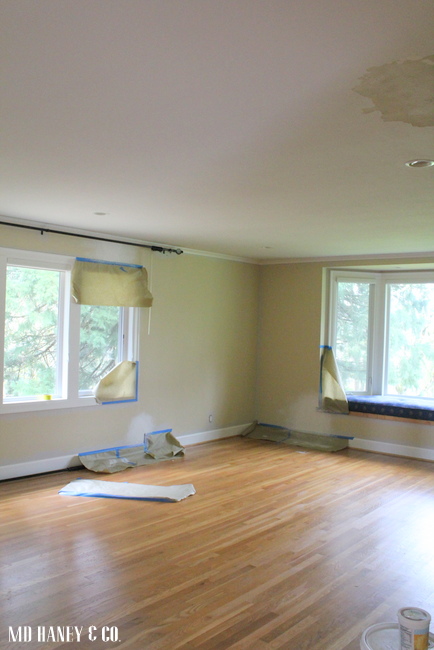
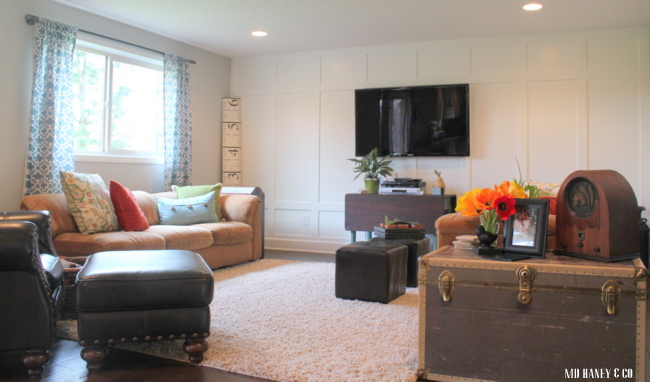
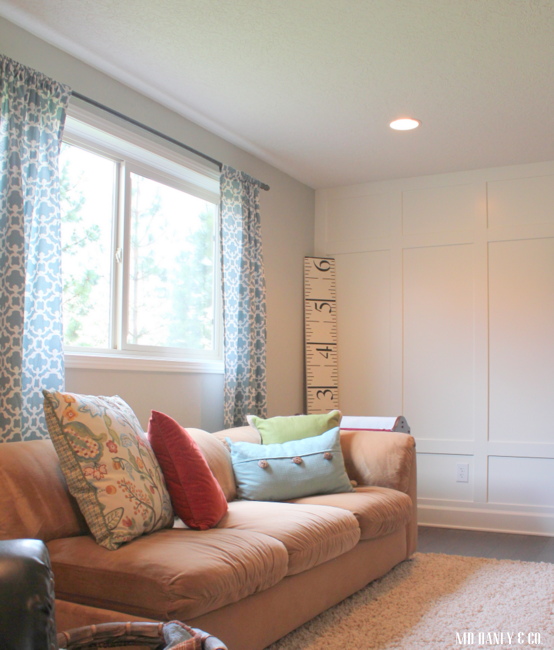
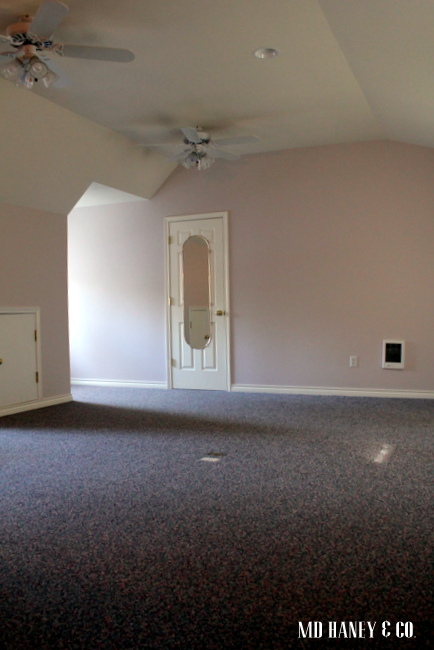
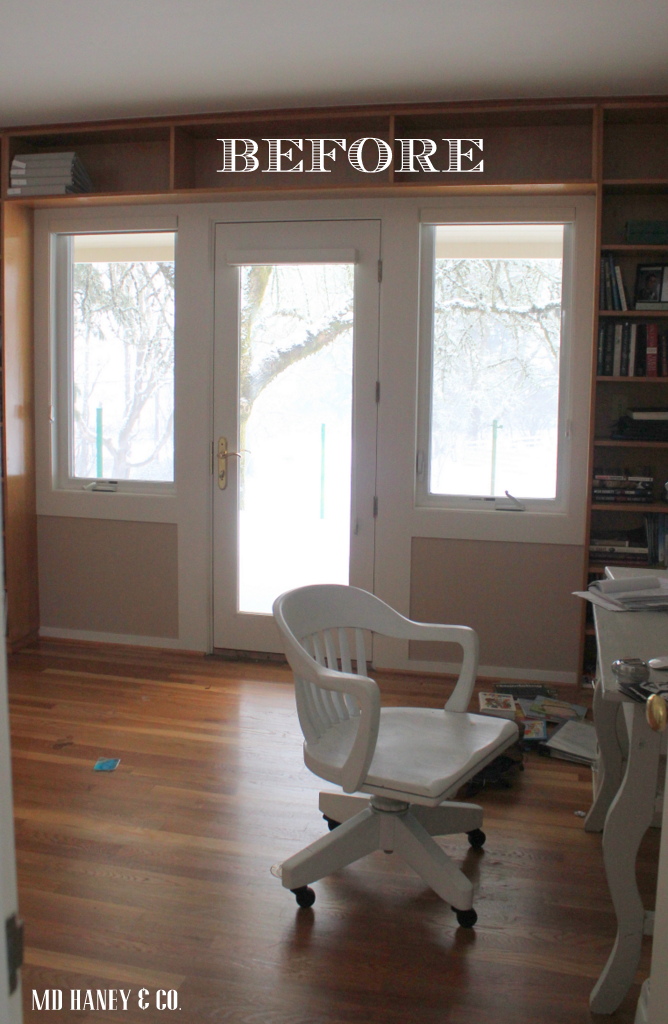
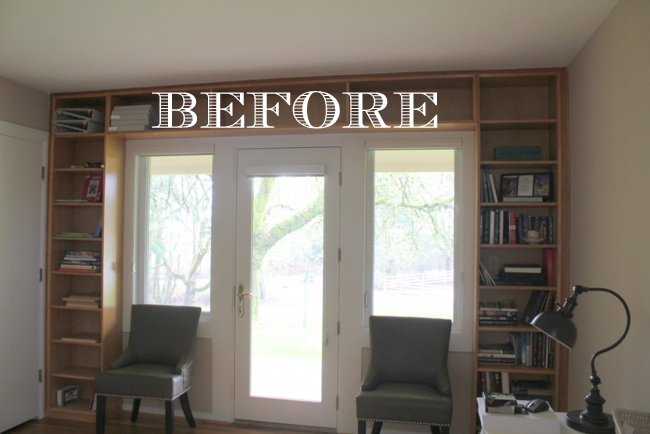
I finally ordered furniture for the living room!  We have about 4 weeks until it arrives so I am hoping to have the living room painted and ready when the furniture arrives.

IMG_4124

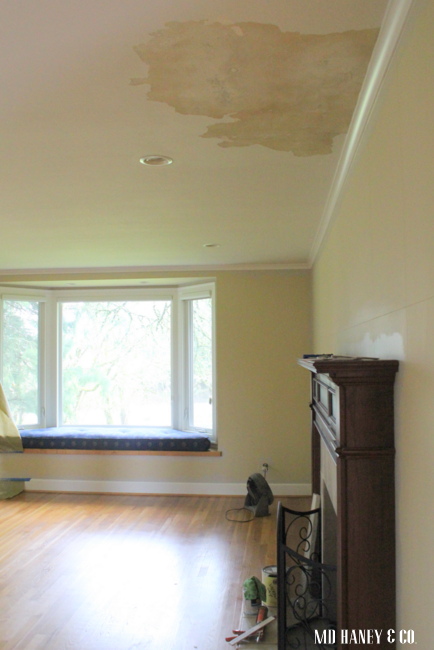
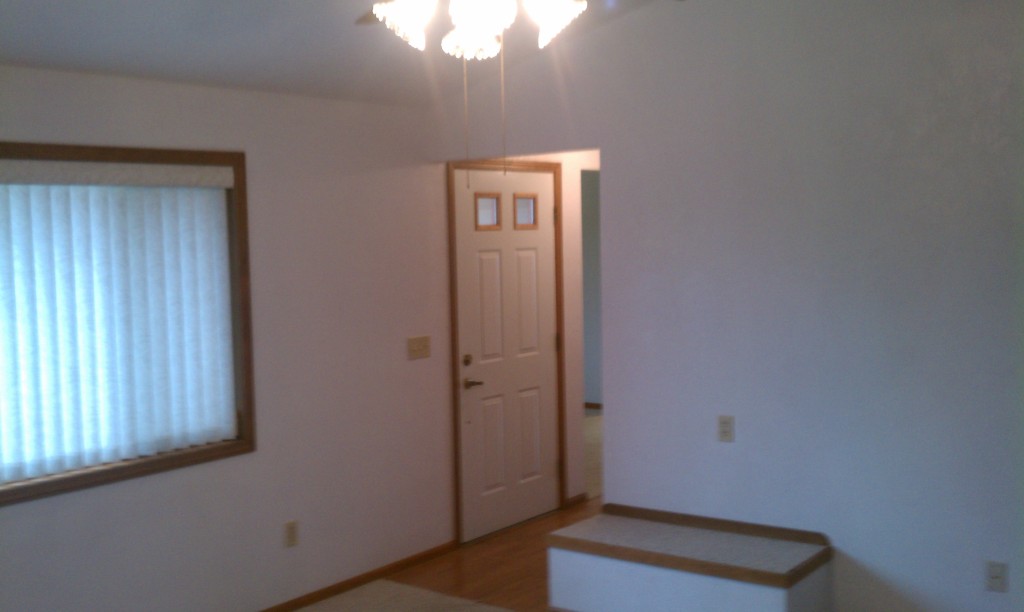
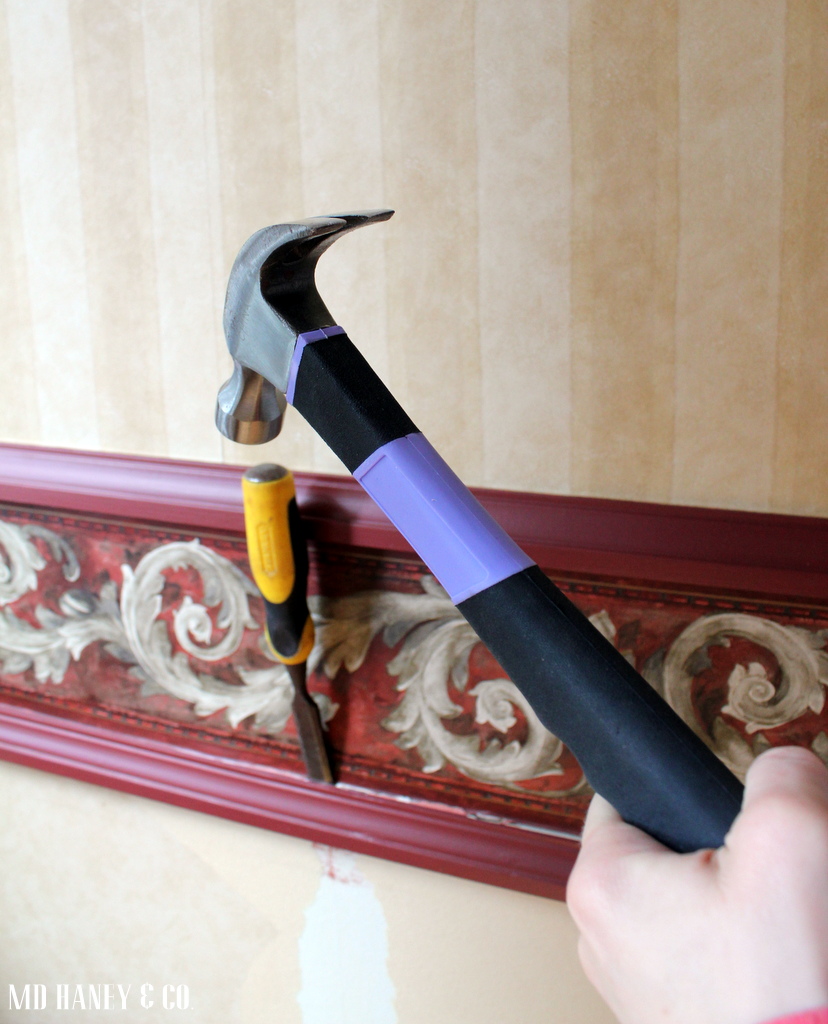
Matt is patching cracks and repairing an old ceiling leak.  The bonus of living with a contractor who is also a perfectionist…..the cracks get fixed before painting.

I am more of a 'i-just-want-paint-in-the-walls' kind of girl. I would have this room painted during one nap time.  Now, it wouldn't look nearly AS  good, but I would feel good about having paint on the walls.  Matt's approach is more along the lines of….puddy every hole, patch + texture every crack, cut in perfectly, paint the ceiling…..you get the picture.  I am slowly {after almost 12 years of marriage} learning that his approach is actually better than mine and always results in a great finished product.  So, the living room may actually take me closer to 4 weeks to paint ;-)

IMG_3972

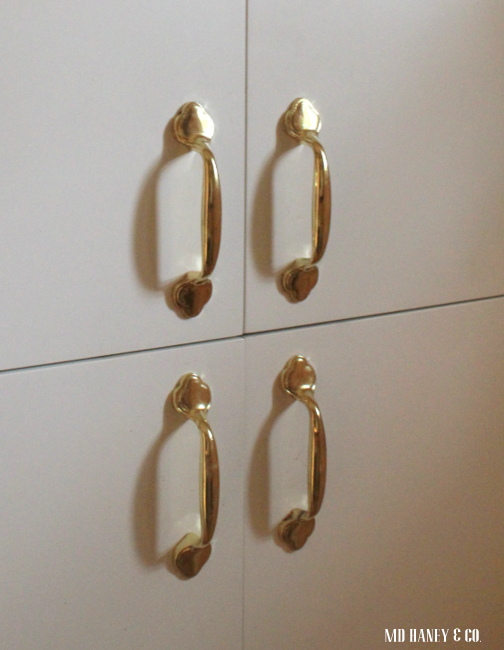
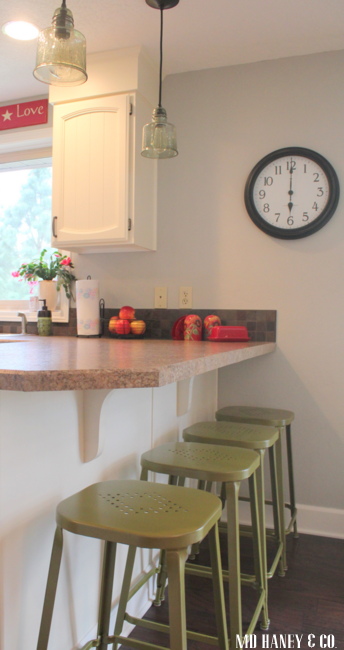
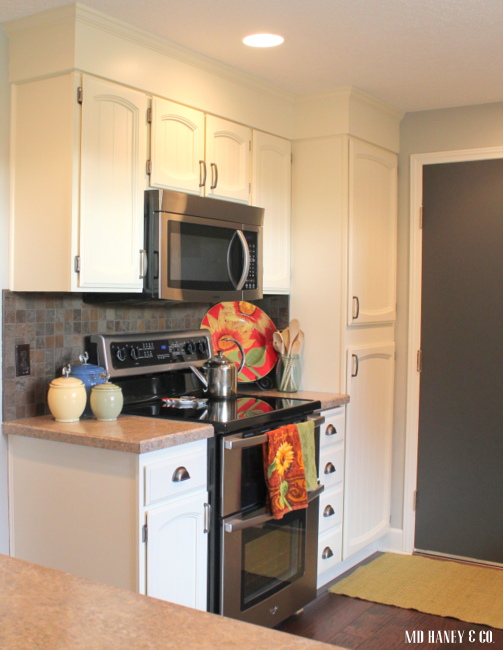
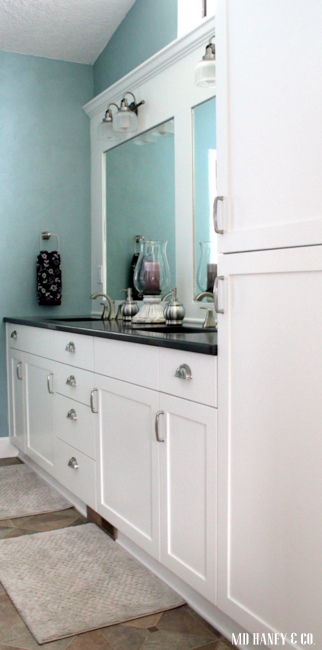
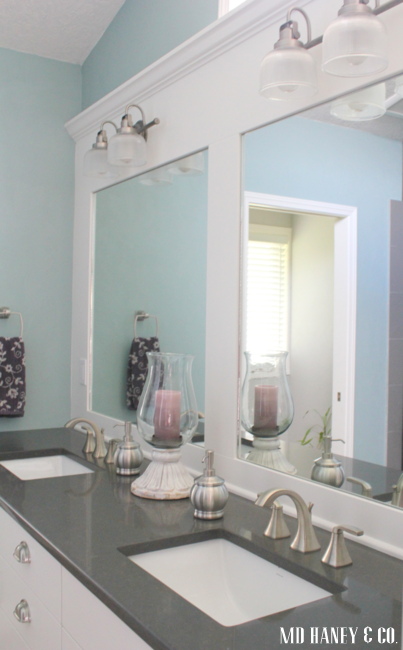
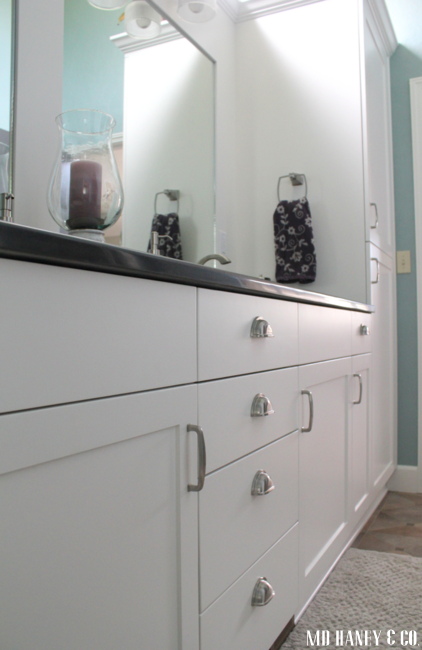
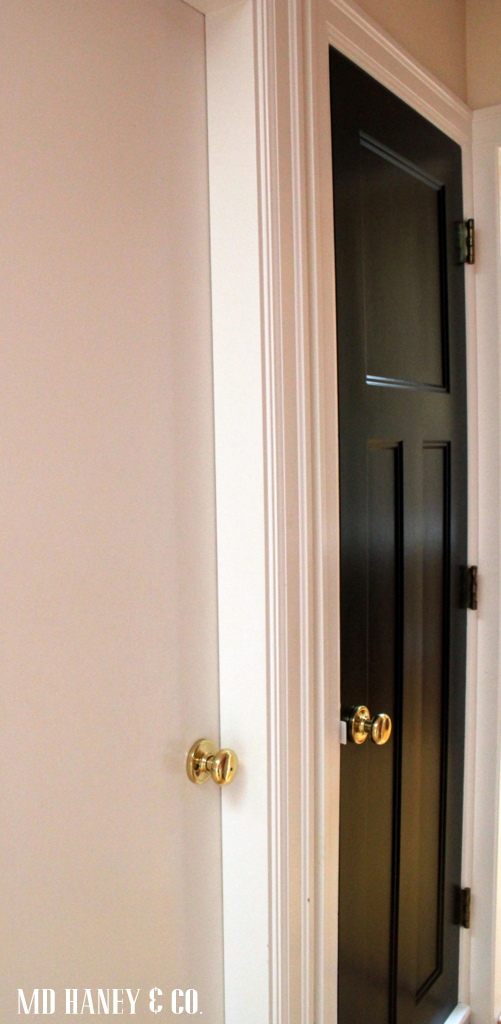
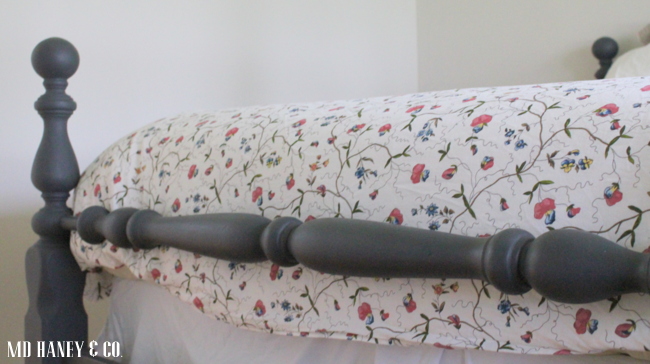
There are some built-ins in the hallway.  They provide excellent storage!  They all had brass knobs that were in great shape.  I painted the knobs black and I love how a simple change can make such a big impact!
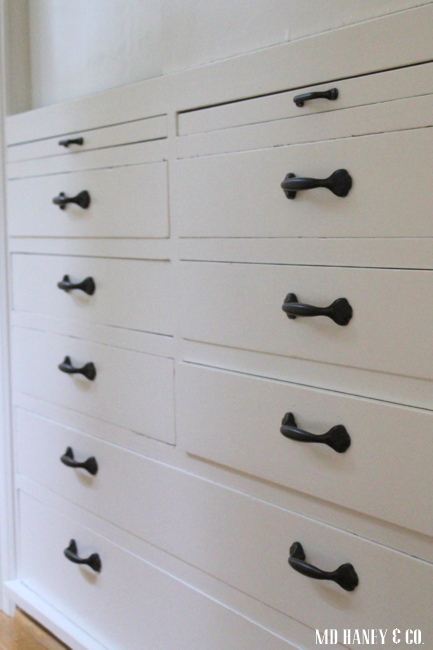
IMG_4131

See what I mean??

IMG_3974

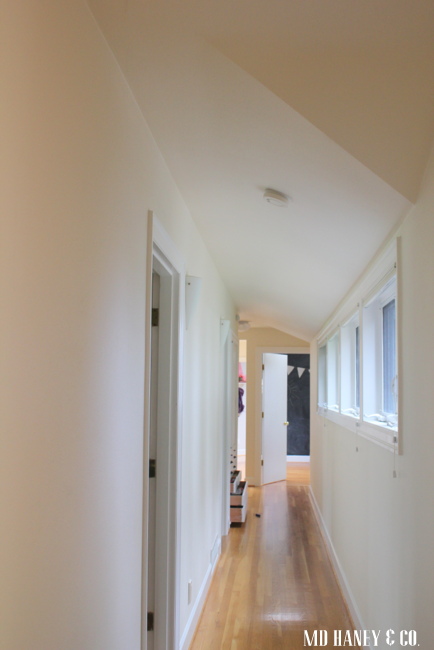
The bedrooms are all connected by this great {long} hallway.  I have been busy touching up paint, caulking and scrubbing.

IMG_3976

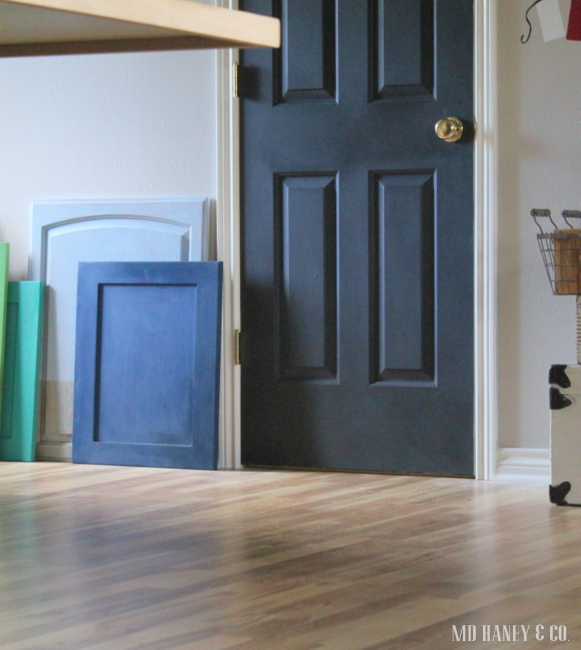
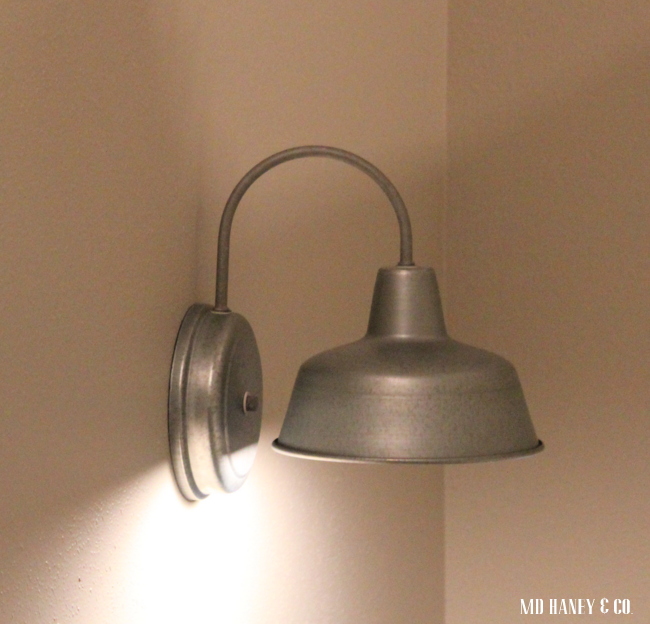
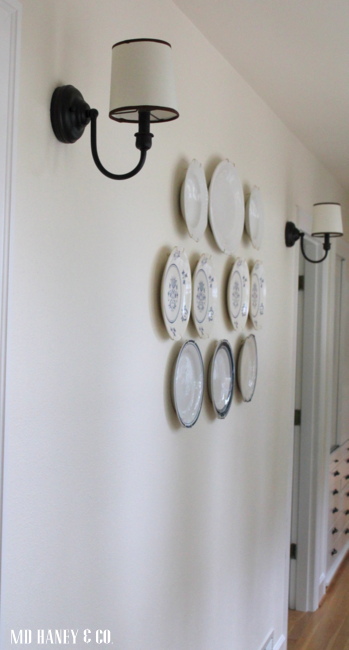
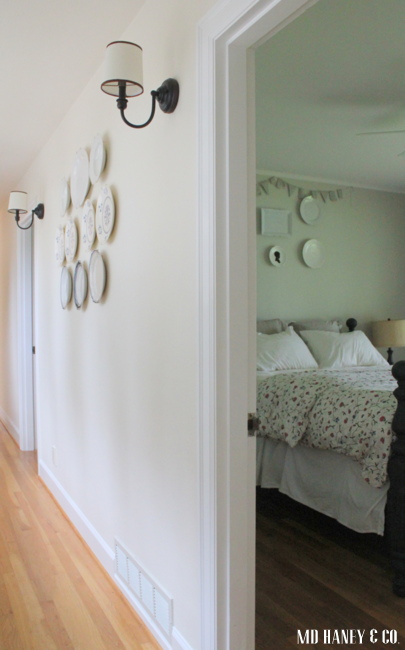
Won't this hall look beautiful with all of our new black doors?!?  Matt is ordering the doors this week, I will keep you posted!  Matt replaced the lights for me and it instantly changed the look and feel of the hallway.

IMG_4133

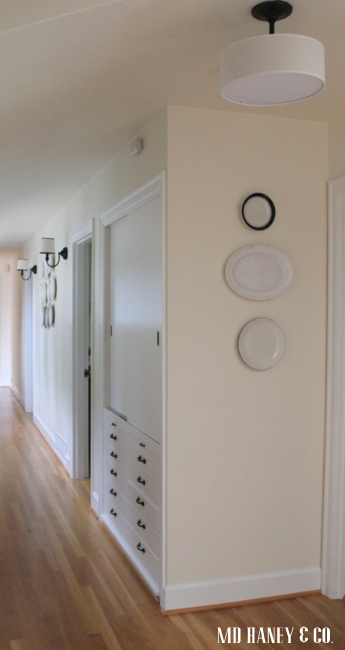
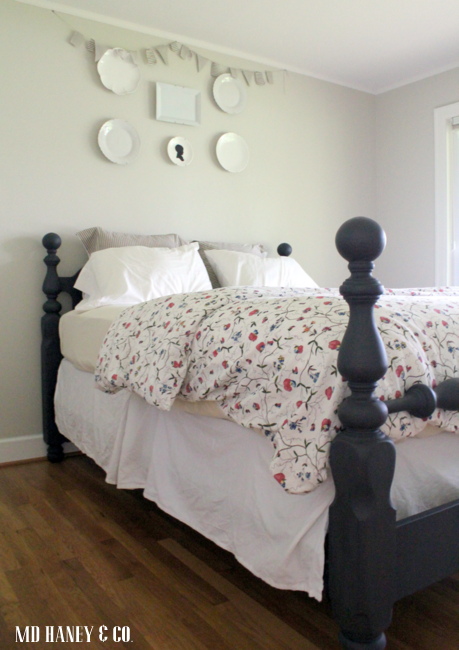
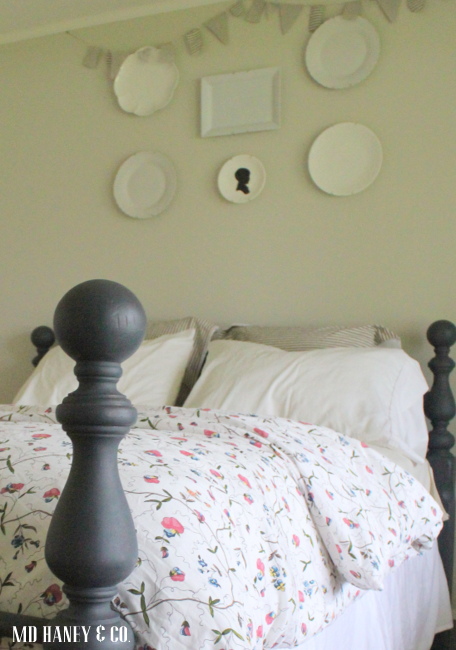
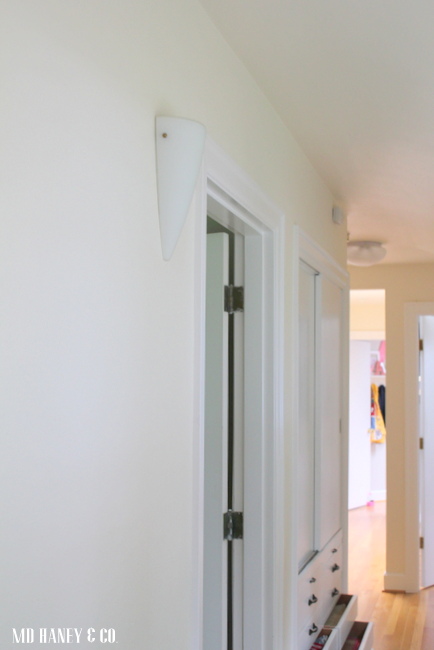
Here it is now with the new lights, painted hardware and some plates on the walls.

IMG_4128

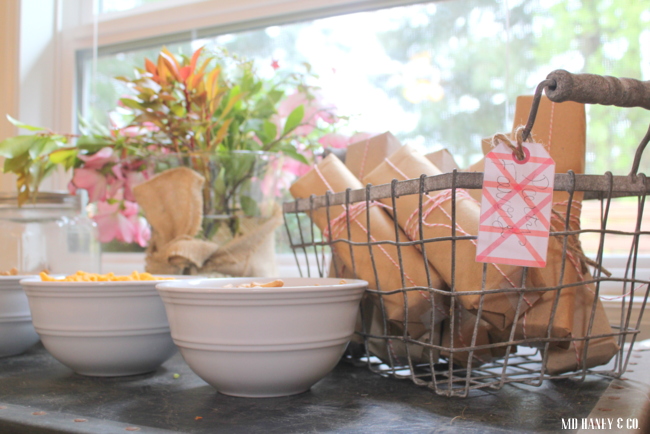
I am working on some family photos to hang on another wall in the hallway.

IMG_4137

So, as you can see, the list of projects is pretty long.  But, we love having little projects and we really love our new home!

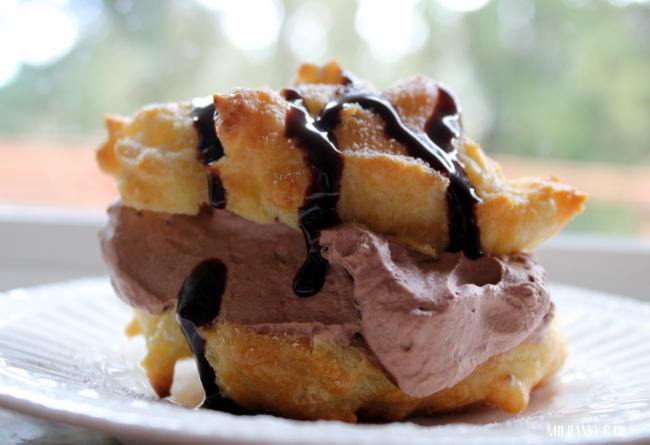
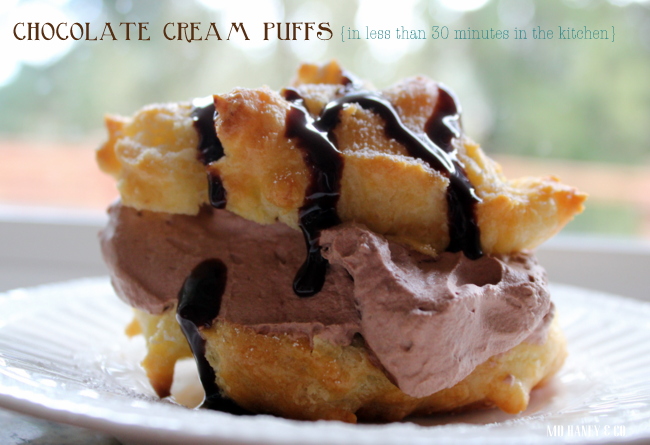
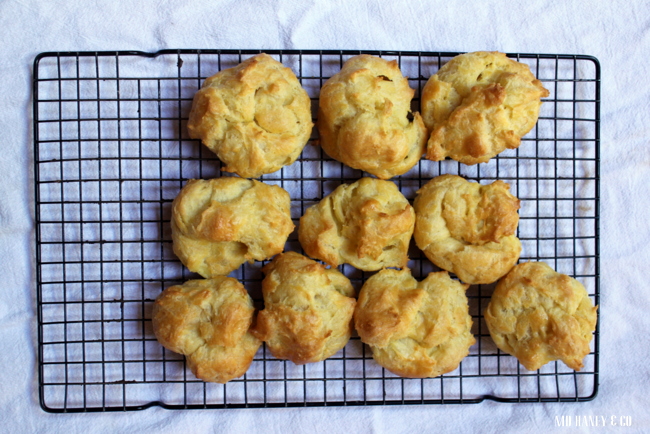
Now, to keep my sweet husband going with the list of projects seems too long, I often bake him something sweet.  A couple of weeks ago I made a batch of chocolate cream puffs.  A friend reminded me how easy {and tasty} they are, so I found an old recipe I had and give them a try.  Sure thing….they are so good!!

IMG_4121

Chocolate Cream Puffs

Ingredients

1 cup water 1/2 cup butter (one cube) 1 cup all-purpose flour 4 large eggs Bavarian pastry cream Melting chocolate

IMG_4111

Directions

  1. Mix the dough.  In a medium saucepan on medium-high heat, place one cup of water and one stick (1/2 cup) of butter.  After the butter is melted, turn off heat and add one cup all-purpose flour all at once.  Stir until the dough forms a ball and flour is absorbed.
  2. Place dough ball in your stand-type mixer with the paddle attachment and mix on low speed until the dough starts to cool, 1 to 2 minutes.  Add the eggs all at once and mix on low speed until the dough absorbs the eggs and the dough becomes very sticky. This will take about 8 to10 minutes.
  3. Bake the cream puffs.  With a large spoon or ice cream scoop (1/4 cup), spoon mounds of evenly spaced dough onto a greased cookie sheet.  Bake at 400 degrees for 20 minutes and then turn the oven down to 350 degrees for another 10 minutes. You can also use a small cookie scoop as shown in the pictures. You'll just need to lower the baking time to 15 minutes at 400 degrees and then turn down to 350 for another 7 minutes.
  4. Fill the cream puffs with Bavarian cream.  If you are using a scratch recipe, make a horizontal slit in the edge of each cream puff and slip a large spoonful of cream into each cream puff.  If you are using professional Bavarian cream, insert the tip of the plastic bag into the edge of each cream puff and squeeze.

IMG_4117

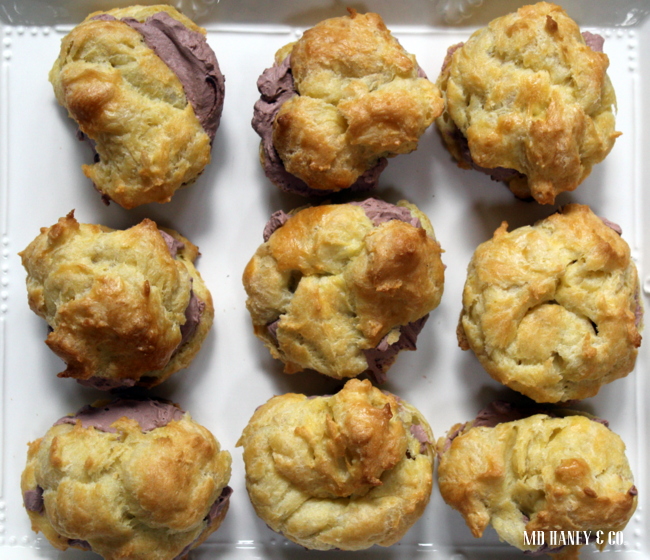
Melt the chocolate.  Melt your chocolate in the microwave for 20 seconds at a time until melted.  Do not overheat the chocolate.  You can either dip the tops of the cream puffs into the chocolate or spoon chocolate over the cream puffs.  Let the chocolate set before serving.

Enjoy!

IMG_4121

REFRESHING A VINTAGE OAK CABINET || an afternoon project

Whenever I have a few minutes of free time {girls are playing together and keeping each other happy, so not truly free time ;-} I sneak away to work in Matt's office.

A few days ago, I purchased this great old oak cabinet from a friend.

IMG_4105

She had texted me a photo of it.  I knew it would be perfect for Matt's office!  I wanted something that didn't necessarily need to function, was darker and masculine, and was at a decent price point, this fit the bill!

Hemp-Oil-534x800-534x800

I wiped the entire thing {inside and out} down with a vinegar + water solution.  There were spider webs, a little mold, the usual things you find in  "old, funky furniture".  Once it was clean, I wiped it down with MMS Hemp Oil.

Hemp Oil is so simple to use.  Just pour some onto a clean cotton cloth and rub it onto the piece.   Just wipe it on and, since it’s all natural, it doesn’t have a strong smell.

Hemp Oil takes about 30 days to fully cure.  You can still use the piece during that time, but it might feel a little oily to the touch.

IMG_4102

The top of the piece was in bad shape.  I painted it with Chalk Paint® {GRAPHITE}.  Once the paint was dry, I added a coat of clear wax and buffed it out.  I wanted the top to look a bit more aged, so I added a coat of dark wax.

IMG_4107

The top would look best if it was still the original wood.  But, it's not and I feel this in the next best thing.

IMG_4105

I have to replace a couple of the metal tabs, but other than that, it's good-to-go!

IMG_4104

Isn't it a fun piece?

IMG_4106

And the best part, it took less than 1 hour {total} and cost less than $100!

Have a great weekend!!

BBQ CHICKEN PIZZA || an easy home made dinner

IMG_4099  

I feel like I should start off with 'don't judge me by the food photos'.  I am not a professional photographer!  OK, I feel better already ;-)

I thought I would share a few of my easy dinner recipes.  Recipes that might inspire you to make home made dinner for your peeps!

I love to eat good food.  Who doesn't?  It's even better when you can make homemade meals fast, and you don't need to use a bunch of processed ingredients. We usually have home made pizza on Monday nights.  It started years ago when I wanted to make Matt 'football' food for when he watched Monday Night Football.  Now it's just part of my Monday routine, kind of like brushing my teeth!

I have used this pizza dough recipe for years.

BASIC_PIZZA_DOUGH

I make the dough while I am cleaning the breakfast dishes, really it's that easy and fast!  I let the dough rise all day and then about 45 minutes before I want dinner on the table, I start to assemble the pizza.

IMG_4101

Last night was BBQ CHICKEN PIZZA.  

Ingredients ::

BBQ sauce {I usually make my own, Ree's recipe is my favorite….it only takes a few minutes}

Olive Oil

Cooked Chicken {I like to use the rotisserie chicken from Costco}

Mushrooms

Red Onion

Mozzarella

Fresh Chives or Cilantro

Directions ::

Pre-heat oven to 425.  Spread out your pizza dough.  Spread 3-4 tablespoons of olive oil over the dough. Spread 2-3 tablespoons of BBQ sauce over the dough.

Chop your cooked chicken and mix with BBQ sauce until the chicken is evenly coated. Spread chicken over dough.

Add sliced mushrooms, sliced onions {and any other toppings that your little heart desires} and top with sliced mozzarella.

Bake at 425 for 15-20 minutes.

Top with fresh chives or cilantro….ENJOY!

THE STUIO || + a little giveaway

Have I mentioned how much I love having the design studio so close to home?  In Carlton, we lived about 3 blocks from my studio.  Not bad.  But here, it's a 10 second walk.  Awesome.

IMG_4050

We do a lot of bike riding on Fridays.  It's fun for the little miss, and we can easily greet customers when they drive up!

I thought I would show you a few photos of the updated studio space.  I still have lots of projects, but at least the space is 'presentable'!

IMG_3827

Remember the 'BEFORE'?

IMG_4057

We started with new paint on the walls and ceilings and a new {laminate} floor.

IMG_4054

The floors have a lot of variation in color which hides dust and dirt well.  And in a working studio, that is a big bonus!

IMG_4052

We switched out a few of the lights.  Matt still has to hang a little chandelier in the entry…..always projects ;-)

IMG_4024

We have a handful of cabinet doors painted in various Chalk Paint® colors.  I still need to paint 15 more doors!

IMG_4025

Not to mention I need to paint another 18 to show all of the MILK PAINT colors!

IMG_4021

I painted a few banners on the wall showing the different Chalk Paint® and MILK PAINT colors.

IMG_4026

I also have trim pieces painted with each color.  It really helps to see the paint applied in different ways.

IMG_4071

Matt was going to build shelves for the wall.  He mentioned using this old hutch top for a shelf instead!  Perfect!  I din't have a use for it, so, I painted/waxed/distressed and it saved him the time of having to build shelves.

IMG_4029

Lots of Spring colors!

IMG_4028

Do you see how dirty those daffodils are?  Do you know how to get the mud off of the petals??  Every time I try I rip the petals!

IMG_4068

And just for fun I thought I would do a little Miss Mustard Seed Milk Paint giveaway.  Trying saying that 10 times!!

IMG_4066

A bar of spearmint and green tea soap to clean your hands and brush when you are done painting.

A sample size of MUSTARD SEED and KITCHEN SCALE Milk Paint.

Fun, right?  I am limiting this giveaway to local gals.  I want to be able to drop it off and give you tips on how to use Milk Paint {if you have never used it}.  Just leave a comment on the blog telling me what you think you will paint with Milk Paint!  I will draw a winner Sunday and deliver next week.

Have a wonderful weekend!!

HOUSE PROGRESS || a quick update

Thank you for all of your sweet  comments, emails and FB messages about Monday's post.  You guys are so great.  I try to keep this space primarily about decorating/design/construction, thank you for the encouragement!

I thought I would update you on the progress of our various house projects!

In between  work {Matt has several smaller jobs going that is taking up all of his time during the day and I have a couple of ongoing design projects}, loving on my family {Savanna is almost 1!!} and just doing my best to keep our home in order, owe don't have a lot of room for working on projects.

IMG_4000

We have replaced one of the doors.  We picked a style that we thought fit the house, painted it black {Matt sprayed it with a true black, semi-gloss} and Matt hung it over the weekend.

IMG_4001

We decided to replace all of the interior doors {upstairs} and paint them black.  We both LOVE them!  You may remember this conversation we had before we moved ;-)

IMG_4008

I have started taking down the wall paper in the dining room.  By started,  I mean I have spent a total of 15 minutes.  I take what I can get!

IMG_3841

And, Matt's office….

IMG_3842

Over the weekend, he sprayed the book shelves white.

IMG_4003

Ahhhh, the power of paint!  Don't you love how it brightens the room??

IMG_4011

We also got the first coat of the wall color on.

IMG_4010

We have been working in here after the girls go to bed, so it's taking a while!  By 8pm my mind is mush and my body is tired!  I help for about 15 minutes, then go to get ready for our ice cream and tv viewing.  Sad, I know.  Matt is a rock star and has obviously been spending more time painting than I have!!

Well, that's it for now!  I am hoping to have photos of the design studio by Friday.  And possibly a little give away!!

Have a great day!!

THE HEART OF HOSPITALITY || and it's not all about me

Hospitality has been growing in my heart for the past few months.  Isn't it the ache of every human heart to be known and loved?  I get way too caught up in entertaining and 'putting on a show' {which can be a lot of fun!!} instead of focusing on sweet people around me.

Hospitality-is-not-about....1-467x700

I should be use to the fact that we always have a project going at our home.  Now that we have moved, we have a lot of projects, and no furniture.  It's the perfect storm for me!  I LOVE to create and work on projects, I can easily get lost in them and forget about people outside of my walls.

IMG_1727

It's been a about 7 weeks since we moved.  God has really placed on my heart being hospitable.  Opening our home and lives to others.  Loving on people and not being so concerned about having a perfectly cleaned or decorated home.

IMG_2139

It's hard on my pride to open up my home to people when my home is not furnished or decorated/designed how I want it to be.  Not that I have always had a perfect home, or one that was perfectly decorated.  But sometimes it's in the least expected times that I realize I am selfish and prideful.  Ugh.

IMG_2665

This weekend we had a lovely little family over for dinner.  We have only met a few times.  We really didn't know anything about them, and they didn't know anything about us, other than they are nice and have two darling little girls just a bit older {6 months} than our girls.

IMG_2914

That's what it's about.  Opening our homes when they aren't perfect, because really, when are they ever perfect?  Sharing food, and laughter, and stories.  It's about relationships.  I can get so caught up in everything else and forget to focus on the hearts of others.

375581_310921465671338_964897362_n

When our 'new friends' came over, I kept wanting to apologize.  Apologize that I didn't have furniture,  that there were toys everywhere, that I didn't have dinner perfectly displayed…..

IMG_2339

But, when we are invited to someone's home, I just love being there.  Talking.  Doing life.  I don't care about their decorations, their furniture, if the food is perfect.

IMG_1850

So, this weekend was a bit of a stretch for me.  To open our home to others who don't 'know our story'.  They don't know that we always seem to have a project, or we like to fix things up.  And I don't want my identity wrapped up in that.  I want to love on others.  I want my girls to see that first hand.  I want them to love on others and be hospitable.

As I come up with easy hospitably tips, I will be sure to share them here.  It's so much easier to have people into our homes when we don't feel like it's a big deal.  Don't you think?? If you have tips, I would love to hear them!!

SIDE TABLES || before + after

So, you may find this surprising.   I have a million little different projects going at once.  Surprising, right??  Before having little people in my home, I could finish projects in no time.  Now, I am accustomed to a little project stretching out for days.  I love this season of life, so I don't mind.  It's teaching me patience and flexibility!

IMG_3979

Since we sold most of our furniture to our home buyers, I am on the look out for little tables.  I picked up these two cuties and thought they could make great night stands.

IMG_3996

For the pine piece, I lighting sanded the bottom, cleaned it really well with vinegar + water, and then applied a coat of hemp oil.

IMG_3997

For the top, I applied 2 coats of MMS Milk Paint {color::  TROPHY}.  I lightly sanded the edges, applied clear wax, then a coat of dark wax.

IMG_3990

I am almost positive I will change it {probably sooner than later}, but for now it fits in our master bedroom perfectly.

IMG_3983

The other little table got 2 coats of Milk Paint {TROPHY} as well.

IMG_3989

I distressed it then added one coat of hemp oil.

These cute little guys work for now and things off of the ground!

Next week, I should have BEFORE + AFTER pictures of my new design studio!  Until then, have a great day and go paint!!

MATT'S HOME OFFICE || the next project

Hello!  I hope you had a fun and restful weekend!

As you may have noticed, I have been tackling the small rooms in our new home.  I feel very overwhelmed at decorating  and furnishing a 4200 s.f. home, especially when we sold 90% of our furniture to our home buyers!

I love, love, love creating and decorating.  But, with little ones, the time I can spend on my own home is so limited…..so, the little rooms are providing me instant gratification ;-)

The next 'little room' on the list is Matt's office.

IMG_3978

It's a darling little room right off of the living room.

It's got it's own entrance, a closet and a fireplace.  It's lacking good lighting, but that's a project for down the road.  Until then, I will add lighting with table lamps and a floor lamp.

51ba70e891f6caf33b45eb99c6dd057a

This is one of my inspiration photos.  I want this room to feel masculine, but still flow with the rest of our home.

56bd88e2368204ada6c5c3181b99a882

Beautiful tufted leather furniture is not in the budget for the office.  But paint and accessories are!  Matt's really pushing for the bear skin…..

IMG_3978

We are going to paint the wood shelves white.  See those two little patches of drywall under the windows?  We are going to paint those white too, then the entire wall will look built in.  The walls will be a dark, rich blue, I will post the name of the color when I show 'AFTER' photos.

IMG_3977

We are replacing the interior doors with a 3 panel door that will be painted black.  Very masculine….right?!?  Matt is going to build a desk.  We can't seem to agree on what desk will fit, so, he decided to build his own….

8130V499S

I think I am going to get this floor lamp.  Remember when I said I felt overwhelmed at needing to furnish and decorate our new home?  Well, on the flip side, it's really fun to get to buy new items and find used treasures to re-purpose.  If we hadn't sold our furniture, I would be working with what we had.  So I guess it's a blessing {in disguise}.

The new hall lights arrived Friday, I can't wait to show you what we are doing in the hallway!

Until then, I am off to go paint night stands I bought for our bedroom.  I have about 30 minutes left in Savanna's nap time, so I bet get moving ;-)

{savory} CHEDDAR & DILL SCONES || a recipe

I just thought I would pop in to share this easy and delicious savory scone recipe!  I love it when a food can serve two purposes.  You too??  These scones were perfect with our beef stew last night, and then equally perfect with our bacon and eggs this morning!

IMG_3950

Ingredients 4 cups plus 1 tablespoon all-purpose flour, divided 2 tablespoons baking powder 2 teaspoons salt 3/4 pound cold unsalted butter, diced 4 extra-large eggs, beaten lightly 1 cup cold heavy cream 1/2 pound extra-sharp yellow Cheddar, small-diced 1 cup minced fresh dill 1 egg beaten with 1 tablespoon water or milk, for egg wash Directions Preheat the oven to 400 degrees F.

Combine 4 cups of flour, the baking powder, and salt in the bowl of an electric mixer fitted with a paddle attachment. Add the butter and mix on low speed until the butter is in pea-sized pieces. Mix the eggs and heavy cream and quickly add them to the flour-and-butter mixture. Combine until just blended. Toss together the Cheddar, dill, and 1 tablespoon of flour and add them to the dough. Mix until they are almost incorporated.

Dump the dough onto a well-floured surface and knead it for 1 minute, until the Cheddar and dill are well distributed. Roll the dough 3/4-inch thick. Cut into 4-inch squares and then in half diagonally to make triangles. Brush the tops with egg wash. Bake on a baking sheet lined with parchment paper for 20 to 25 minutes, until the outside is crusty and the inside is fully bake.

This recipe is one of Ina's recipes.  She is one of my favorite cooks!  Her recipes are so approachable….and so good!

IMG_3956

In other news, I took some pictures of the guest room progress.  But, it's too rainy and gray outside, my pictures just didn't turn out well.  When the sun shines again I will show the progress of the guest room!

Next on my list…..ordering a sofa, and furnishing Matt's office!  Fun!!

MARCH GIVE AWAY || a little taste of spring

Hello friends,

March seemed to sneak up on me!  I turn around and it's March 3rd!  Are you ready for a giveaway?  A little Spring treat??

IMG_3941

This month's giveaway includes ::

~ a cute little cake stand and glass dome.  Perfect for cookies, a giant cupcake or even a little plant.

IMG_3944

~5 green chevron bags from my shop.  Perfect for little goodies.

Candle-CUPCAKE-200

~ a package of 6" tall green celebration candles from my shop.  These are darling on cakes and cupcakes!!

IMG_3945

~ 1/2 dozen freshly baked peanut butter cookies.

To enter to win~

1. Like MD HANEY & CO. on Facebook {if you don't already ;-} and tell me your favorite Spring time sweet treat.

2. Leave a comment on the blog telling me your favorite Spring time flower.

A name will be drawn on March 31st and the basket will be delivered or mailed shortly after!

Good luck!!

A QUICK BED TRANSFORMATION || and my baby turns 3

Good morning friends!!

I thought I would show you a quick furniture 'BEFORE + AFTER'.  And a testament to how easy Chalk Paint® is to work with!!

2014-02-112

A friend was re-decorating her guest bedroom and asked if we wanted the Queen bed.  Of course I said yes!

IMG_3879

I loved the lines of it.  We wanted a Queen bed for the guest bedroom….it was just made to be :-)

IMG_3880

I painted it GRAPHITE.  I didn't sand or prime.  Just wiped it down with a clean cloth and started to paint.  It took two coats to get a really nice finish. I applied 1 coat of CLEAR WAX and it was ready to be set up in the guest bedroom the same day I painted.  Talk about instant gratification!

IMG_3933

The guest room isn't finished/decorated, but I wanted to show you how the bed turned out.

IMG_3936

I am addicted to this paint.  It makes painting so enjoyable and rewarding!

IMG_3935

Now I need to find a table and lamp.  I am thinking a red table could look really darling in this room…..don't you think?!?

IMG_3924

And, I thought I had some great pictures of my birthday girl.  Turns out, just a lot of videos and phone pictures.  This is a photo of when she crawled out of bed….her room was full of balloons when she woke up.  I got that idea from a friend {fill the bedroom with balloons while they sleep} and she was so excited when she woke up!

We spoiled her with lots of sugar, a new bike, and a trip to see her first movie at the theater.  Did anybody else cry like a baby at the FROZEN movie?  Oh I was a mess!  I think I can thank motherhood for that!

OK, off to {hopefully} finish up my chores at the vacation rental for the week!!

THE NURSERY || savanna's room

Hello and happy Monday!

I finished decorating my sweet baby's room last week.  She just turned 10 months, so before long, we will be re-decorating for a big girl room.

Where does time go? Seriously!  We celebrated Addilyn's {and mine, well, not my 3rd, just my birthday ;-} 3rd birthday yesterday!  3 years old!  I will post pictures later this week.  Until then, here are some photos of Savanna's room….

IMG_3844

Her room when we moved in….

IMG_3909

and her room now.  One of the many great things about our new home, is the abundance of natural light!  There is really no need for lights during the day, even our dark-gray-Pacific NW days.

I painted the crib 'VERSAILLES' {Chalk Paint®}.  It took two coats.  I lightly sanded the edges and waxed it with a clear wax.

IMG_3910

As you already know from here, I painted a chalk board wall in her room.  I love chalk board paint! I love the way that it looks, and it serves a practical purpose.

IMG_3916

All of the bedrooms in our new home were already painted this wonderful soft gray.  It's light but softens the room.  It's the perfect backdrop for bright colors!

IMG_3914

Matt made this shelf years ago when we were first married.  I painted it 'CHATEAU GREY', lightly sanded the edges and waxed with a clear wax.  I added a few treasures I had lying around the house.

IMG_3919

Matt's mom gave me this dresser a few years ago. I sanded it down and painted it with milk paint.  Last week I added some fun and colorful knobs {from our shop} and it adds a touch of whimsy.

IMG_3921

And finally, a little wall with hanging plates.  I love adding plates and dishes to walls!  It can be an inexpensive way to decorate walls, and it's a lot of fun.

Well, there you have her little room.

I will check in later this week with pictures of the birthday girl!

Now I am off to take a birthday girl to the doctor for her annual check up, and then meet up with some old friends.  We will be planning the food and decorating for a dear friend's funeral this week.  She passed away unexpectedly, last Thursday.  We know she is in heaven, but if you think of it, please say a prayer for her grieving family….

PROGRESS ON THE VACATION RENTAL || and a handful of bookings

IMG_2919.jpg

I have been slowly working on turning the cottage back into a vacation rental.  A hour here, 20 minutes there, my girls are good sports as I try to make adventures out of making a bed and sweeping floors!

I finally photographed the downstairs bathroom.

IMG_3888

It's a small bathroom with marble floor, pedestal sink and claw foot tub.

232323232fp53269>nu=3247>259>6;7>WSNRCG=34-7536567327nu0mrj

I can't seem to find a 'BEFORE' photo, but this is the 'BEFORE' photo of the hallway and living room leading to the bathroom door….so you get an idea!

IMG_3889

We went back and forth on building a beautiful tile shower, complete with large glass door.  In the end, it came down to budget and time.  We opted for a reproduction claw foot tub/shower.  It fits the space perfectly and adds instant charm!

IMG_3892

The downstairs bathroom was the last room to be remodeled in our little 1938 cottage.  We actually remodeled it after we moved out!

IMG_3907

Matt also built a twin bed for the upstairs office.  The cottage can now sleep 5.  Usually the 5th person is a kid, college student or someone who just needs a bed for one night.

IMG_3904

It's nothing fancy, but for a vacation rental, a much better use of the space than a desktop and cabinetry.

04-attic-remodel

This is how it looked when it functioned as our office.

02-attic-remodel

A darling office….right?!?

I will post an entire tour of the vacation rental.  Hopefully by next week I will have it cleaned, furnished and photographed!

The phone calls and summer bookings are already starting, the summer craziness is officially beginning!

Do you like to stay in vacation rentals when you travel??

PAINTING WITH CHALKBOARD PAINT || an addiction

Hello!  I hope you had a wonderful and restful weekend!!

I get a lot of emails and questions about painting with ChalkBoard Paint.  {Not to be confused with Chalk Paint}.  ChalkBoard Paint is the paint that turns almost anything into a chalk board.  It can be purchased at almost any hardware or big box store.  I always have a quart {or two or three} hanging around!  Chalk boards are so fun! I love that they can turn anything ordinary, into something fun and unique.

Collages2

You have probably noticed I have a lot of chalk boards around my house….I guess it's my 'old house' now. ;-)

IMG_3138

And chalk board walls {my old office}….

IMG_3139

I love the look, and they are really fun for kids!

IMG_2912

I have quite a few tucked in here and there at the shop too!

Here are a few tips and tricks I have learned from painting with ChalkBoard Paint…..

IMG_3893

~ Cut in along walls and base, just like any other latex paint.  The consistency is a bit thicker than most latex, but treat it just like you are painting a wall or piece of furniture with a latex paint.

IMG_3898

~ Always apply 2 coats, and be sure to wait 24 hours between coats, and then another 24 hours before priming the surface with chalk.

IMG_3897

~ Most importantly, always 'prime' the painted surface.  By priming, I mean run chalk vertically and horizontally across the entire surface.  Then wipe it clean with a damp cloth.  If you don't prime your newly painted wall or furniture piece, your chalk writing will be etched into your new chalk board.  After it's been primed, you can write and draw to your heart's desire, then easily erase.  Make sure to prime, I learned this the hard way!!

IMG_3899

I know chalk boards may just be a trend, but I have loved them for years and imagine I will love them for years to come!