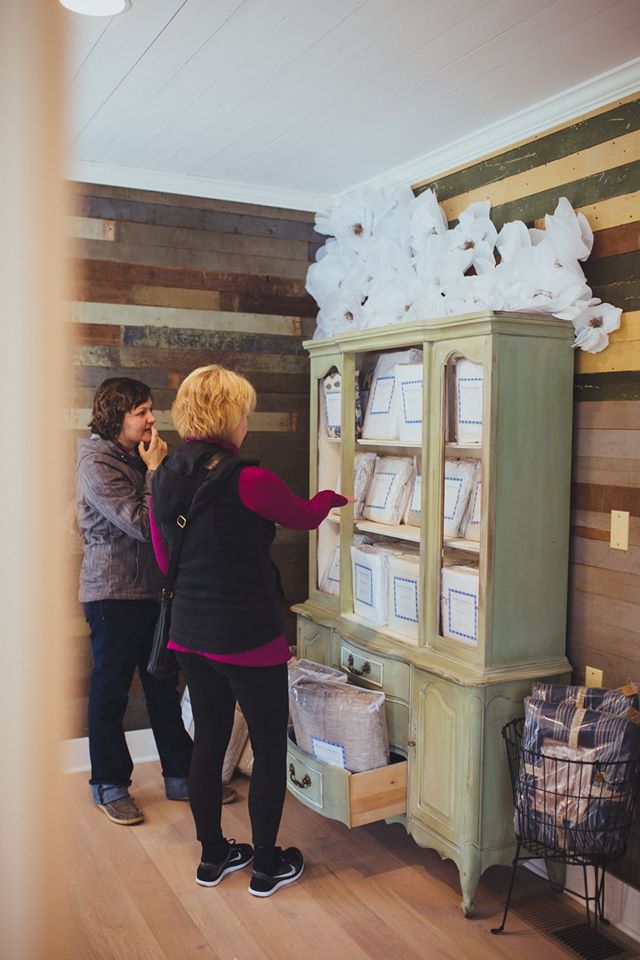
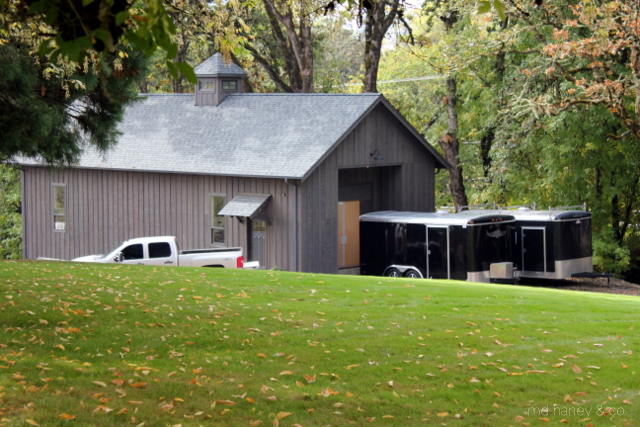
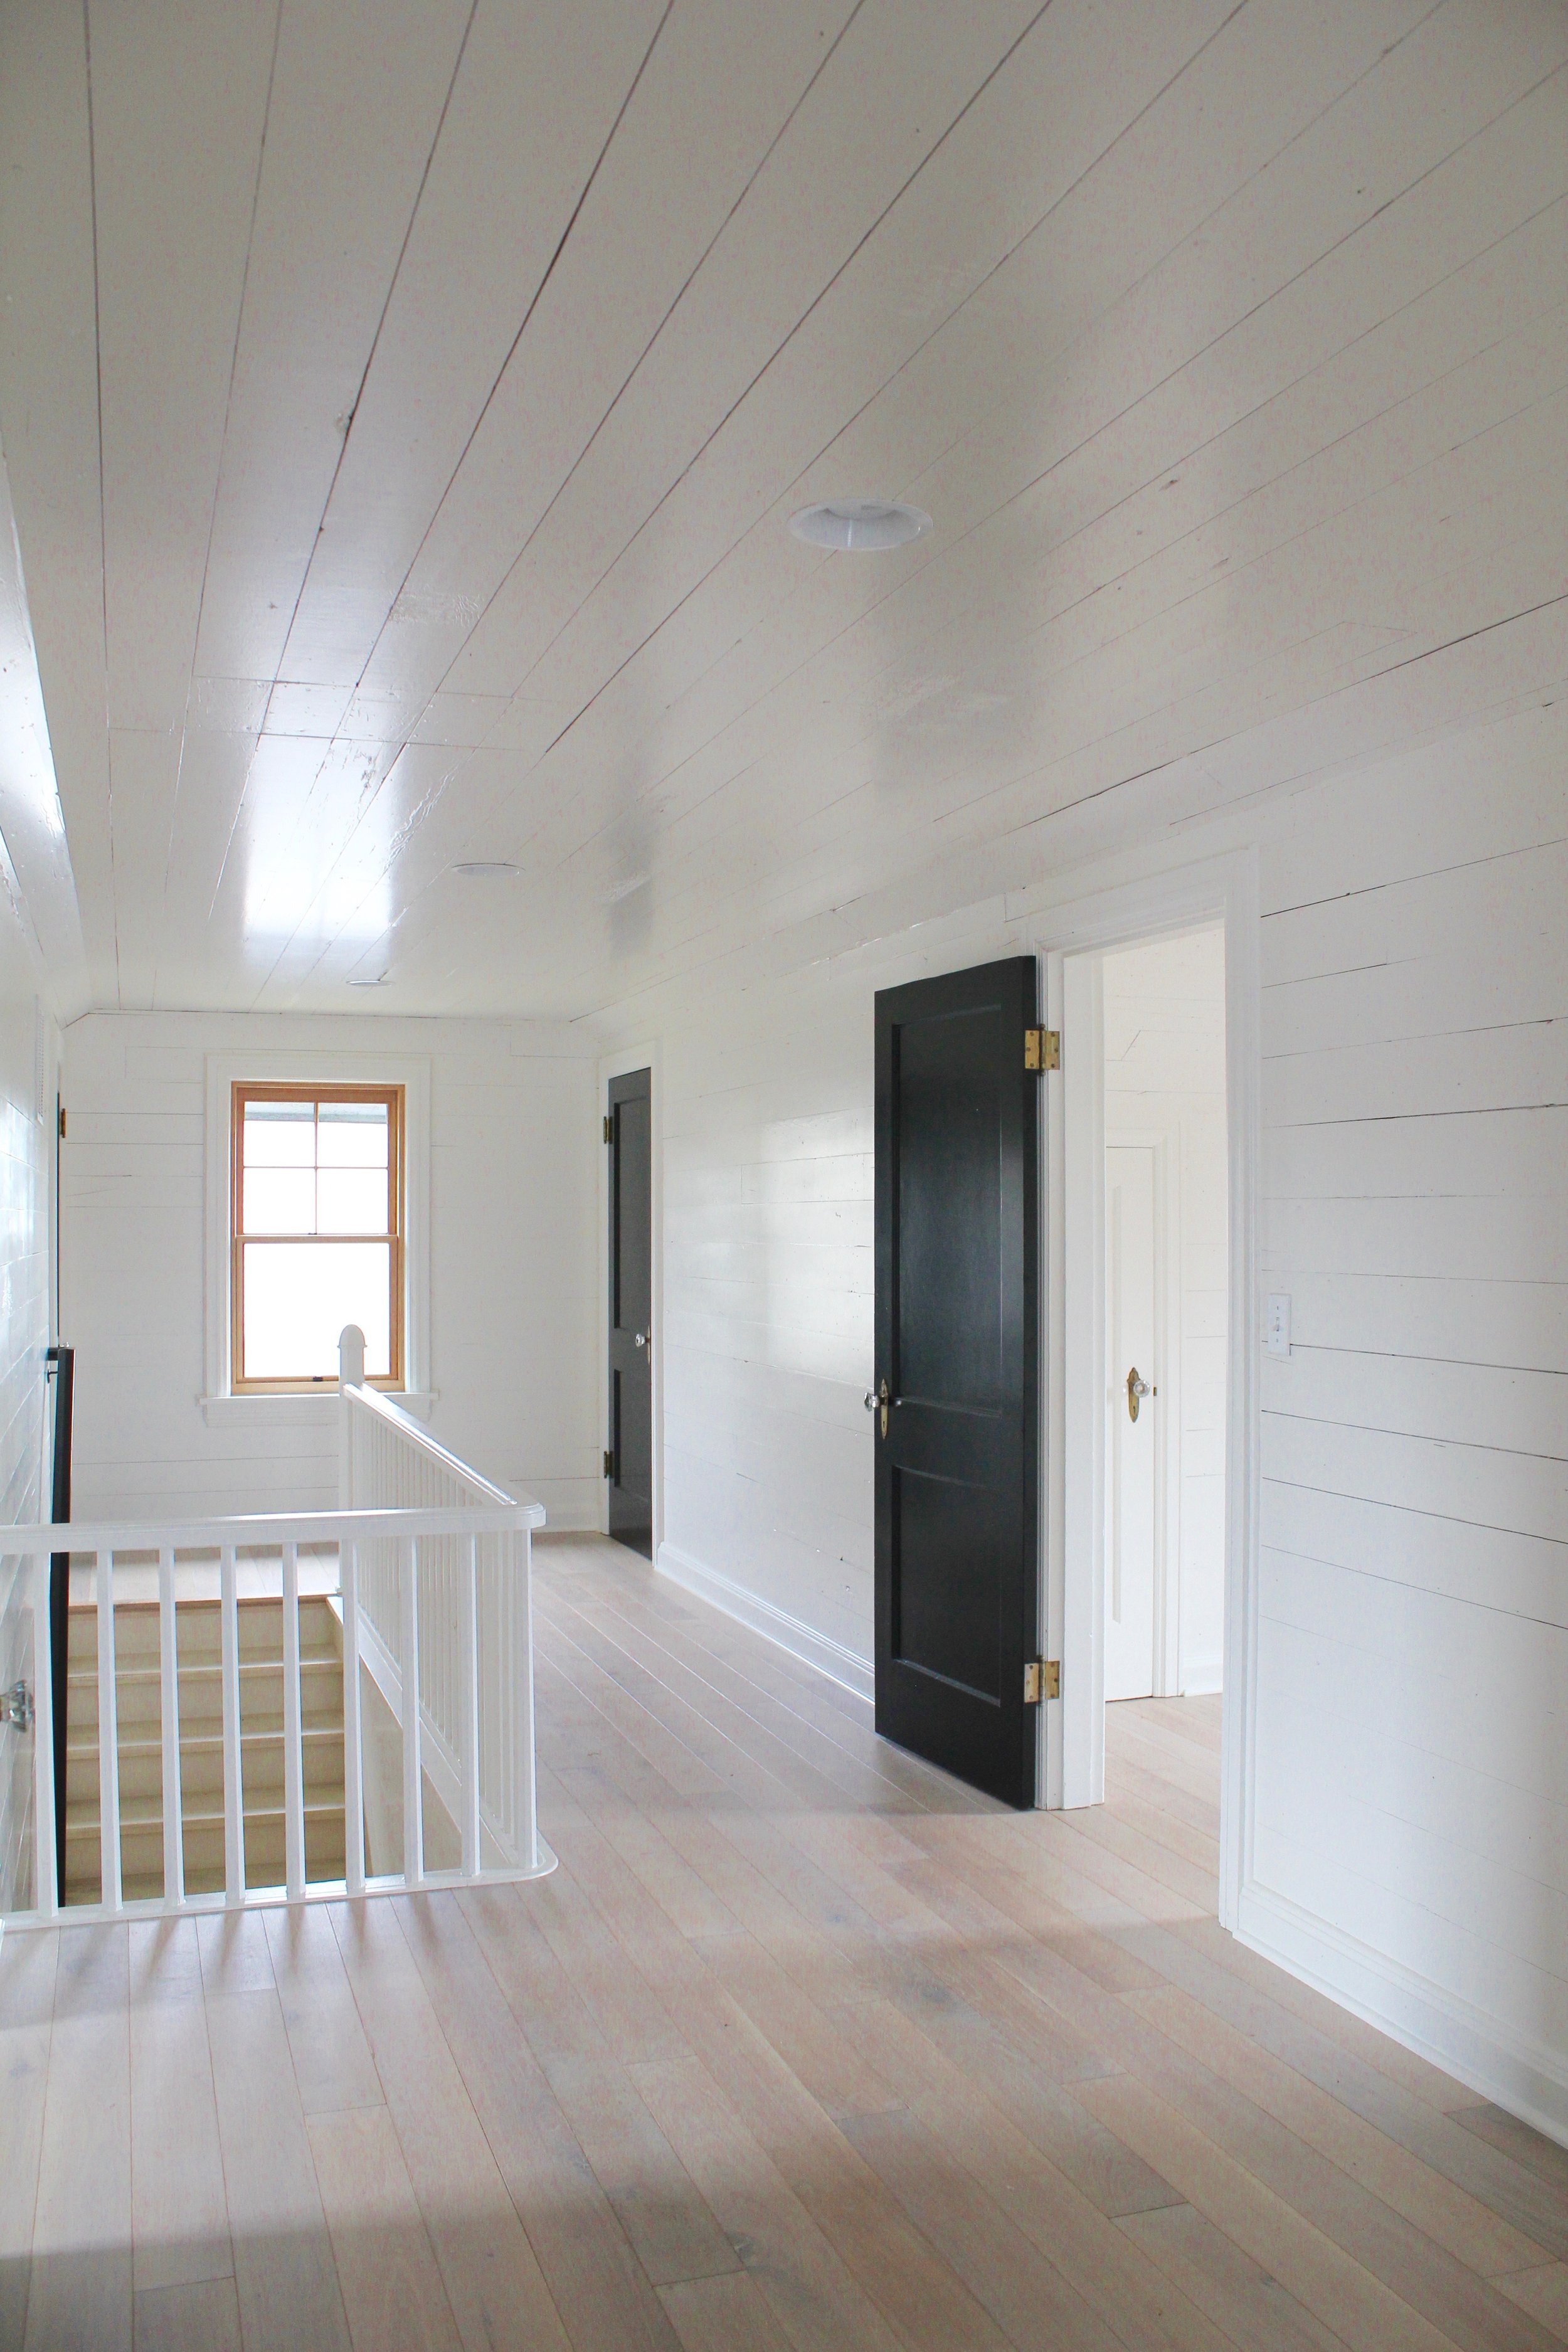
before + after || upstairs offices and workshop area at the shop

Last week Matt finished the upstairs office + workshop space!

We bought this old house turned retail building just over a year ago.  We wanted to have the upstairs finished before our grand opening (March 27th, 2016) but we just ran out of time....and money was running out too!  I am so glad we waited!  After being at the shop, we figured exactly how we would use the space, and that is different from how we originally thought we would use the space!

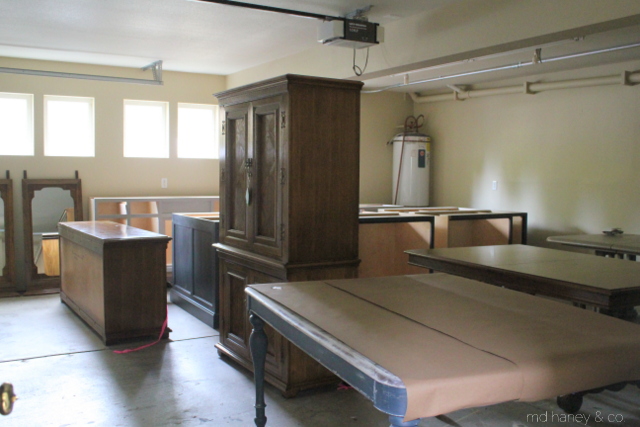
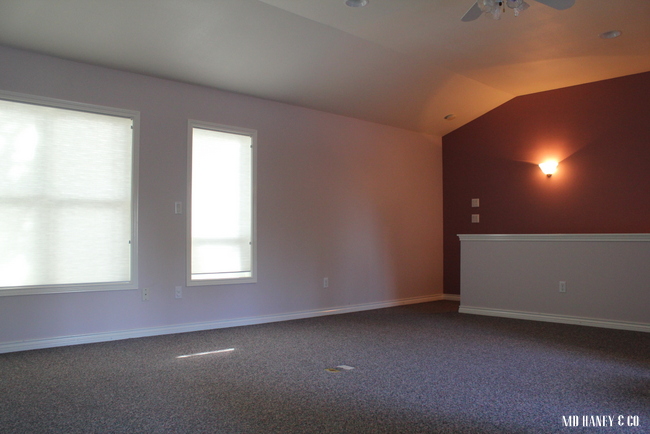
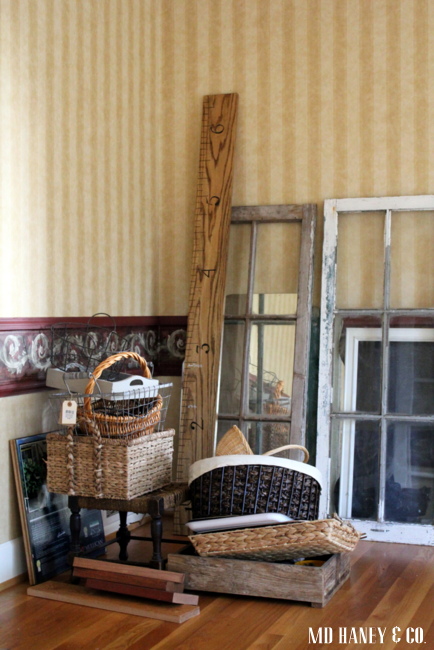
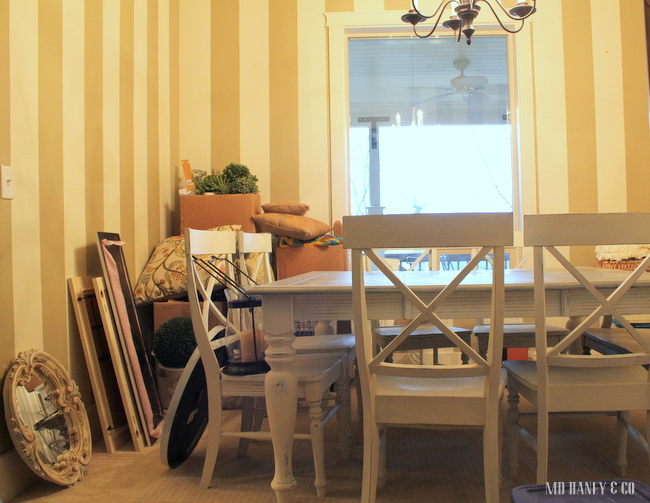
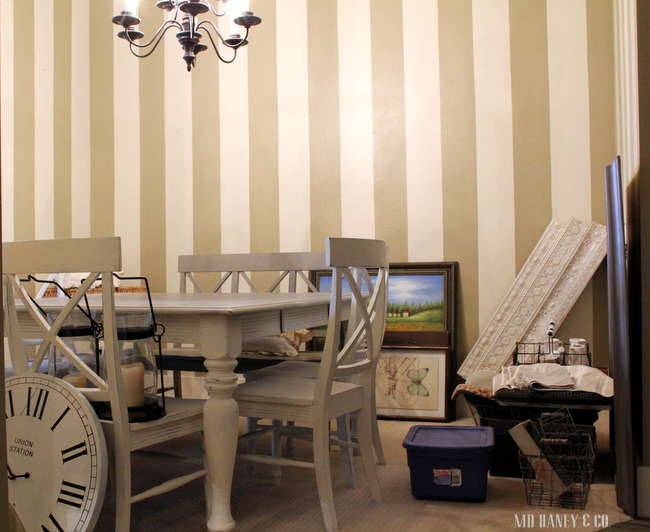
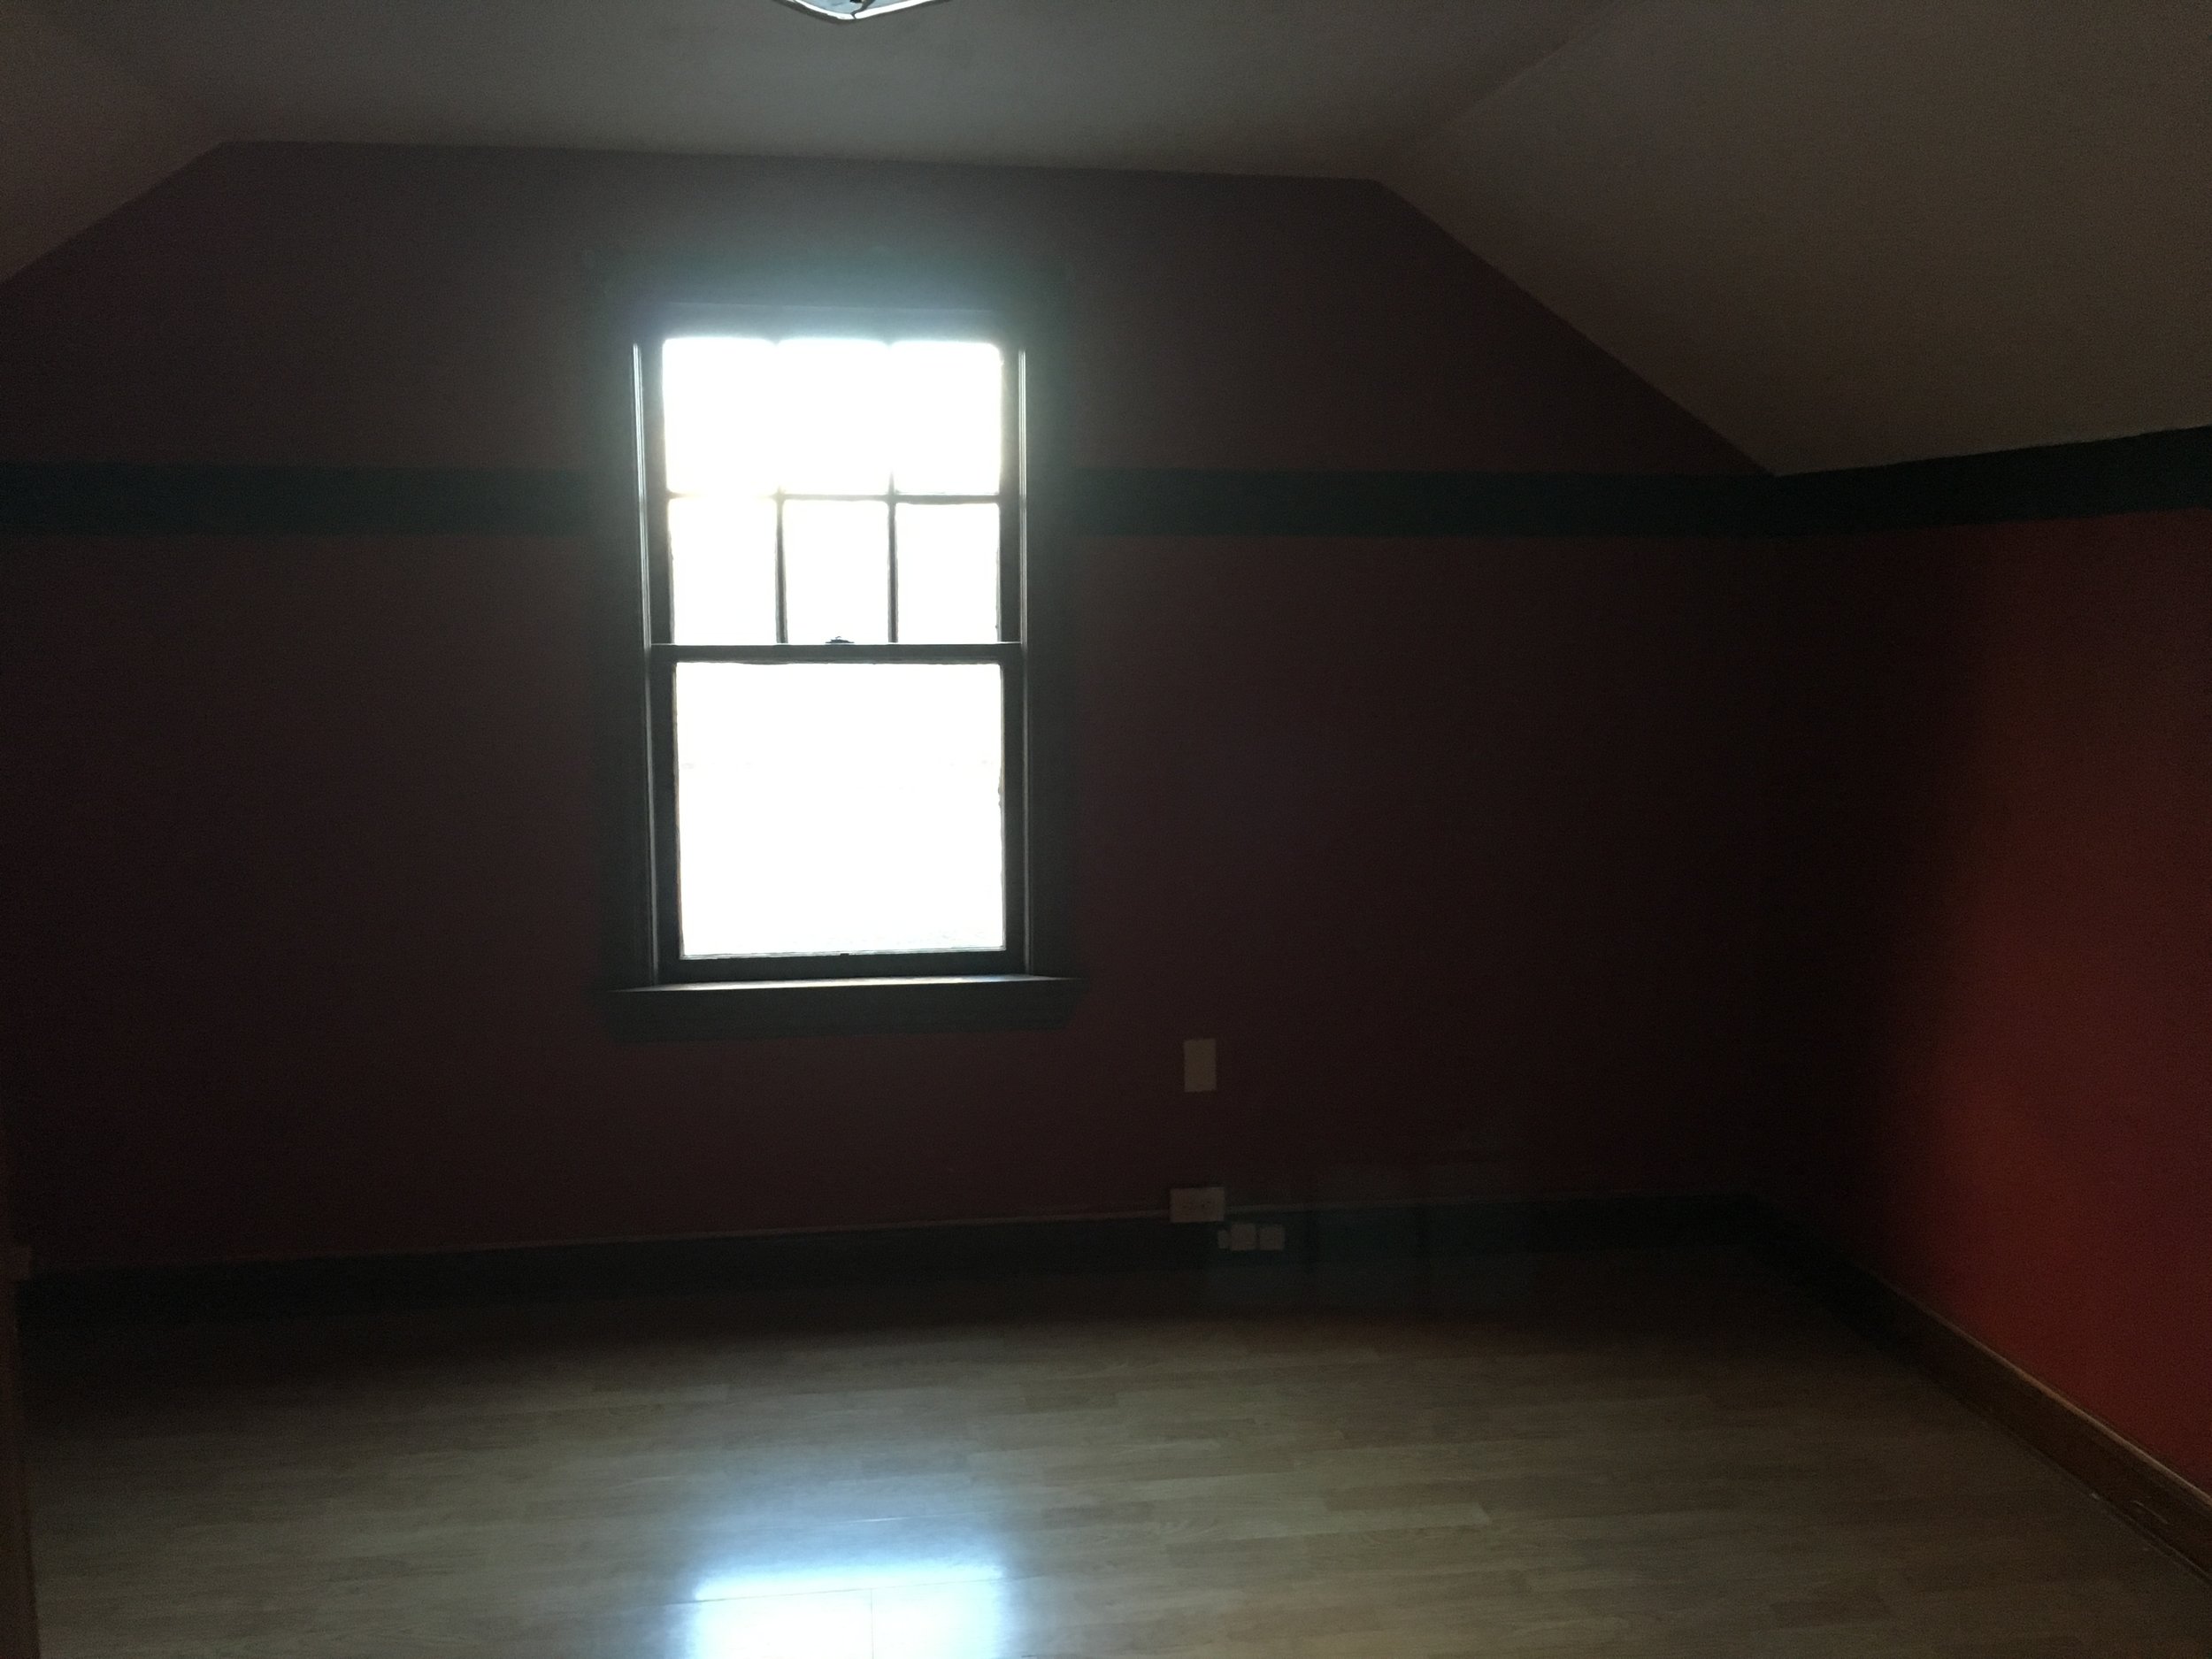
Here are some BEFORE pictures....the upstairs space was originally 3 bedrooms.  It had three layers of wallpaper, over drywall.  The floors were yucky, the windows were rotting, the lighting was bad, and it was hot in the summer and cold in the winter.

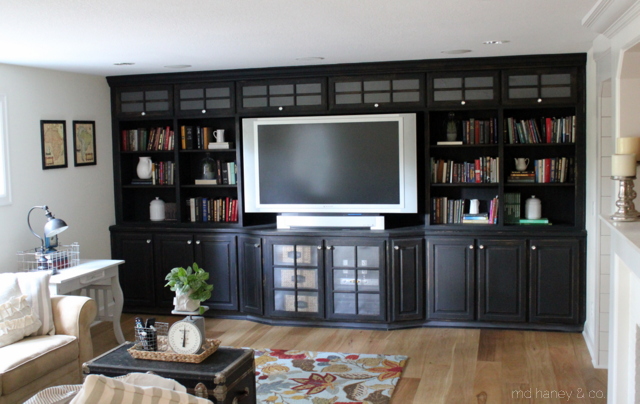
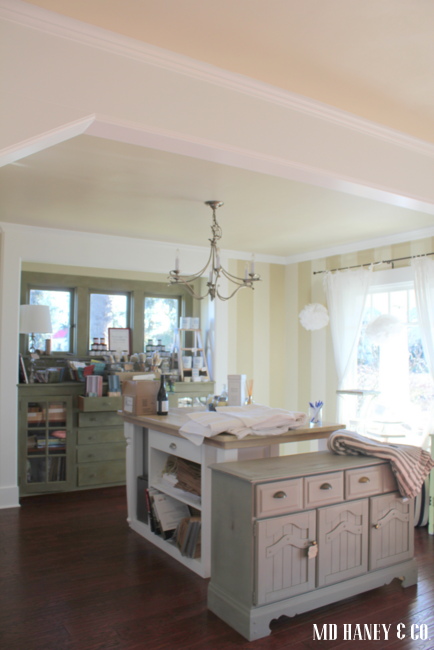
We removed all of the wallpaper and drywall.  Under all of those layers, we found shiplap!  We sanded it and sprayed it white.  Matt spent a lot of time sanding and spraying those walls...they really look amazing!

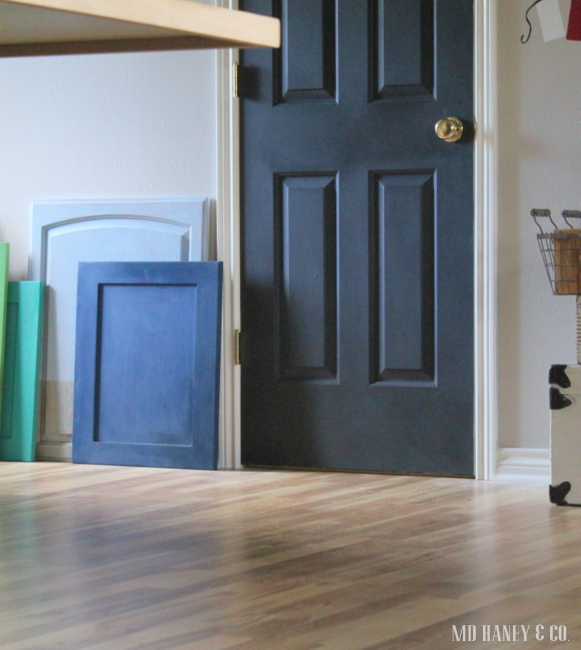
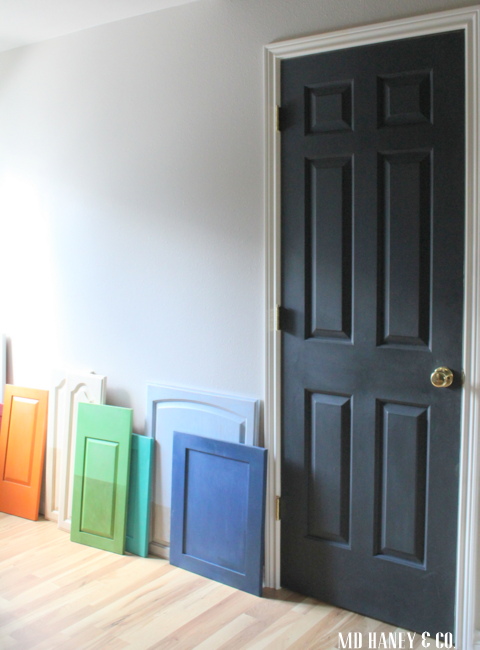
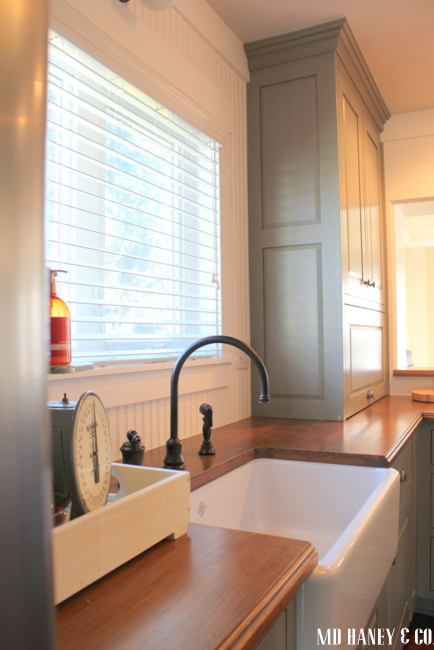
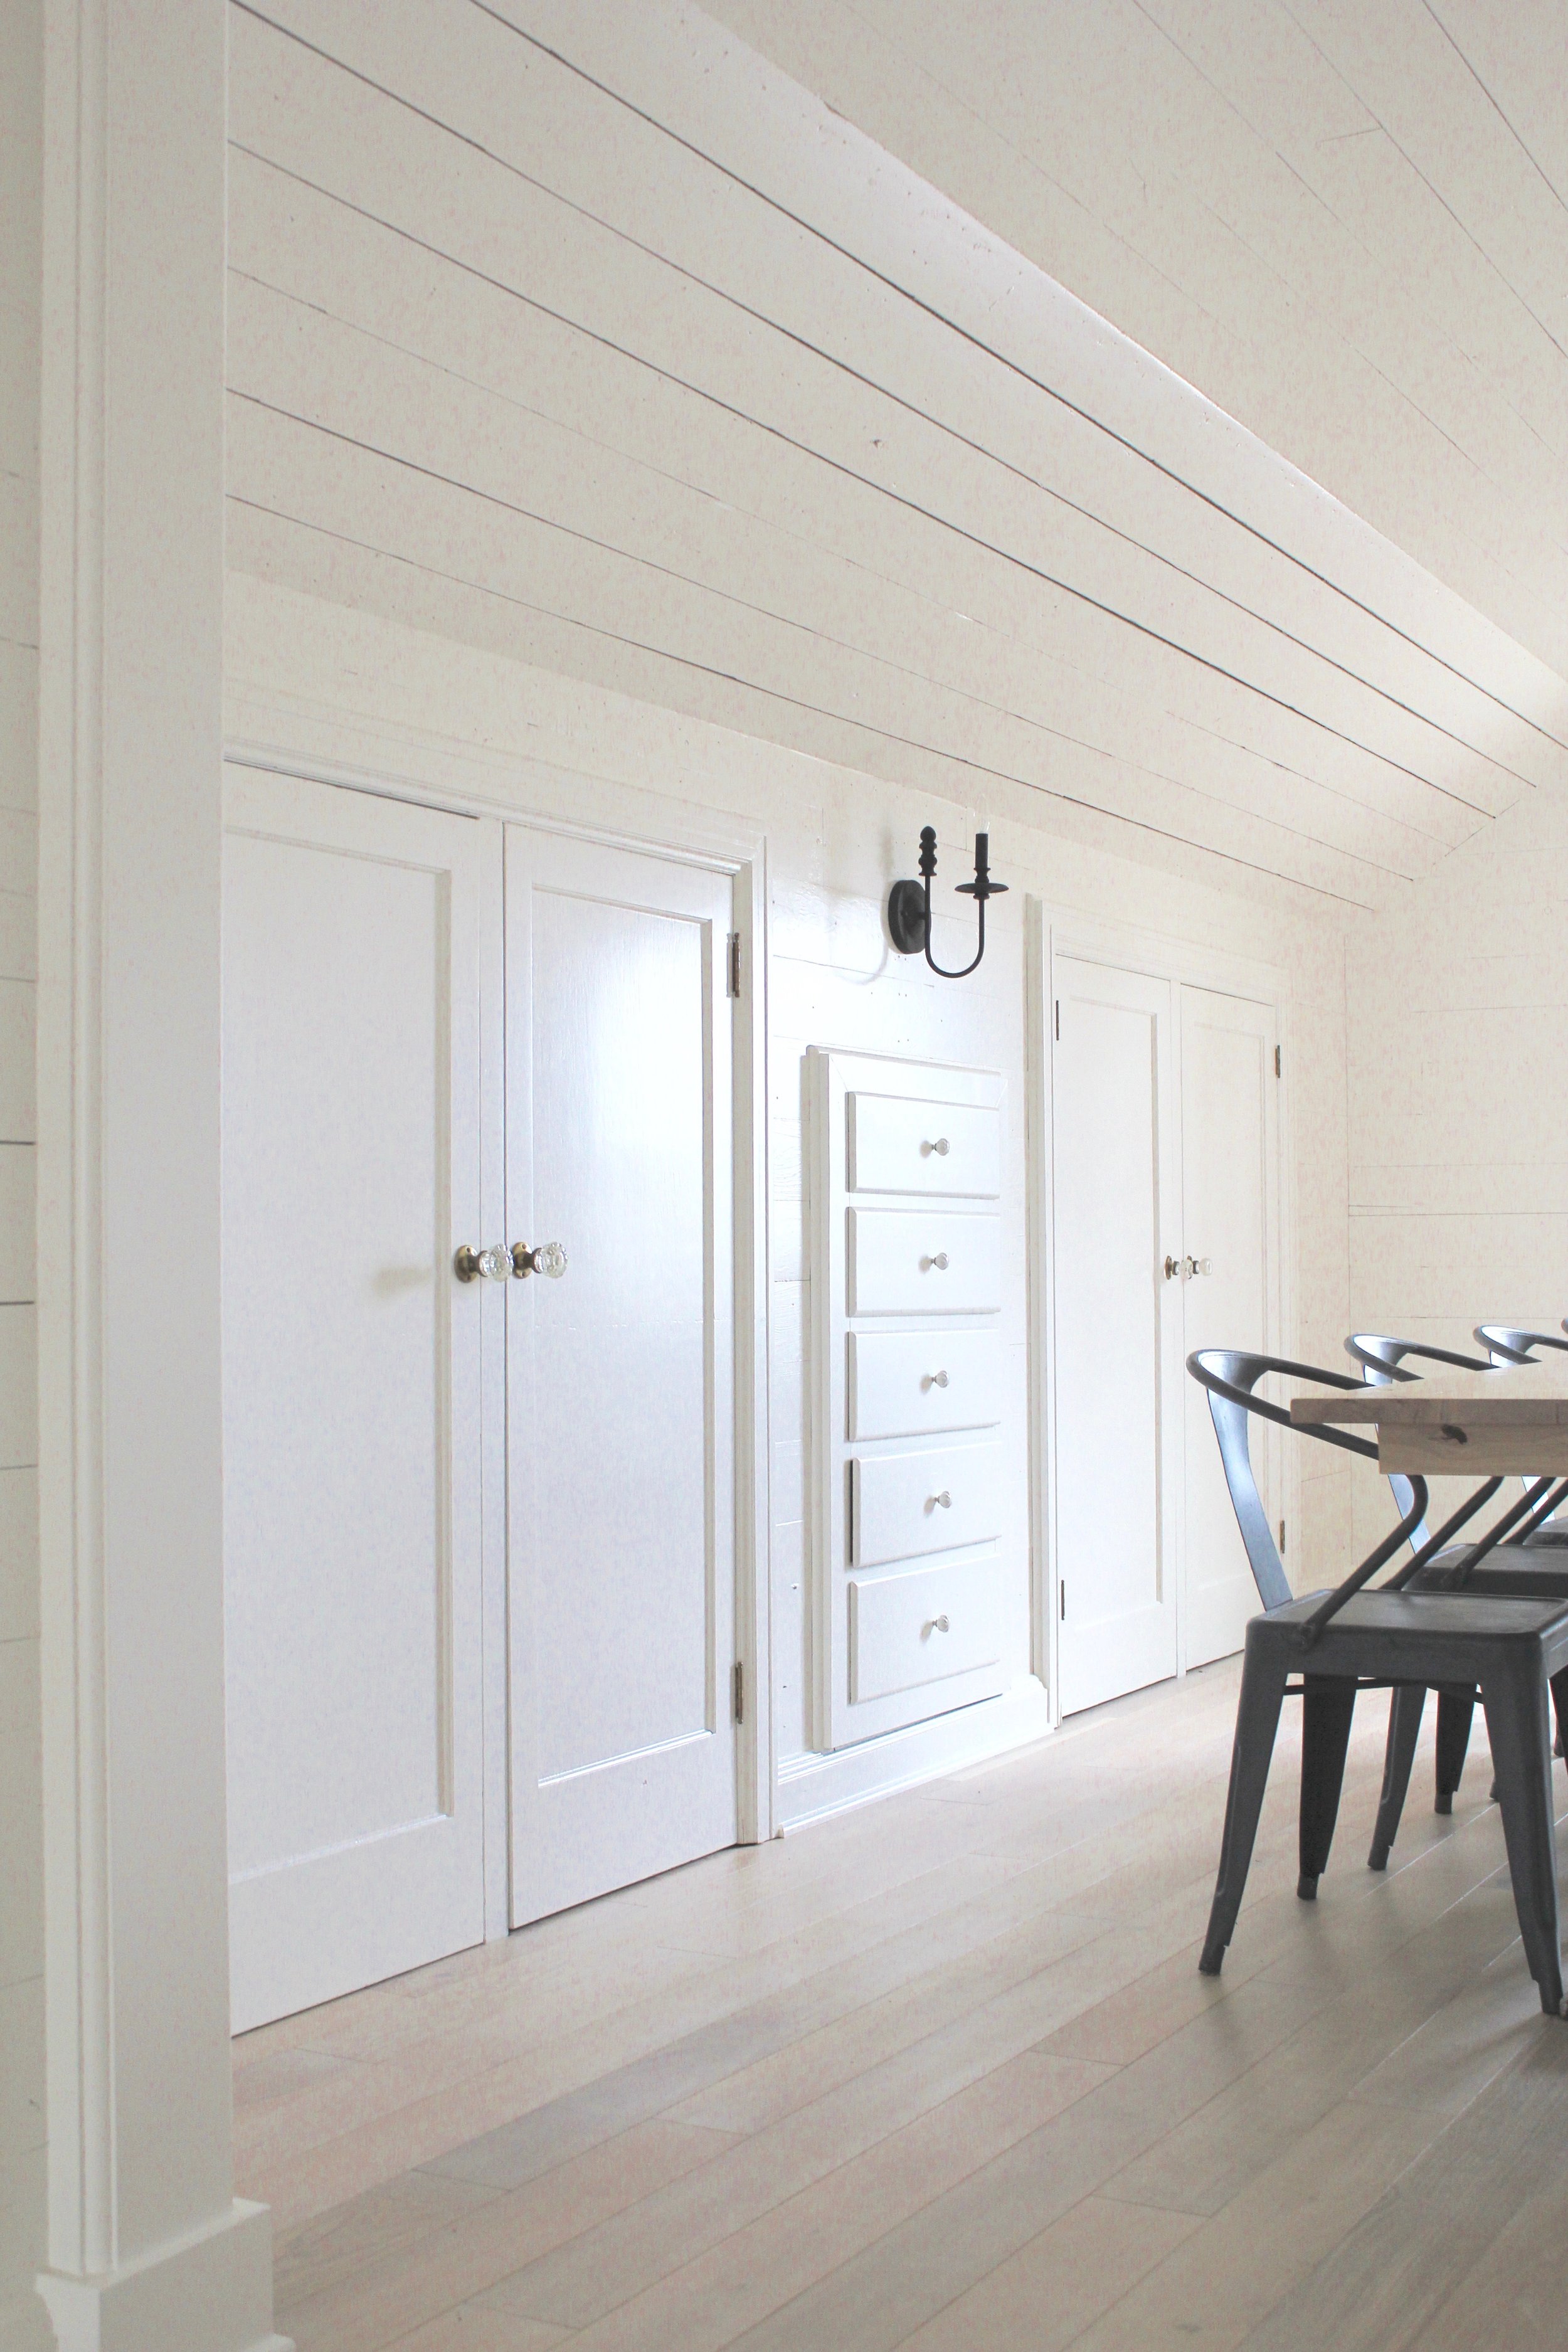
We sprayed all of the doors with a pure black satin paint.  
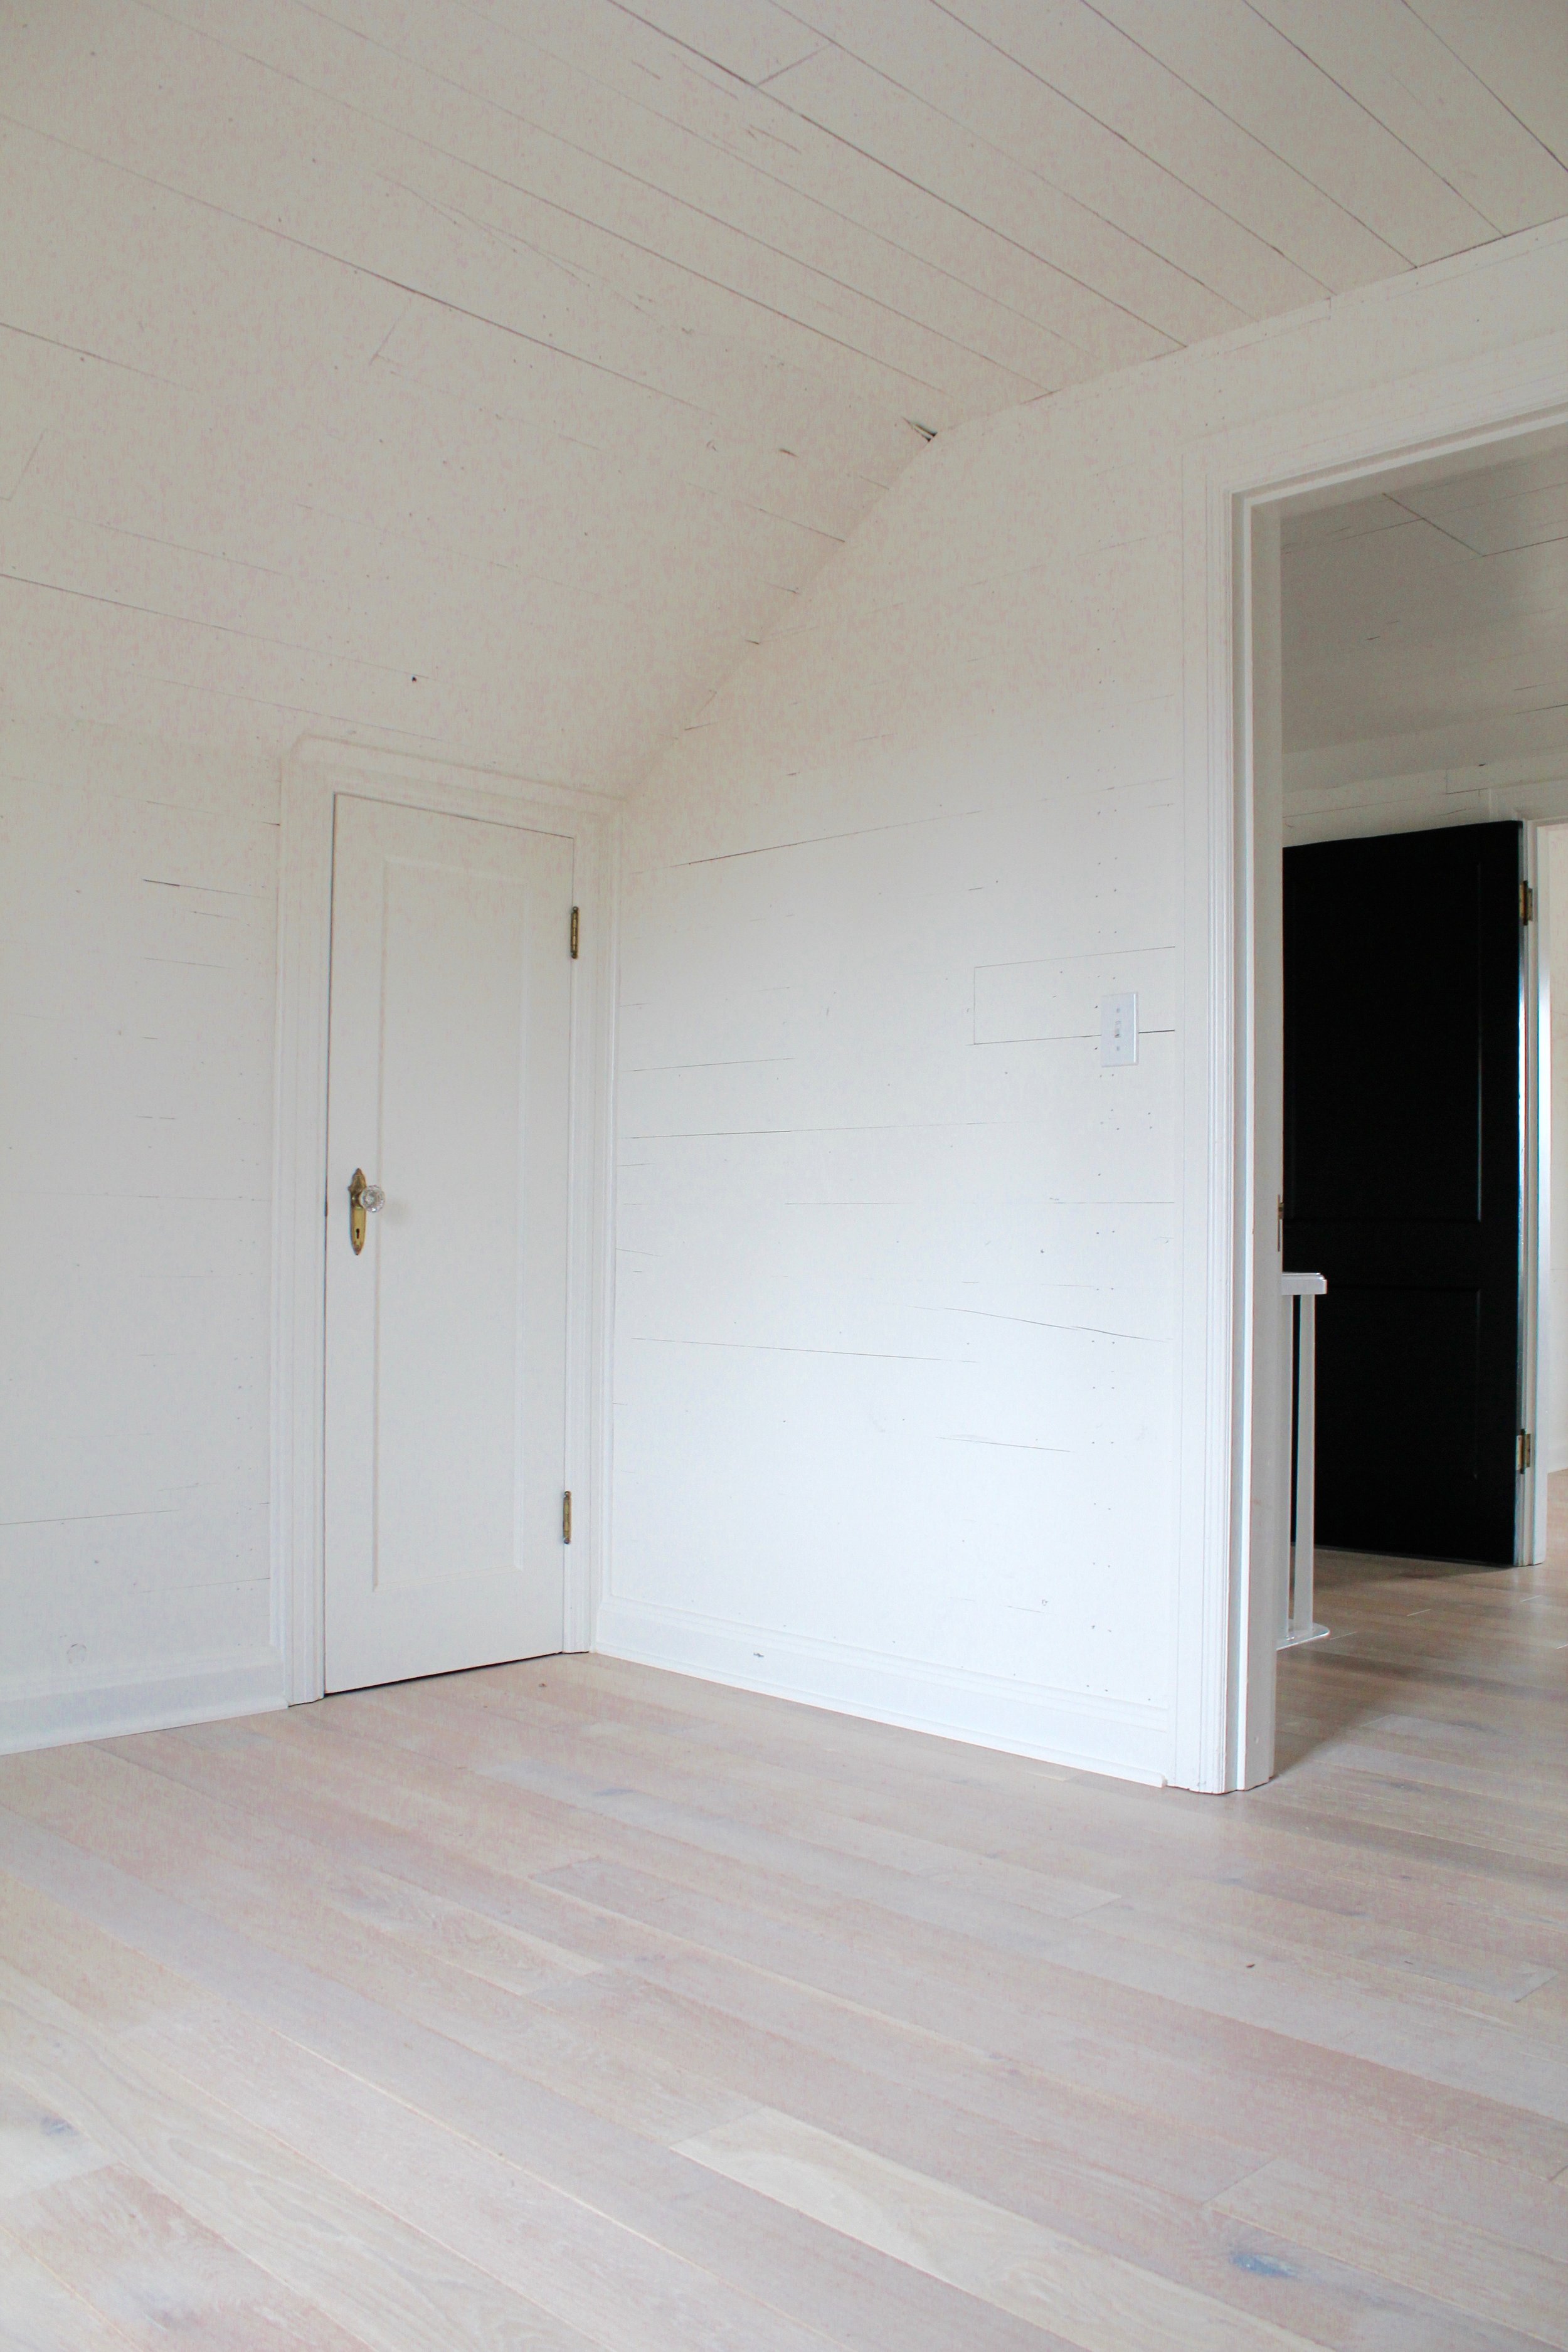
The doors and hardware are original!

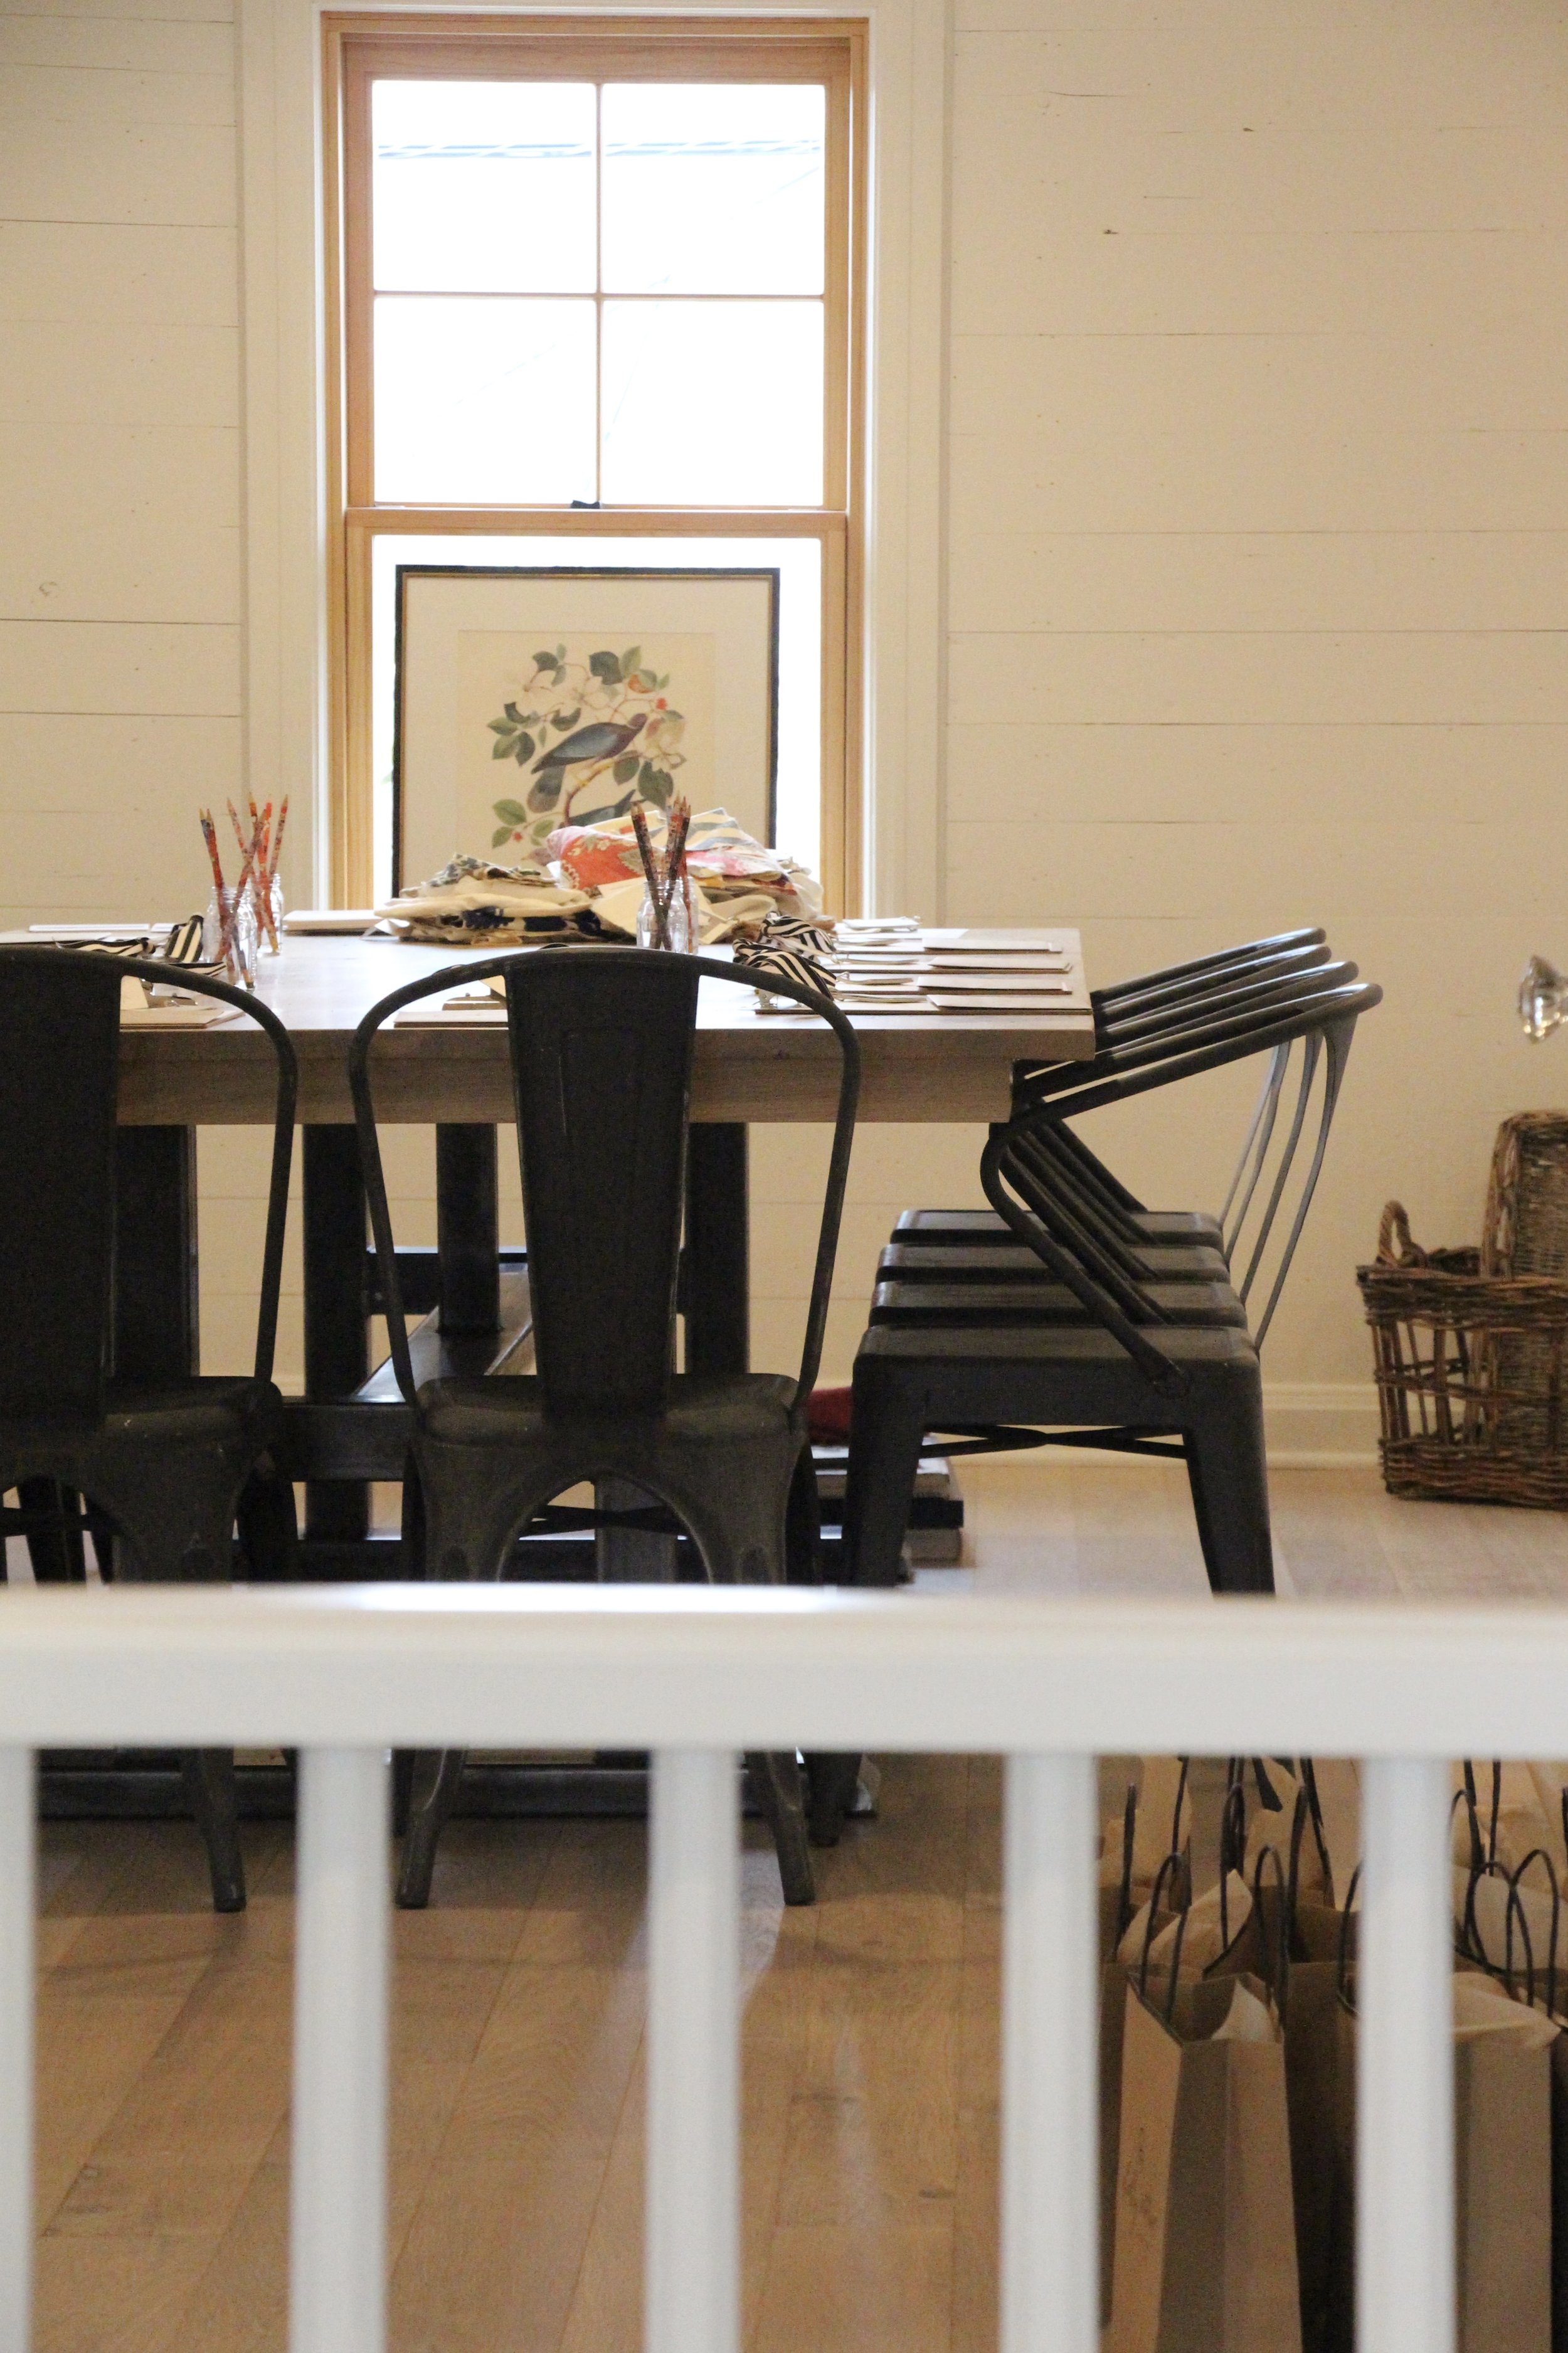
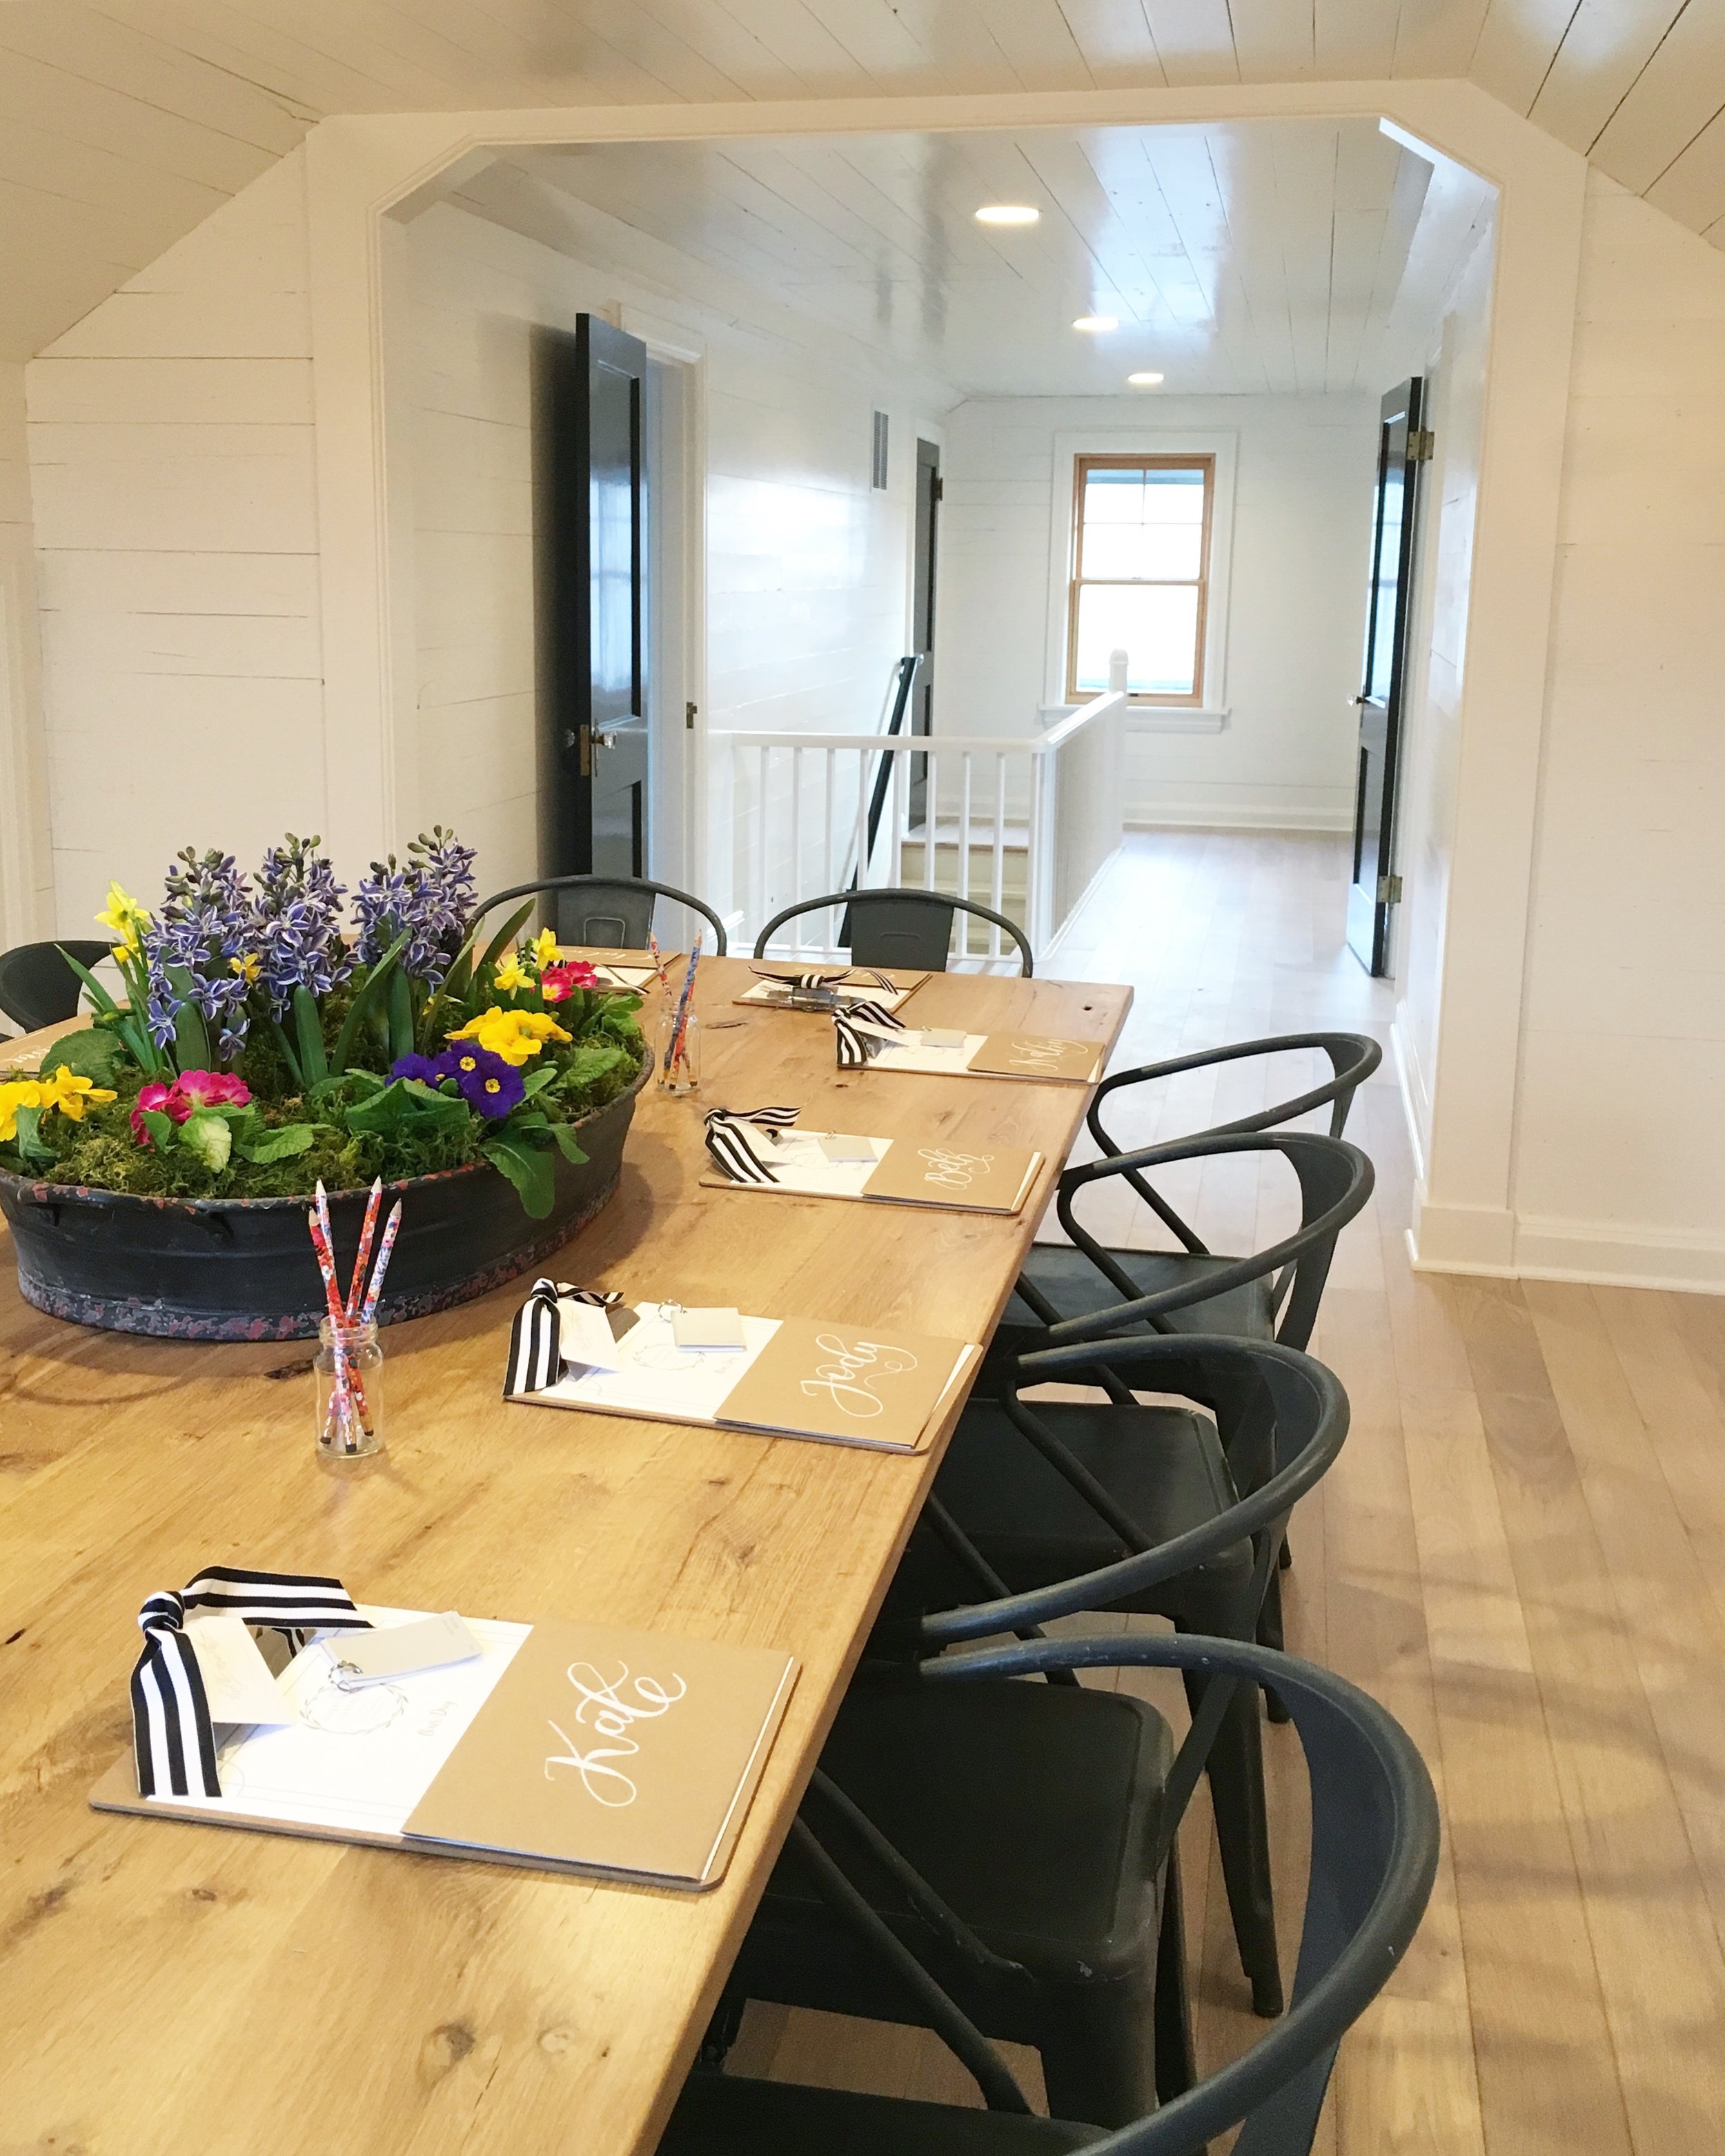
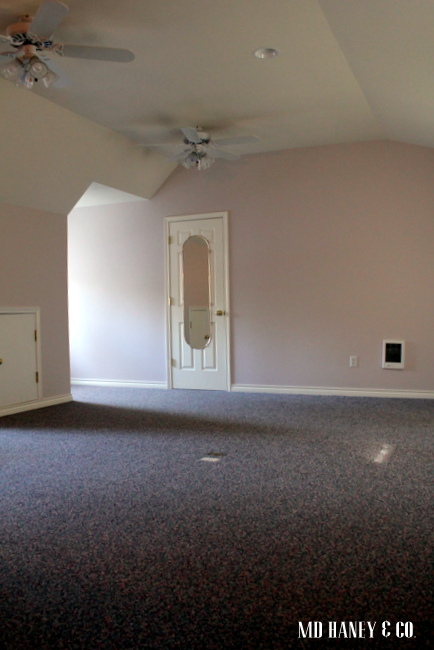
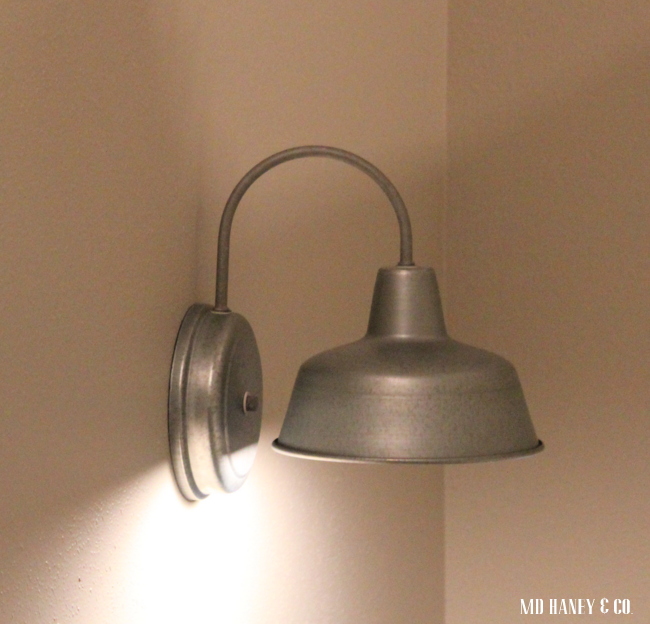
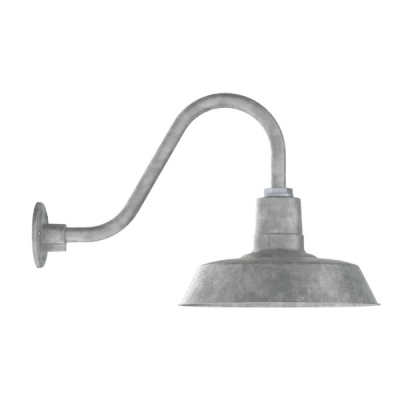
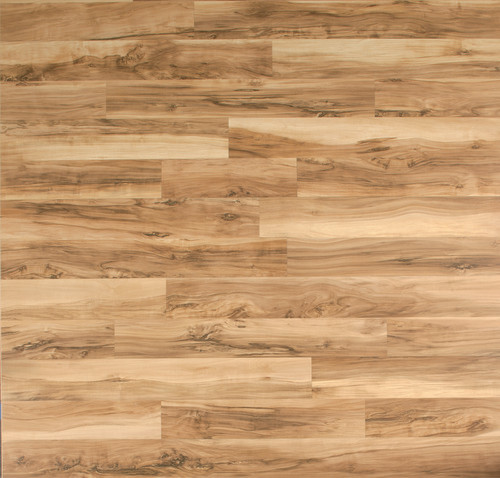
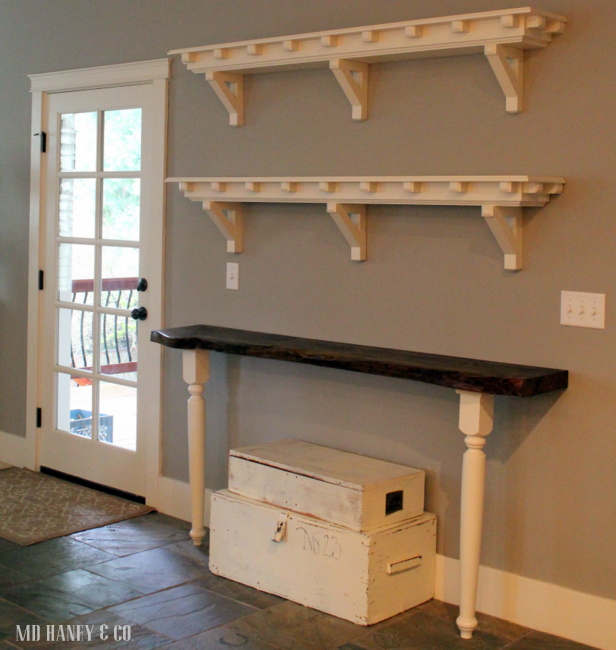
We added can lights and two sconces in the workshop area.  We also added new engineered hard wood flooring, the same that we have downstairs.  The HVAC was updated to make the space comfortable and we replaced the windows with new wood windows.  Can you believe these darling built-ins?  I love, love, love the character of old homes!

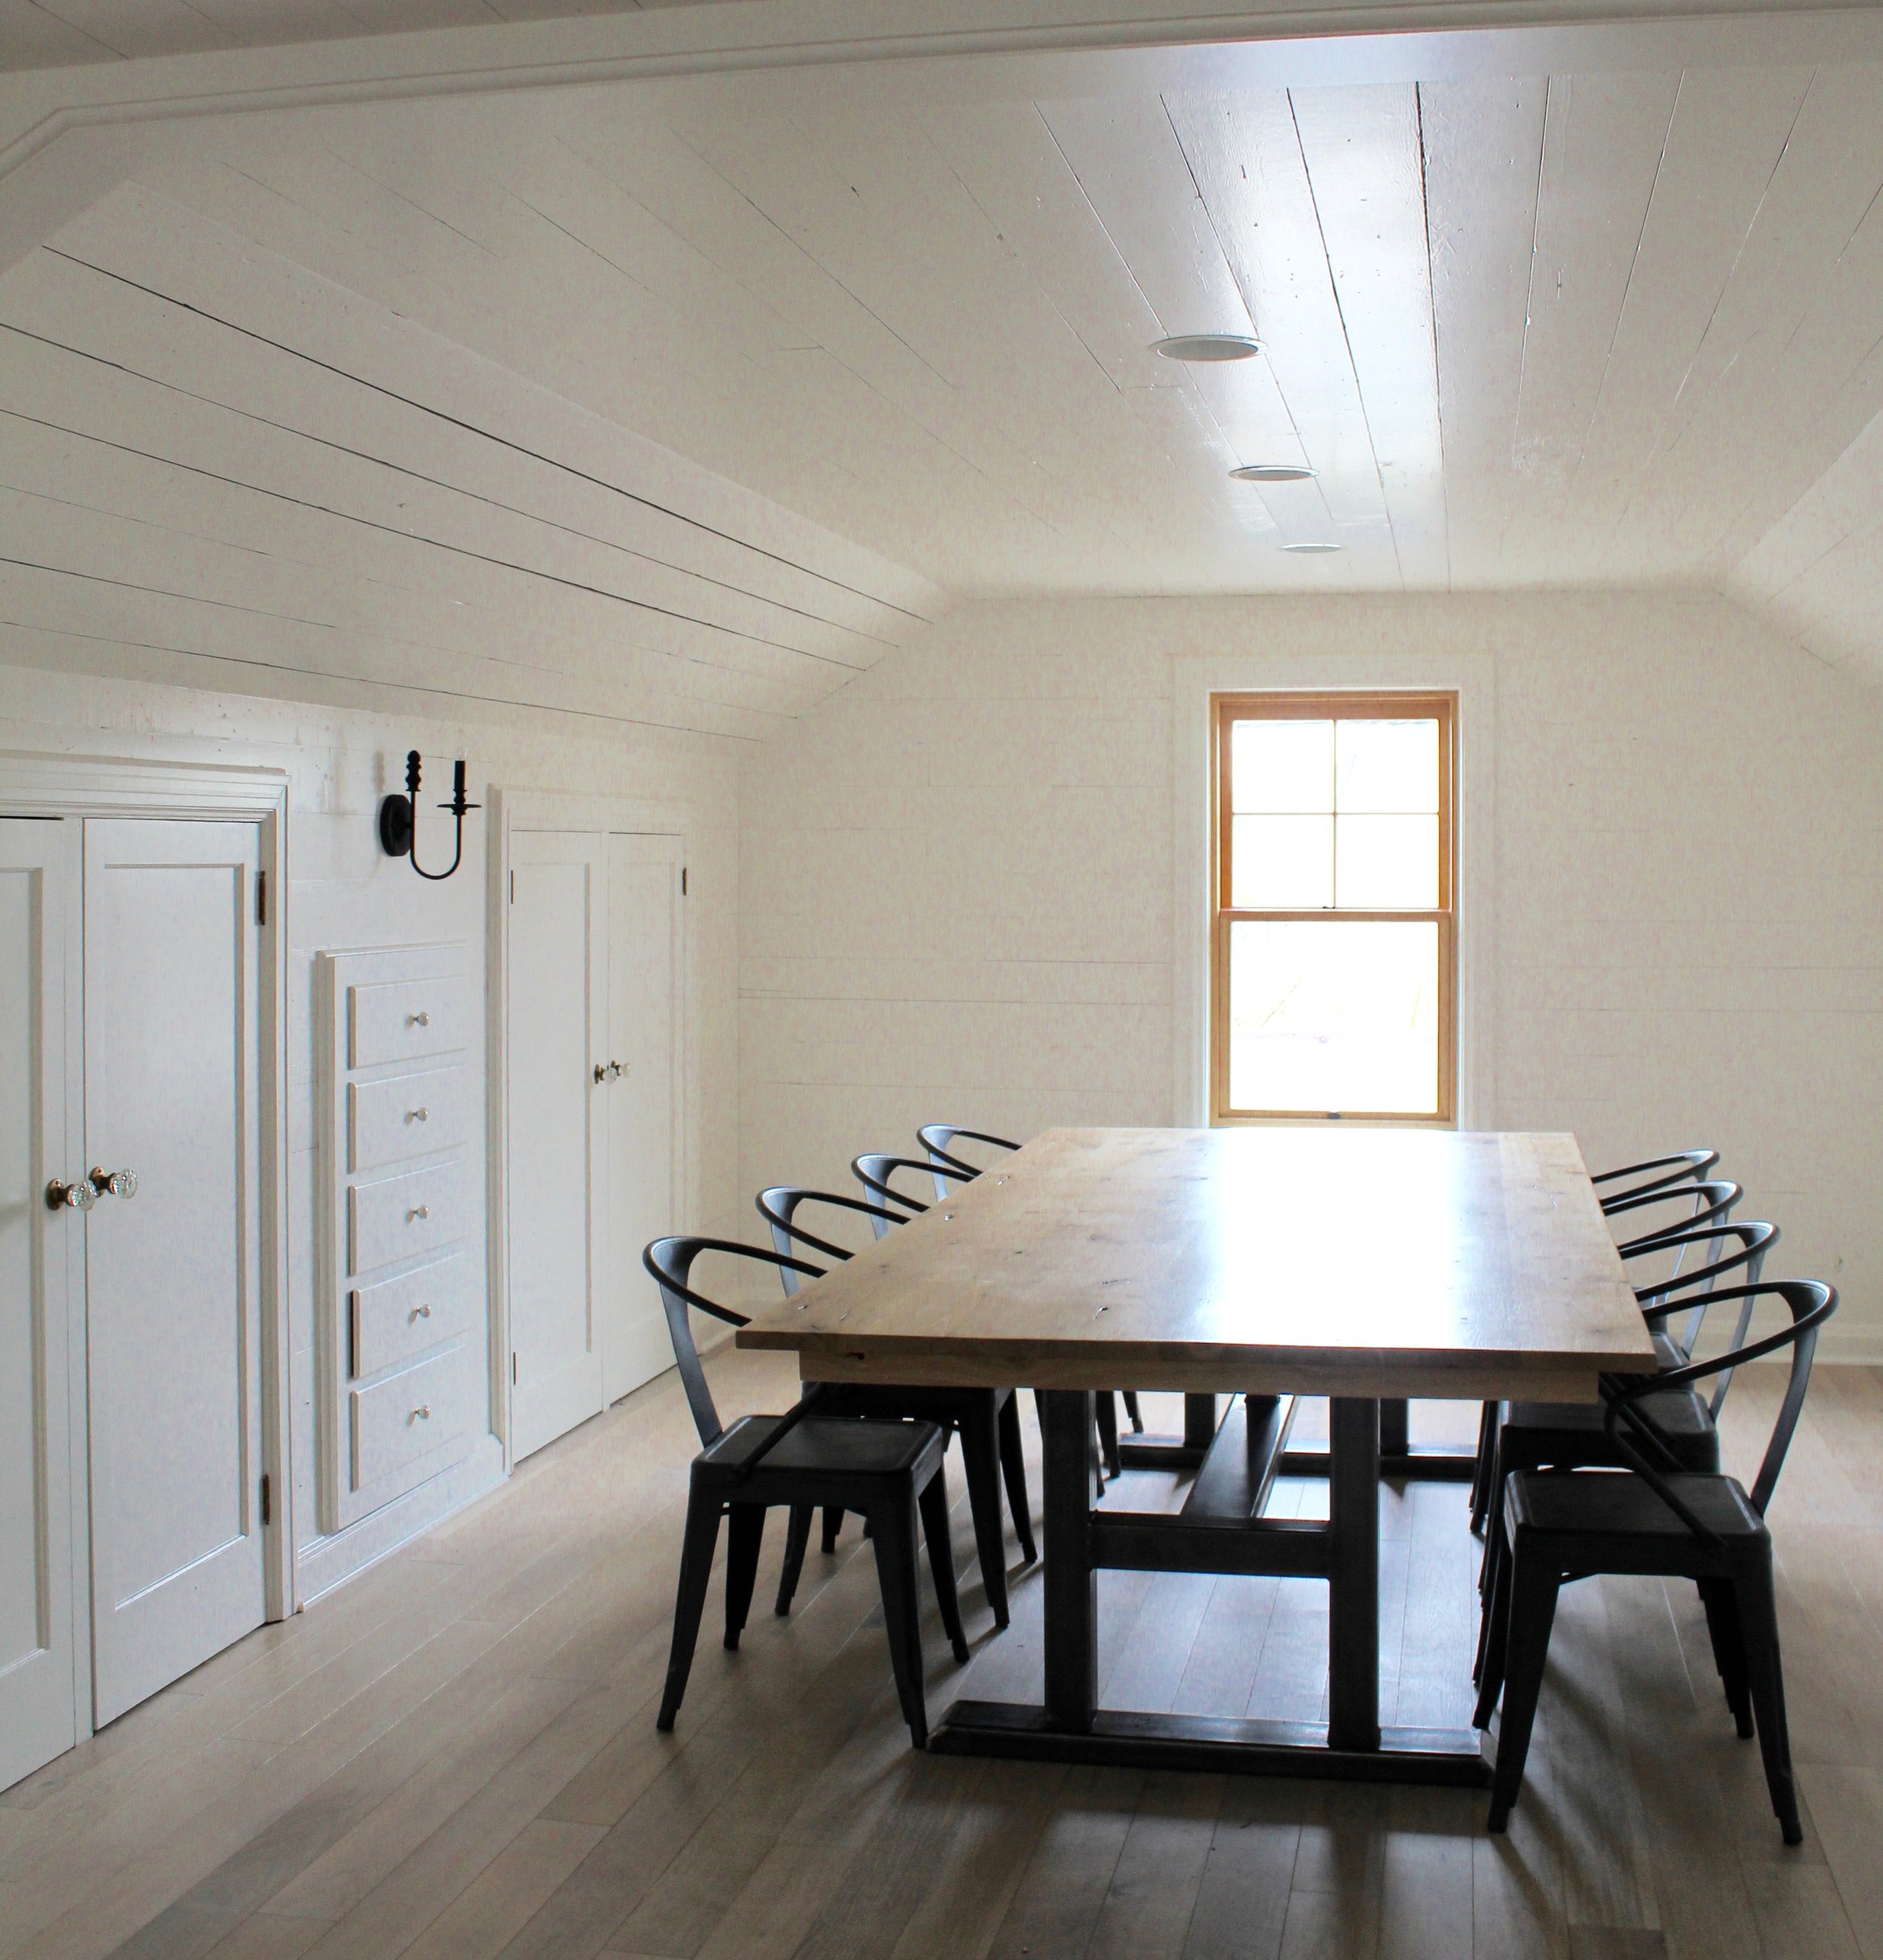
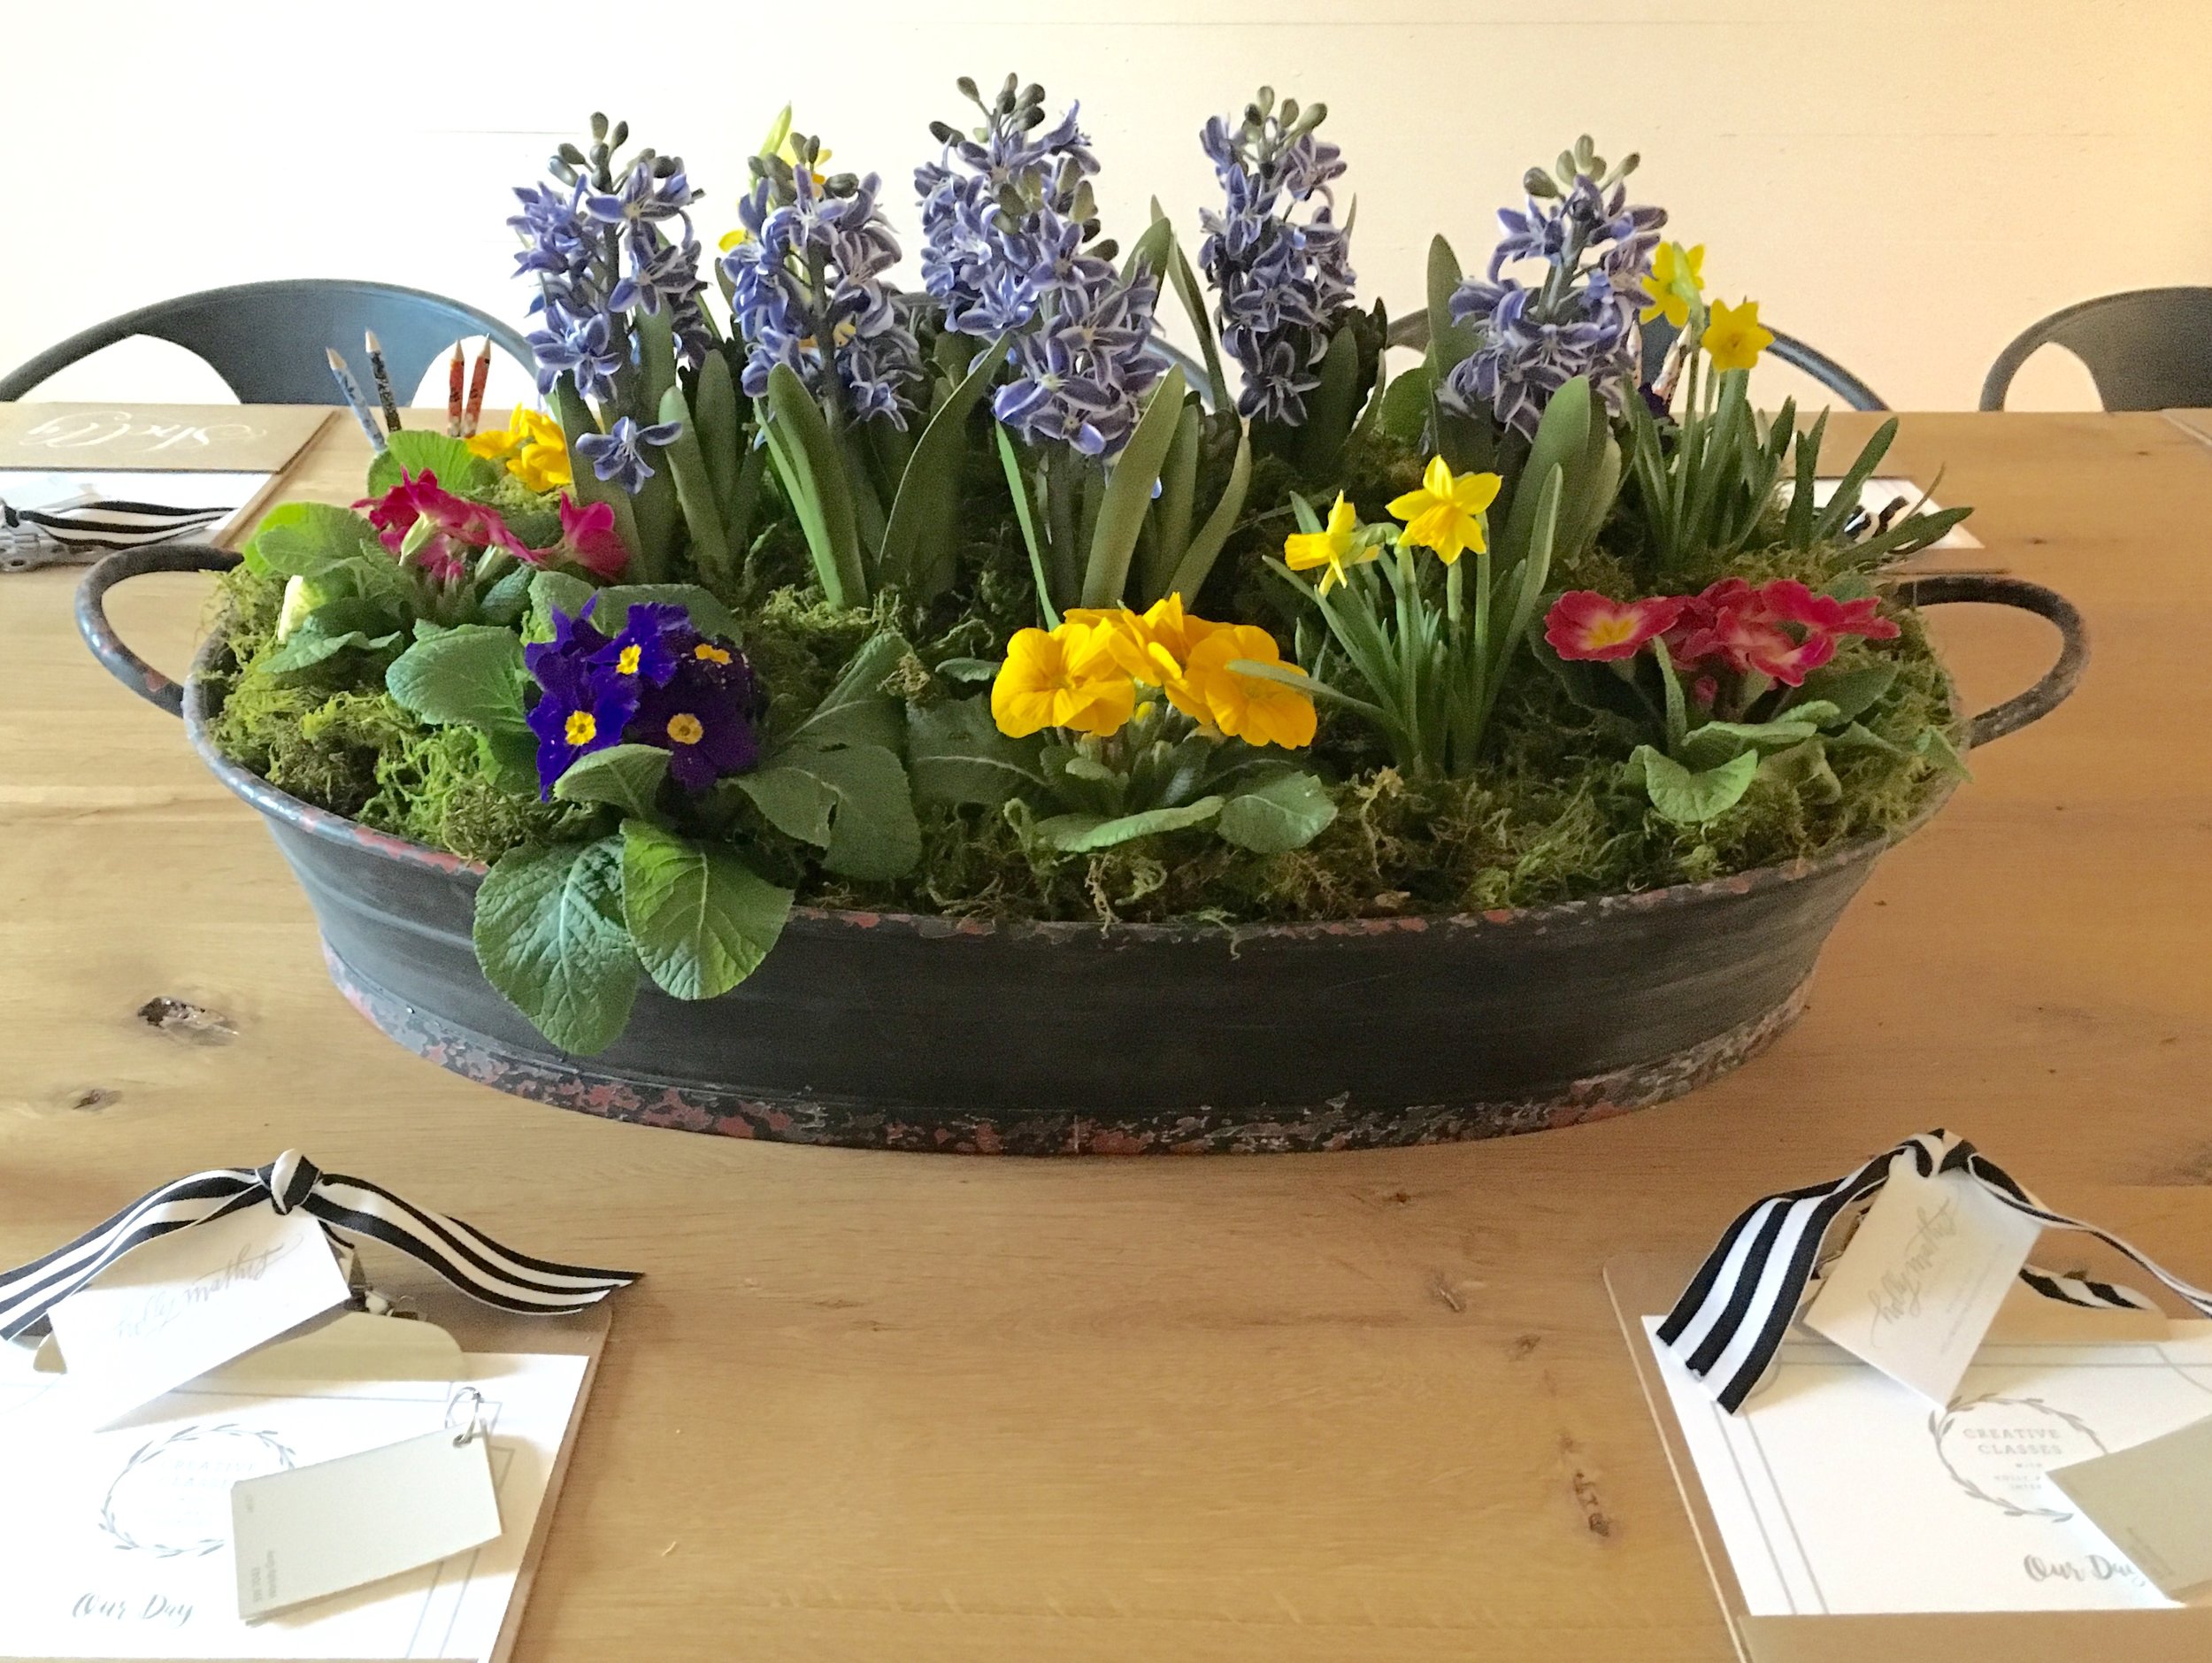
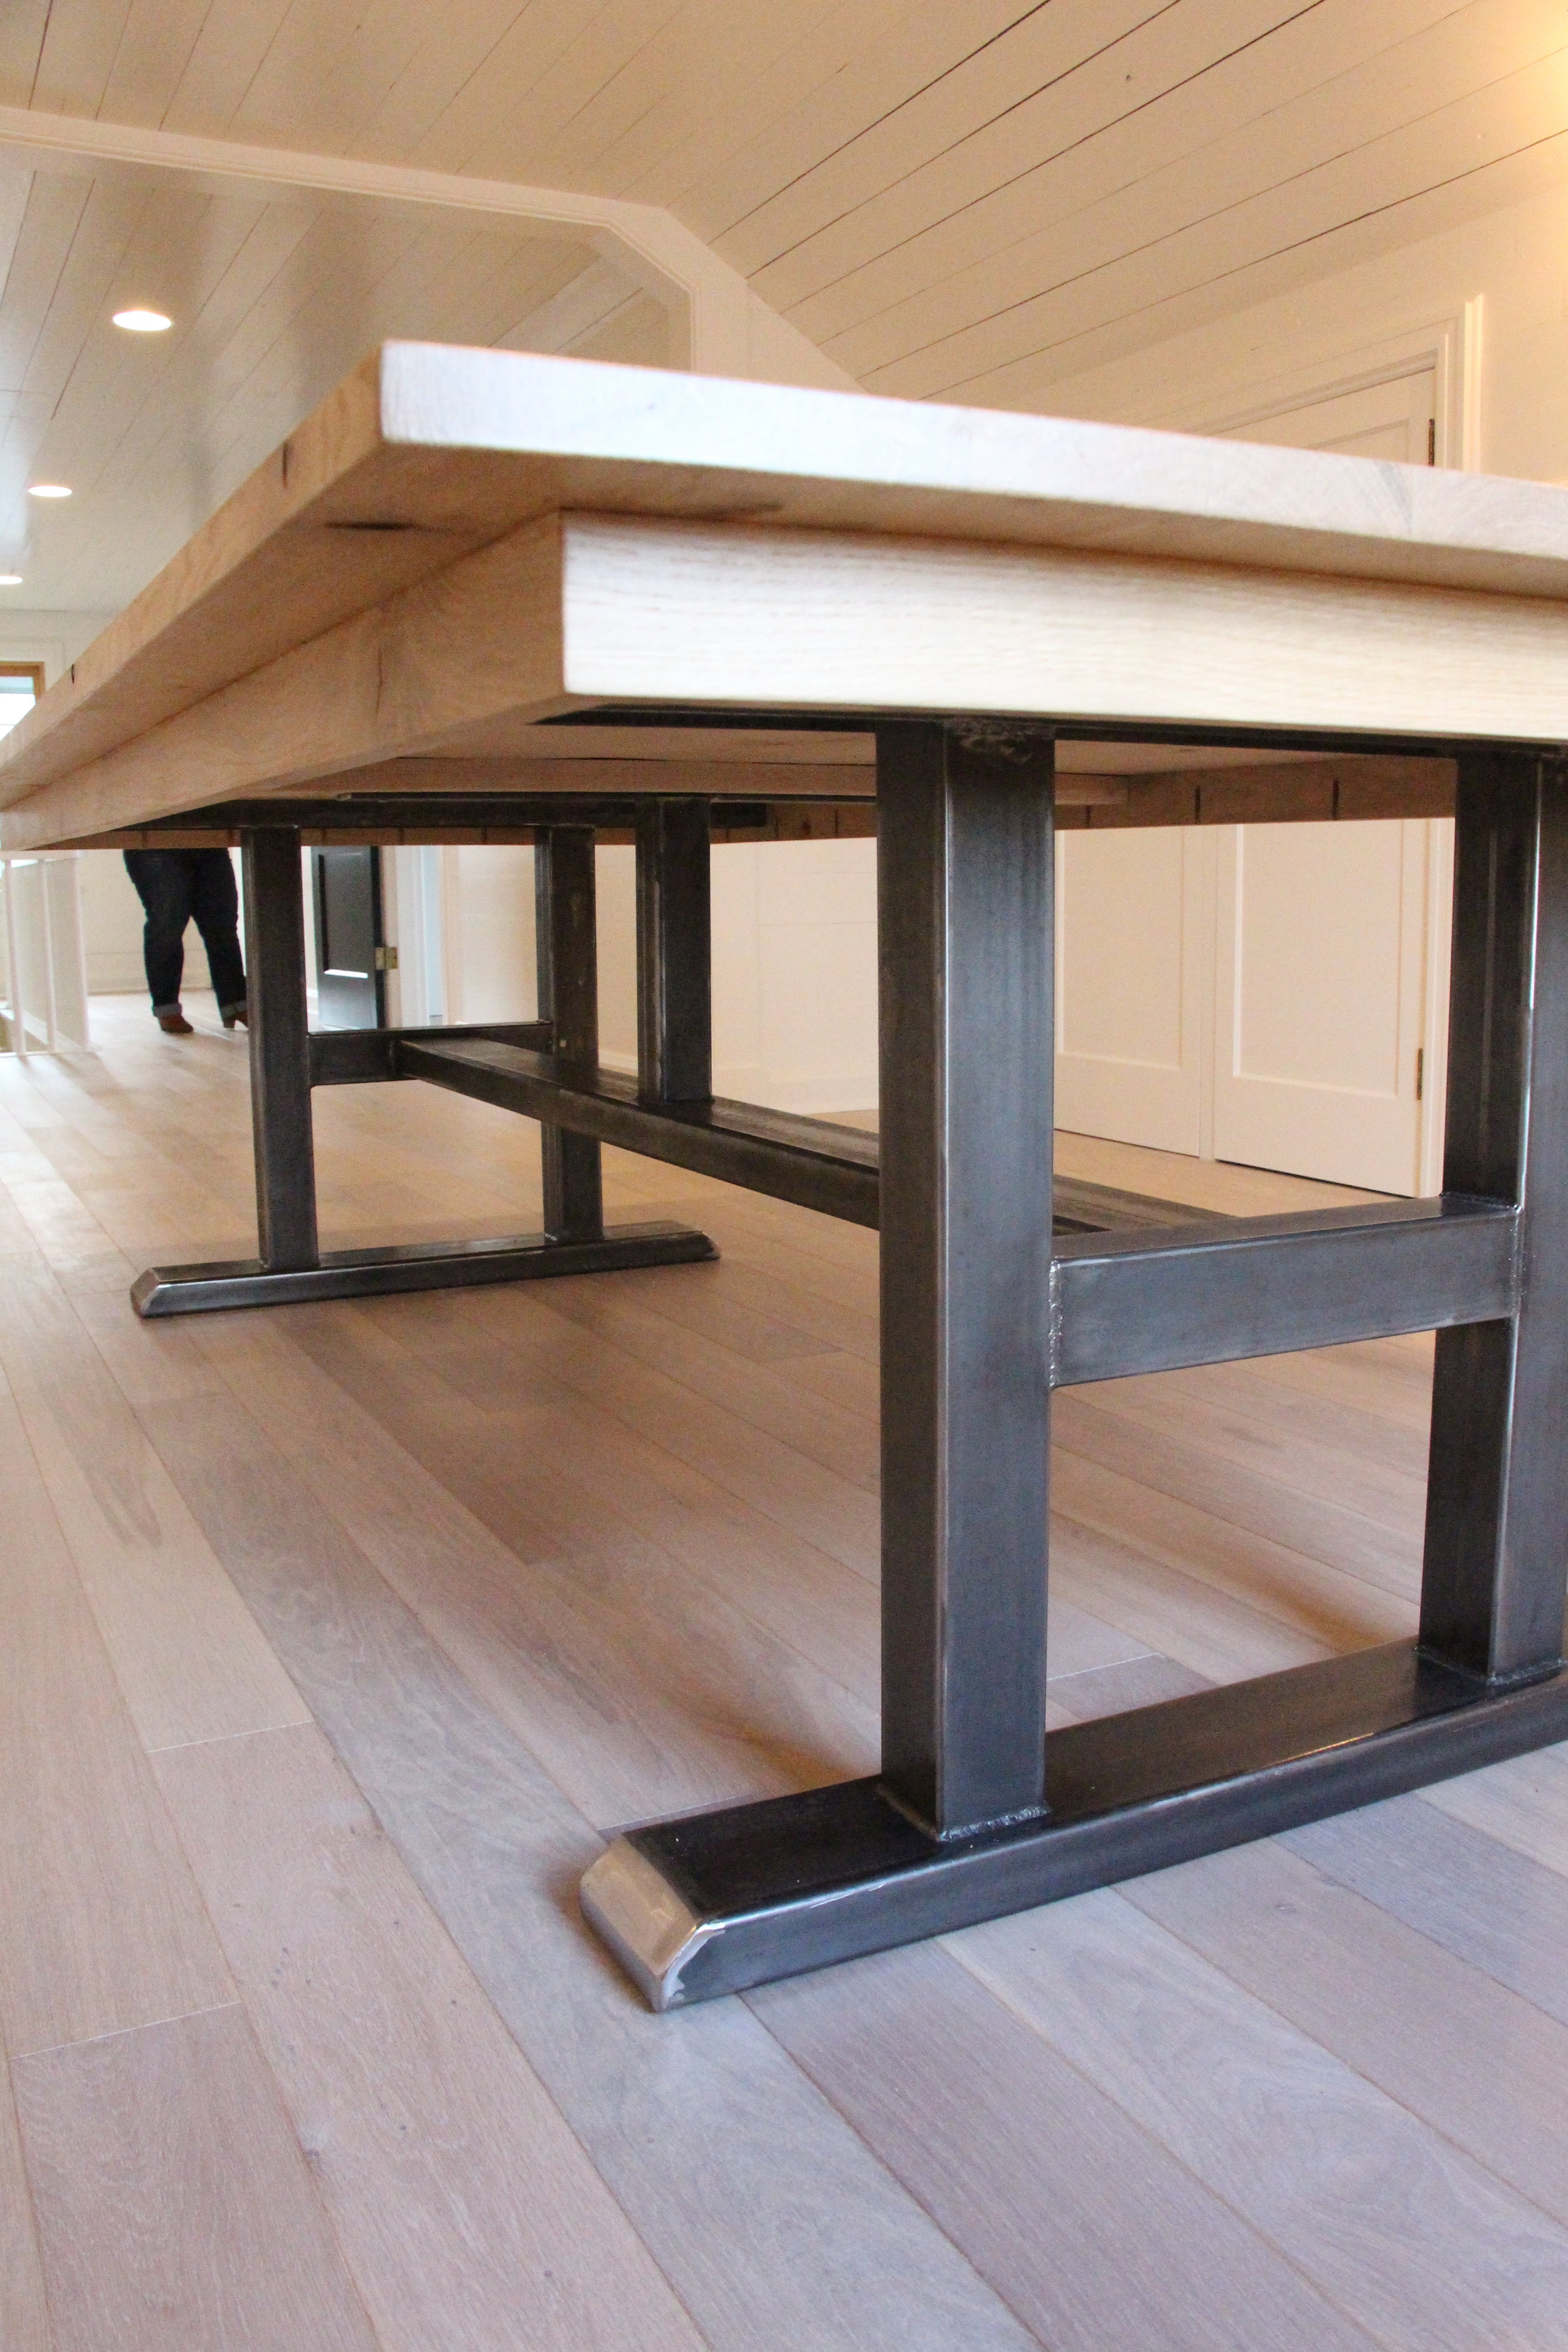
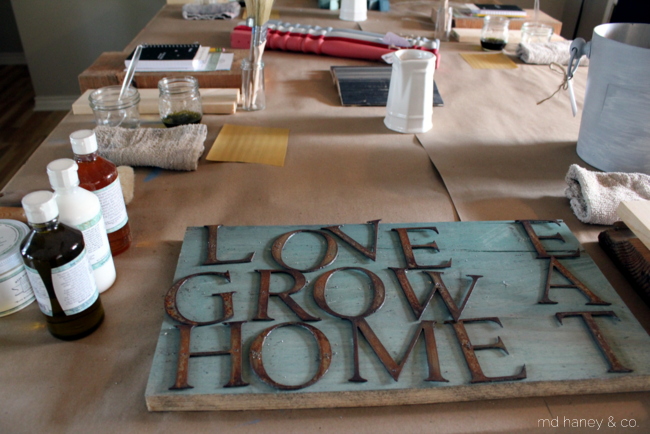
My Christmas present from my sweet hubby, was this amazing table!  He used white oak for the top, which matches my downstairs shelving, and he welded the base, which also matches my shelving.  They had to bring it up in two pieces because it is so big and heavy!  It's perfect for classes and workshops!  I am one lucky girl!!

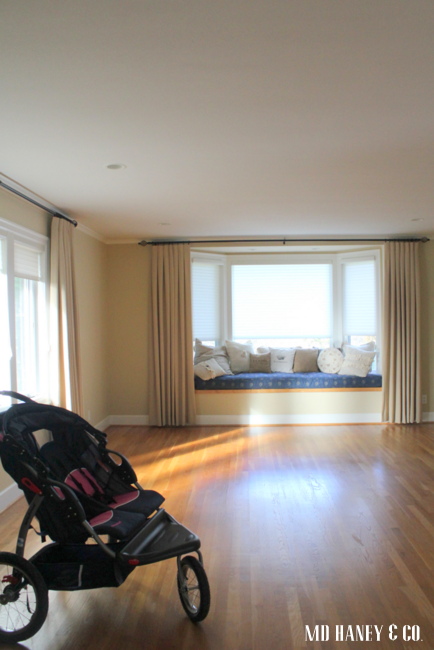
It's a blank canvas at this point!  I still need to fill the office spaces, but I am not in a huge rush.  I love it simple and clean so I am just enjoying it as it is!

xoxo

Darci


a creative weekend with new and old friends

Would you believe that I did not get one picture of any of us ladies?  We had some incredible talented ladies in town this weekend and the only (and very few) photos I snapped were of spaces or things...no people!  Geesh!

I met Holly last summer when I headed down to Texas to take one of her creative classes.  I have followed Holly for years and it was so inspiring, and such an honor to meet her!  Well, we became buddies and lots of emails and texts later, she decided to come up and offer one of her creative classes in McMinnville!

My job was to take care of flowers and food and to have a place to host her.....

I planted this huge and really cool tray with a combination of fake hyacinth bulbs and live primroses and daffodils.  We sell the hyacinth bulbs at the shop-they look so realistic!  They will last for years and they don't have the scent, which can be a bit overwhelming for some.  The primroses and daffodils were purchased at the grocery store.  I nestled the bulbs in, just where I wanted them (still in the pots) and topped everything with moss.  Easy peasy!

Of course I didn't snap any photos of the food because I never seem to have enough time to get things prepared and take pictures!

My dear hubby built this beautiful table, just for our workshop space.  I absolutely love it!! It comfortable seats 12 and it has extra meaning to me because he built it!  He also finished the upstairs space at 2:30am the night before we were setting everything up!  He is a keeper I tell ya!  I will do another post soon on the details of the upstairs space ;-)

Melaine of My Sweet Savannah joined Holly in Portland and those two talented ladies stayed at the cottage.  It was such a treat to meet Melaine, she is a sweet one Holly and I were already scheming as to how we could get Melaine to host a sign making workshop and we would come help her!

Truly a treat and a blessing to meet so many fantastic and talented ladies!  Most of these photos are from Melaine, she was kind enough to share as I never seem to make the time to take pictures!

Have a great week and I will be back soon with more pictures and details of the upstairs workshop space!

xoxo

Darci


painted furniture || ANTIBES GREEN CHALK PAINT®

A dear friend of mine is giving herself a beautiful home office.  She has switched some rooms around and is making a space that is absolutely bold and beautiful, just like her!  She had a solid hutch that she wanted painted, it's going to be her pop of color in the new office.  We settled on Annie Sloan's ANTIBES GREEN..... hutchbefore

It is a beautiful piece of furniture.  Solid, well built and has some really great storage.  It was a lovely piece to paint!

hutch1

2017-01-09-23-00-53

2017-01-09-22-59-22

2017-01-09-23-01-30

2017-01-09-23-02-50

I used Annie Sloan Chalk Paint, ANTIBES GREEN, Annie Sloan lacquer and Annie Sloan Clear Wax.

The hutch was originally intentionally distressed.  It had manufactured worm holes, gouges and was made to look old.  She wanted the new look to be shiny and crisp, no sanded edges or distressing the paint.  This piece took four coats of paint (I watered down each coat, I wanted it smooth!) two coats of Annie Sloan Lacquer and one coat of Clear Wax.  I can't wait to see this beauty in her new office space!  I hope this has inspired you to paint something....maybe something bright and bold!

xoxo


opening the shop || MD HANEY & CO. H O M E

My sweet hubby has been working his tail off to get the new shop space ready for business!  You may remember the BEFORE pictures, the space was dated, dirty and dark.  Now it's light, bright and airy with a lot of really fun features.  I will post soon on some of the work that we did! Anyways, last week was L O N G and we worked H A R D but come Saturday morning, all of the hard work paid off.  I was so incredibly blessed by everyone who came to support us!!!  A sweet friend from church snapped some photos shortly after we opened on Wednesday morning and I think she did a fabulous job!

door

blopic10

blogpic12

We installed new hard wood flooring and Matt added moldings, beams and some really fun architectural features!

blogpic11

blopic9

My sweet hubby also built these fabulous shelves!  We didn't want to block off the windows, the natural lighting in this part of the shop is amazing.  He built these shelves so the view is not blocked from the inside or outside, and I can pile high the inventory!

blogpic8

blogpic7

blogpic6

blogpic3

blogpic2

blogpic1

12924586_506070569580339_6331897073095198959_n

12924586_506070666246996_718204940644928592_n

12794468_506070706246992_2306516969841779869_n

12898395_506070922913637_2483261664671281246_o

Can you believe these walls?!?  That wood is original to the house!  The guys started removing drywall and found this wood.  It's really amazing!  We found it throughout the house.  Again, I will do another post soon on what we did to the building.  We still have a lot to do, but we were able to get enough done to open our doors last weekend.

Thanks again for all of the encouragement and support!  Such a blessing!!  God is good and His timing is always perfect!  The new shop hours are WEDNESDAY - SATURDAY, 10am-5pm.  The address is 636 NE Baker Street, McMinnville.

Valentine's Day and a BEFORE video

Hello and Happy New Year!!  I hope you enjoyed your holiday season.  Ours was filled with family, friends, fun and some good doses of rest too! Last week, we closed escrow on a commercial building in downtown McMinnville.  We are super excited to move the studio downtown and expand the retail side of the business!!  I will share more as the shop space progresses, but I shot this little video right after we picked up the keys.  As you can see, the building needs a little help, but we love a good Fixer Upper!

[embed]https://www.youtube.com/watch?v=bcgjxYT2c_Q&feature=share[/embed]

The girls are at such a fun age.  I have enjoyed every season, but I am really enjoying all of the activities that we can do together!!  Yesterday we baked some brownies and decided to cut them into heart shapes and decorate them for Valentine's Day.  Such a simple activity but we had so much fun....then of course we had a little 'milk and brownie' movie night and enjoyed our sweets.

IMG_6583

IMG_6586

IMG_6587

IMG_6590

The brownies were a box mix, my favorite!  So easy, and so good!  Once the brownies cooled, we just used a heart shaped cookie cutter, sprayed it with oil and cute our hearts.  We sprinkled on a little powdered sugar and the girl decorated their hearts with these sweet little heart shaped candies.  Cold milk with cute straws and we were ready to cozy in and watch a few episodes of Madeline ;-)

And that cute tea towel in photo, that's one of the many cute tea towels I will have for sale at the new shop.  I just received my shipment and they are all DARLING.   I now have one of each color in my kitchen ;-)

Have a lovely weekend, and go bake some brownies!!!  Your family will love you (even more) for it!!!

SEASONS CHANGE

I know I am not alone in this....but I LOVE Fall!  The cooler weather, the Fall colors, the desire to make my home warm and cozy, the list goes on and on!  This is the view out our bedroom and living room window.... 2015-10-08 00.59.26

aren't those trees amazing?  It's inspired us to plant some maple trees along the new pasture fence.  We need a little Fall color down there!

IMG_6044

In 'family' news, my sweet pea started Pre-School this year!  She is going two mornings a week and she loves it!  I am really cherishing this time with my girls....2 1/2 and 4 1/2, it's such a fun age.  They wear me out but they soften my heart every day!

In 'work' news, in less than two years, we have already out grown our work spaces on our property!  Matt builds cabinetry in the barn,  and he turned what was going to be my studio space into a spray booth.  This is what the front of the barn looks like....

2015-10-08 00.59.42multiple trucks and trailers as he moves cabinetry form the workshop area to the spray booth area and then up to the garage when they are finished.  And here is how my garage looks now....

2015-10-08 01.00.53

full of finished cabinetry, furniture pieces waiting to be painted and custom pieces that are finished and waiting to be picked up.  I am definitely not complaining, just amazed at how we continue to grow!

Over the past year, we have been looking for a commercial spot in downtown McMinnville to move the retail and design side of the business.  Nothing was a good fit and I wanted to stay working from home to be with my girls.  Well, the perfect spot became available!  It even has a huge basement that we can use for storage and a huge play room/creative area for the girls!  It's just darling!  Escrow closes January 5th.  We plan on about one month worth of renovations, and plan on opening February 2016!  I can't wait to share the plans we have for the space!

In "home" news, not much has been happening in the way of projects.  Matt has been working 14-16 hour days, 6 days a week.  Since he is the "brawn and talent", not a lot has been happening!  He did finish the screen on the basement cabinetry and I love that it's finished! ;-)

2015-10-01 00.47.48

I have also started to slowly tackle the laundry room and basement bathroom.  It will be a slow process because, big surprise, I need Matt's help.

But, over the past 6 months I have found contentment in my home.  It's not finished, and we have a lot of projects that we want to do.  But, it's a warm, cozy and beautiful place to raise a family, share life with friends and make memories.  And that's what's important to me, the rest is just the icing on the cake!!

PAINTED HUTCH || miss mustard seed milk paint

I finally finished painting a hutch that has been sitting in the garage for a few months.  I bought it to use as a milk paint display for the new shop, then things fell through with our downtown shop location so I just let the hutch sit un-finished.  Well, things are moving forward again with the shop space so it's time to get these pieces painted!

IMG_5493

IMG_5497

IMG_5491

IMG_5495

Since it will be a display for Miss Mustard Seed's Milk Paint line, I figured it should be painted and finished with Miss Mustard Seed products {wink}.  I layered, and dry brushed with IRONSTONE, LINEN, GRAIN SACK AND LUCKETT'S GREEN.  I accented some areas with LINEN, distressed the entire piece and finished with with white wax.  I left the original hardware because I liked the look of the brass.  That may change when it gets into it's new space, but for now it works!

IMG_5500

IMG_5499

IMG_5501

IMG_5502

We are starting to work on some outside projects {of course, before other projects are finished}!  I am starting to plan the garden, the chickens have spent the winter in the garden so I need my sweet husband to build a chicken coop and a new pen.  Of course we want to add some goats to our little family this summer, so they will need a little place to live, and the list goes on and on.  Plenty of fun projects to keep us out of trouble!

IMG_5444

And my little baby is turning two next week!  Time continues to fly and I am always reminded that each day is precious.  No matter how long the to-do list is, I always want to cherish the time spent with family and friends!

RUSTED LETTERS || new to the shop

IMG_5408.jpg

A couple of months ago I purchased a few boxes of rusted letters.  All different sizes and a few different fonts.  Once I move to a larger shop/studio space {hopefully really soon!!}  I plan on offering more letters.  They are so fun and versatile.

IMG_5410

IMG_5413

They start at just $2 for the 3" letters and go up from there.  I have been using them in my Milk Paint 101 Class.  We work on various techniques and then paint a reclaimed piece of wood, the wood becomes the base of our sign and we attach the rusted letters to the wood.  The signs can also make great (and personalized) gifts!

IMG_5294

IMG_5415

I have used them in my studio....

IMG_5423

IMG_5420

IMG_5417

and in the little reading nook of the girls' playroom....and other little places 'here and there'.    If you would like to purchase the letters, you can pop into the studio any Friday, or if Fridays don't work, let me know and I can send you pictures and pricing.  They are so fun!

IMG_5428

IMG_5432

VINTAGE VANITY || painted with milk paint

Customers all always asking me which I prefer….Milk Paint of Chalk Paint®?  My answer is usually the same; it totally depends on the piece of furniture and the scope of the project!

IMG_4808

IMG_4791

IMG_4802

This vintage vanity is feminine and very detailed.  Not to mention old with really darling curves an.

Four years ago {when I was very pregnant with my first} I stripped and sanded {well, my not-pregnant-sister sanded for me} this vanity down.  This was before Chalk Paint® or Milk Paint had become popular, before Pinterest, before I could google 'low odor' or 'natural furniture paint".   Anyways, I researched about Milk paint and I was able to locate a brand of Milk Paint that was carried in Portland.  I painted the vanity and a dresser a light green…I was hooked!  Milk Paint gives a very authentic finish, it adds to the character of an old piece.

Last month I participated in Carlton Crush-a local street fair/carnival event.  My theme was white pumpkins with pops of muted orange and pink.  I painted the vanity with a new color of Milk Paint {MMSMP apron strings} and used it as a display piece.  Last month I had no intention of selling it!  Now I need room in the studio for more furniture pieces I have picked up, so I am going to sell this darling vanity.  It would be perfect in a girls' bedroom, bathroom, home office or even in a living or dining room!

IMG_4809

46" Long x 30" Tall x 19" Deep

White Milk Glass Knobs

$195 ~ free local delivery available


THE STUIO || + a little giveaway

Have I mentioned how much I love having the design studio so close to home?  In Carlton, we lived about 3 blocks from my studio.  Not bad.  But here, it's a 10 second walk.  Awesome.

IMG_4050

We do a lot of bike riding on Fridays.  It's fun for the little miss, and we can easily greet customers when they drive up!

I thought I would show you a few photos of the updated studio space.  I still have lots of projects, but at least the space is 'presentable'!

IMG_3827

Remember the 'BEFORE'?

IMG_4057

We started with new paint on the walls and ceilings and a new {laminate} floor.

IMG_4054

The floors have a lot of variation in color which hides dust and dirt well.  And in a working studio, that is a big bonus!

IMG_4052

We switched out a few of the lights.  Matt still has to hang a little chandelier in the entry…..always projects ;-)

IMG_4024

We have a handful of cabinet doors painted in various Chalk Paint® colors.  I still need to paint 15 more doors!

IMG_4025

Not to mention I need to paint another 18 to show all of the MILK PAINT colors!

IMG_4021

I painted a few banners on the wall showing the different Chalk Paint® and MILK PAINT colors.

IMG_4026

I also have trim pieces painted with each color.  It really helps to see the paint applied in different ways.

IMG_4071

Matt was going to build shelves for the wall.  He mentioned using this old hutch top for a shelf instead!  Perfect!  I din't have a use for it, so, I painted/waxed/distressed and it saved him the time of having to build shelves.

IMG_4029

Lots of Spring colors!

IMG_4028

Do you see how dirty those daffodils are?  Do you know how to get the mud off of the petals??  Every time I try I rip the petals!

IMG_4068

And just for fun I thought I would do a little Miss Mustard Seed Milk Paint giveaway.  Trying saying that 10 times!!

IMG_4066

A bar of spearmint and green tea soap to clean your hands and brush when you are done painting.

A sample size of MUSTARD SEED and KITCHEN SCALE Milk Paint.

Fun, right?  I am limiting this giveaway to local gals.  I want to be able to drop it off and give you tips on how to use Milk Paint {if you have never used it}.  Just leave a comment on the blog telling me what you think you will paint with Milk Paint!  I will draw a winner Sunday and deliver next week.

Have a wonderful weekend!!

A LITTLE UPDATE || our organized chaos

We survived our move!  It almost got the best of me!!  Packing, cleaning, moving two businesses…. and all with two little helpers was rough.  Matt says our next move will be to a nursing home ;-)

Matt is busily working on making my new studio space 'pretty'!  I am so excited to have the shop/studio so close to home.  I will be able to devote more time and energy into helping customers and painting projects.

IMG_3827

This is what the space looked like last week.  It's a really neat space, I can't wait to show you the finished project!

IMG_3828

Matt is painting the walls today.  The walls and ceiling will be a really soft gray…..

barn_light_14_inch_original_gooseneck_shade_975_galvanized

I got these cuties for the wall mount lights, there are 2 of them going up the stairs.

contemporary-laminate-flooring

Matt ripped out the existing carpet and is installing this laminate floor.  We wanted to go with a vinyl or laminate.  Both options are easy to clean and can handle water and paint spills….perfect for a paint studio!!

I have a painting workshop this Saturday, so our goal is to have the space ready by then!

IMG_3825

Meanwhile, the rest of the house has 'organized' piles of chaos,

IMG_3826

or, it has nothing.

We sold most of our furniture to our home buyers.  I wanted to buy new furniture for this home so it was a win-win for both of us!

IMG_3829

Once my shop/studio space is set up, and our Main Street property is set up and functioning as a vacation rental {again} we will start to decorate!  Addilyn's room is first on the decorating calendar!  This is what we have so far….pretty bare bones!

Thanks again for all of your patience.

My design clients have been so patient and gracious, my paint customers have been so understanding, my rock-star of a husband has been busily up-packing and helping around the house.  Addilyn spent all day yesterday with her Grandma and I was able to get so much un-packed. Such a blessing-all of you!

I can't wait to share all of the changes with you guys!  And, I will be offering a new line of paint {in addition to the Chalk Paint®}.  So much great stuff in the works!!!  But, for now I need to get painting!!

MOVING THE STUDIO :: and the vacation rental

I feel like we are always moving/building/creating/changing.  I love it, wouldn't have it any other way.  But, with sweet little kiddos in the mix now, we don't have the bug to always move/build/change.   You know?!?  We still love all of that, just don't want it to take up all of our time.

IMG_3783

The new house we are moving into has a great detached garage + upstairs office/studio.

I love working at/creating at the studio.  It's my own little creative space and I love the opportunity to meet new people!  But, it's really hard with two little ones.  So moving the studio to our property is going to be awesome!!  I will have more details about the new studio space once escrow closes {next week}.

With all of the moving changes, we have decided to turn our Main Street property back into a vacation rental.    We have had vacation rentals in Carlton for 6 years now!  Crazy how time flies! This past week, we have been slowly making the changes to turn it back into a vacation rental.

IMG_3785

The living room is slowly coming together.

I sold all of furniture last year when we turned this house into a studio {of course}!  So I am buying new furniture and moving things over from our house.

IMG_3791

This is what the dining room currently looks like.  Lots of work ahead of us!

IMG_3797

I have the kitchen stocked, cleaned and ready for renters!

IMG_3799

The kitchen takes me the longest to clean after we have had renters….at least 1 hour!  But nobody wants to vacation at a home with a dirty kitchen!!

IMG_3793

Matt still has to build a bed for the upstairs office, and convert the work room back into a bedroom, I have to make changes to the website, yada yada yada.  Seriously, we are crazy!

But, I know in the long run it will be much easier, and I can be more productive, to have the studio where we live.

Life is good, I am so very blessed.  Hard work just keeps me sleeping good at night and not having to work out!

CHALK PAINT® CLASSES :: what's the difference?

Hello and happy {rainy} Thursday!

This is what has been consuming my extra time lately….

IMG_3741

Packing, cleaning, and organizing.  It feels so good to go through everything!

IMG_3740

I am using the dining room as my packing and sorting room.  If I don't love it, or haven't used it in one year, it's donated or put in the garage sale pile.  It's hard to stick to my rule!!  I am always thinking 'someday I might use that'.  Yesterday,  I took six huge bags or little girl's clothing to the Blessing Room….and I still have two bags to give away and several outfits to sell at the garage sale! It feels soooo good to simplify!!

IMG_3742

Speaking of simplifying, some areas of my home are looking pretty bare!  I am having a garage sale tomorrow, and the buyers are coming by to see if they want to purchase any of our furniture.  My goal is to hardly move anything…..either sell it or donate it!

So, the point of this post is not to talk about me, but to explain the different Chalk Paint® classes and workshops we offer.  I get quite a few customers asking about the differences.  Good question!  Below are descriptions for our most popular classes.

bannerlinen

First Friday {which I am going to change to every Friday starting in March}!

The first Friday was something I started this year, and people seem to really love it.  As of March, I am going to offer this every Friday, instead of just the first Friday of the month.  I will be calling it OPEN WORKSHOP.

IMG_3532

OPEN WORKSHOP is where you can bring your own project to paint, in our workshop.  We open our workshop from 1pm-5pm on Fridays.  

You bring your own paint and wax {or purchase when you arrive} and you can use our workshop space, brushes and tools.  I am happy to offer tips and advice, in between helping customers.  You can stay for the entire 4 hours, or just pop in for 45 minutes.  The goal is to provide an incentive {a fun and creative environment} for you to just start painting!

I have light refreshments and the cost is $10.  You don't need to rsvp, but just know we only have space for 5-6 people at a time.

IMG_3699

BRING YOUR OWN PIECE

BYOP classes are offered once a month.  The class lasts 3 hours.  Here we guide you through the steps to paint and finish your own pice of furniture {a tray, box or shelf are great, nothing larger than 2 feet wide or 2 feet long.}  We teach tips and tricks and help to build your confidence.  We provide the paint, wax, brushes and tools.

Light refreshments, drinks and a tote are included.  The 3 hour class is $75.  You do need to rsvp for these classes, the maximum number of attendants is 6.

IMG_2987

INTRODUCTORY TECHNIQUES

This is a fun class, meant to inspire your creativity and evoke confidence.  You will learn four techniques to understand the basics of this unique paint and proper wax application.  You will learn tips to achieving beautiful results on all of your painted projects.   You will paint and wax molding pieces that are yours to keep.

Light refreshments, drinks and a tote are included.  The 3 hour class is $75.  You do need to rsvp for these classes, the maximum number of attendants is 6.

To sign up for classes, you can call {503.857.8176} or send a note via our contact page.  I will send you detailed information about the class and add you to the list!

Happy Painting!

JANUARY :: a busy month

IMG_3223.jpg

Hello and thank you for bearing with me as I only posted once last week!  I probably won't post much for the next 3-4 weeks, I will be a little busy ;-)

exterior

My to-do list includes….

Packing, purging and cleaning our house….and a garage sale this weekend!

Turning our Main Street property back into a vacation rental.  {More on that soon ;-}

Packing up my design studio, I am moving the studio in 3 weeks!  

Updating the website with all of the changes.

Still working on design projects for clients, keeping my children alive and still trying to keep our home somewhat livable.

exterior

I love the challenge and I am super excited for this next phase.  I can't wait to fill you in on all the details!

IMG_3053

Until then, don't hesitate to call if you want Chalk Paint, I am still happy to meet you if Fridays don't work.  I have the best customers….thank you and I can't wait to share all of the new changes with you!!

cupula

I will be back soon!

xoxo

CHOCOLATE OATMEAL NO BAKE BARS AND CHRISTMAS AT THE STUDIO

I started decorating the front porch of the design studio the weekend after Thanksgiving.  Of course I had my two little helpers, so I wanted to keep it really simple.

IMG_3578

I had 3 objectives…..decorate quickly, use what I already have,  make it pretty!

IMG_3573

I filled old buckets with various fresh cut greens.

I love using fresh greens!  They smell amazing, they are naturally beautiful, and most of the time they are free!

IMG_3579

I made the wreath with fir and cedar branches from the back garden.

IMG_3570

I love using Chalk Boards to decorate with!  A simple little Christmas message on the Chalk Board and we are set.

IMG_3568

I forgot to turn on the market lights for the picture!  They are so fun at night.

IMG_3581

Two freshly cut trees, boxes with burlap ribbon and pine cones and a few red ornaments….all things I had laying around.  Well, not the freshly cut trees, but you know what I mean ;-)  I bought the large basket from my dear neighbor a few months ago, it provided just the right amount of height for one of the trees.

It's simple but festive.

****

The other day I 'pinned' NO BAKE CHOCOLATE OATMEAL BARS.

I love 'no bake' because they hardly take any effort.

If you are in the mood for an easy chocolate treat, you have got to make these!

IMG_3562

Best Ever Chocolate Oatmeal No-Bake Bars

  • 1 cup peanut butter
  • 1/2 cup honey
  • 1/2 cup coconut oil (you could also substitute butter)
  • 2 cups old fashioned oats
  • 1 cup shredded coconut
  • 1/2 cup chopped nuts, raisins, or dried cranberries
  • 1 1/4 cups dark chocolate chips (or regular semi-sweet chocolate chips, if you prefer)
  • 1 teaspoon vanilla extract

Melt the peanut butter, honey, and coconut oil over medium-low heat in a saucepan on the stove. {Watch this closely. Mine started to burn!}

Remove from heat once it’s melted together and add in the oats, shredded coconut, chocolate chips, nuts/raisins, and vanilla. Stir together until the chocolate is completely melted.

Pour into a greased 9×13 pan and cool in the fridge. If you’d like thicker bars, you can pour the mixture into a smaller pan.

When the mixture is hardened, cut into bars and eat. Store in the refrigerator or freezer.

Recipe adapted slightly from I Hear Exercise Will Kill You.

IMG_3566

Have a great day, and tomorrow I will show you a master bathroom design I am working on for a client!

FIRST FRIDAY :: bring your own furniture

A few weeks ago I was chatting with a sweet friend of mine.  {She paints furniture and re-purposes old pieces into little gems.  We met this Spring.....she buys Chalk Paint® from me, and she has become a dear friend! I am so happy our path's crossed!!!} Anyways, she threw out the idea of me opening up the work room to the public.  A space where local people can come create.  I loved it!  Below are the details..... IMG_3362

FIRST FRIDAY || the details

What :: bring your furniture/lamps/frames {whatever you want to paint} and use our work room to paint and create!

When :: the first friday of every month

Time :: 1pm-4pm, come and go as you please during that time period

Where :: the design studio, 543 west main street, carlton

Cost :: $10

Extra Details :: bring your own Chalk Paint® and wax, or purchase when you come.  The work room space, brushes, rags, and tools will be available for you to use.  I will also be around to answer questions!  Not to mention we will have hot drinks and tasty treats ;-)  No need to RSVP, just show up!

IMG_2987

Hope to see you Friday!

HOLIDAY SCHEDULE & THE COOKIE EXCHANGE :: updates

Hello friends!

Below is an updated HOLIDAY SCHEDULE for happenings at the design studio.  I will be around this week and next week for appointments if you would like to stock up on Chalk Paint®!  The studio won't be open this Friday {11/22} or next Friday {11/28}, but just call/text/email and I will gladly meet you there!

winterschedule copy

So, the upcoming COOKIE EXCHANGE is going to be a lot of fun!!  I know the holidays can get busy, but I thought this would be a fun way to get together with friends and neighbors.

img_plan-cookie-exchange_1

Here are the details ~

DATE ::  Sunday, December 8th, 2013

TIME ::  6:30-7:30

LOCATION  ::  543 West Main Street, Carlton {the design studio/cottage}

WHAT TO BRING  ::  3 dozen cookies ~ 1 dozen to share and 2 dozen to exchange

I will have drinks, appetizers, a packaging station for your sweet treats and a warm, cozy fire ;-)

Hope you can come!!

COME PAINT :: first Friday of every month

I am really enjoying being 'open' at the design studio on Fridays!  The girls and I are there every Friday from 9am-6pm.

I have a few exciting things up my sleeve for the studio.  The first one :: I have decided to open up the back work room to you....my lovely customers!

IMG_3362

Yep, a time where you can bring your project{s}, ask questions, learn tips and paint away.  I have found that sometimes it's just easier to work on a project at a designated time and/or location.

IMG_2987

I am hoping that by making the work room available to you guys, you will be inspired to create!!

IMG_2986

Here are the details....

BRING YOUR PROJECT || EVERY FIRST FRIDAY

WHEN ||  every first Friday of the month

TIME  ||  open~come any time from 1pm-4pm

WHERE  ||  543 West Main Street, the work room

WHAT  ||  Bring your own project to work on.  Use our space, brushes and rags. I will be available {in between customers} to answer questions and offer tips.

COST ||  $10.  Feel free to bring you own Chalk Paint® and wax, or you can purchase it when you arrive. We won't have our opened paints and waxes available to use, as we do with our classes.

** no need to rsvp, just come and go at your convenience during the designated hours**

I truly value your input and ideas.  I want the studio to serve as a place of creativity and inspiration!  Please feel free to throw out ideas and thoughts on what you would like to see offered!!