MILK PAINT || my favorite colors {at least for this week}

I promise to start posting some 'after' pictures!  We have been busy with projects {both Matt and myself} but I am so bad about documenting the finished project with pictures!!  Maybe next week?!?

On another note, I have slowly been getting the studio organized and it feels so good!  A few months ago I started carrying the line 'Miss Mustard Seed Milk Paint'.  Next month I head to California for a two day training so I figure I better start working on color samples!  Here are my favorite Milk Paint colors….and when you see them in my living room you will see why they are my favorite {for right now anyways ;-}

IMG_4746

IMG_4747

IMG_4762

IMG_4768

IMG_4746

MMSMP colors from top to bottom~

LUCKETT'S GREEN

BOXWOOD

KITCHEN SCALE

FRENCH ENAMEL

FLOW BLUE

EULALIE'S SKY

ARTISSIMO

GALVANIZED CLOCK || adding a touch of industrial

So, the Fall Vintage Sale was awesome!  A huge success and so much fun!!!  I was tired for days afterwards, and of course hardly snapped ANY photos!  I can't believe it….I only snapped a couple with my phone, right before we went to open the gate and let the flood of shoppers rush in!  Thanks so much to all of you lovelies who came, and to new peeps, it was fun to meet new faces and hug on the old ones!

sale2

sale1

On a different note, I have slowly starting gathering and ordering items for when we have a downtown space.  One of my favorite things so far has been this galvanized clock!

IMG_4731

IMG_4734

IMG_4730

Anything galvanized has become so popular over the last few years.  I love that it can really go with anything and yet totally changes the look of a space!  I bought two of these clocks….one to keep and one to sell.

DETAILS::  33.5" W x 33.25"L.  $128

If you are interested in purchasing it, just let me know!

CHOCOLATE CUPCAKES WITH CINNAMON CREAM CHEESE FROSTING

When Fall rolls around, I love everything 'pumpkin' and 'spice'.  I wanted to make some cupcakes and was going to resort to spiced cupcakes, but decided to add a 'Fall" twist with frosting instead.  We ended up with chocolate cupcakes with cinnamon cream cheese frosting….perfectly chocolate with just a hint of spice!

IMG_4702

IMG_4701

IMG_4698

When I make cupcakes, I usually use a box mix-just being honest.  I love the texture and you can't beat the ease of adding a handful of ingredients and turning on the mixer!  I almost always have cream cheese on hand, so these little babies took no time at all!  Below is the recipe, if you can even call it that…..Enjoy!!

IMG_4698

RECIPE

Chocolate Fudge cake mix-prepare cupcakes per box instructions.

Cinnamon Cream Cheese Frosting-

8 oz. package of cream cheese, room temp.

1/4 cup of unsalted butter, room temp.

1 1/2 tsp. ground cinnamon

1 tsp. of vanilla

2-3 cups of powered sugar, depending on desired consistency.  

With a hand held, or stand mixer, mix cream cheese and butter together until smooth.  Add remaining ingredients and mix until smooth. Garnish with dried cranberries or anything else that sounds good!

ADDING 'FARMHOUSE FLAIR' TO A RANCH HOME

As most of you know, we sold our home and  moved about 6 months ago.  We just moved a few miles, but we now have a couple of acres.  Just enough space to grow a big garden, raise some animals and give the girls room to run and play.  The house we bought is a classic ranch and we are slowing adding a little farm house flair.

Construction for the barn started a few weeks ago.  This beautiful barn is actually very similar to what ours will look like.  Matt put a lot of thought and time in to designing the barn….I can't wait to see the walls go up!  I won't bore you with all of the details (widths of batts for the board and batt siding, color of siding, style of barn too, etc.…..but we sure had fun figuring out all of the details)!  Our goal is to make the barn look likes it's original to the house (1948).

DSC02498

IMG_4661

We have plans to add 'farmhouse flair' next Spring.  We will paint the exterior, add corbels, cupolas, shudders, all of the extra touches that give a home personality and character.  We are having the chimney re-built and I am struggling with the type of brick to choose.  All of the little details that can really make a big difference!  In the mean time, we started switching out the exterior lighting.

IMG_4697

IMG_4650

IMG_4695

Here are a few inspiration photos….

DSC_0031

images

f3669f08daea2cc74bd1d1864b5ae97a

74802043780953409_hTZzky8b_c

Arn't those homes darling?

I am so weird about remodeling my own home.  I am always wanting to hurry things up and just be finished, but on the other hand I really enjoy the process!  Does anybody else have the problem when it comes to projects around the home?

xoxo

BEFORE + AFTER || oak table

Matt has wanted to build a farm house table for our dining room, but the reality is, it's falls short on the priority list.  My wood working skills do not even compare to my handy husband, so I knew there was no way I would attempt to build my own!  My in-laws lent us their extra oak dining set since we sold our last dining room set with our house.  A few weeks ago I was telling Matt's mom that we just couldn't agree on a new dining room set to buy.  Matt really wants to build something but I want something sooner than later.  :-0

She said we could just have the dining room set we were borrowing!  Perfect!  The next day I started painting..

IMG_4548

The table is in great shape.  Solid oak and the perfect size for our dining room.  I painted the base with Chalk Paint® {Old White}.  Just one coat since I wanted it to be heavily distressed.  I then applied one coat of clear wax and a bit of dark wax to age the base a bit more.

The top is painted with Chalk Paint® {French Linen} and thinned with water, for more of a washed look.  I sanded the edges and applied two coats of the Annie Sloan lacquer.  The lacquer has a matte finish and is very durable, great for our family who uses this table almost three times a day.

IMG_4688

IMG_4636

IMG_4641

I bought four metal chairs and two upholstered chairs to replace the oak chairs that were part of the original set.  I love mixing different styles and finishes.  Plus, these chairs are pretty indestructible…..good for a family with little people and messy big people ;-)

A FEW {more} FALL TOUCHES

We leave this morning for Crater Lake.  A few nights away with my little family is always so good for my soul!

I thought I would post a few photos of a bit more Fall decorating around the outside of our home.

Have a lovely weekend friends!

IMG_4651

IMG_4647

IMG_4650

IMG_4644

IMG_4658

IMG_4660

**corn stalks and pumpkins from our garden

**fire wood delivered and stacked

**our front door dolled up for Fall

**our new barn is ready for the concrete foundation

A FEW FALL TOUCHES || using what I already have to decorate for fall

This time of year always gets so busy for me (and I know for so many others!)  The tourism is so seasonal here and our vacation rental reaches the peak of busy-ness in August and September.  For me that means a lot of cleaning, gardening and paper work.  But, even during the busy-ness of life, it's so important to make time for family and friends.  Saturday was spent hosting a booth at Carlton Crush ( a darling, local festival ).  It was a long, fun, successful and exhausting day, but the good kind of exhausting!  Sunday we spent the day at Pacific City with Matt's parents….celebrating his dad's birthday.  Pacific City is one of our favorite places to spend the day.  We drive the truck down onto the sand and set up camp for the day.  Football, fire, food and lots of sand and salt water….the best kind of day! IMG_4613

IMG_4620

IMG_4616

And today has been our first 'slow' day at home in a while.  So, the girls and I have been cleaning and slowing adding touches of Fall.  When decorating for Fall, I like to go 'all natural' and use things from nature.  Mostly branches, berries, pumpkins and gourds.  It's easy, cheap and looks great.  A couple of years ago I painted all of my fake orange pumpkins white and light green.  I used Chalk Paint to paint my pumpkins, but I am sure any paint would work just fine.

IMG_4621

IMG_4626

IMG_4642

IMG_4637

IMG_4630

IMG_4627

As you can see by the dining room photos, the room is in progress.  When Matt starts paneling the stairway to the basement, he is going to add an opening to the dining room and panel the entire room.  We contemplated wall papering but we would need to tear off of the layers of wall paper and it honestly would be easier to panel the room than to try to remove the wallpaper, patch the holes and hang wallpaper.

The girls and I are planning on adding some Fall touches to the their bedrooms and the outside of the house later today, I will post pictures later in the week!

xoxo

FALL CLASS SCHEDULE

IMG_4608

Just a quick note to let you know that the Fall Class Schedule has been updated on the 'paint + classes' page of the website and I will post it here as well.

I am getting ready for a booth at this weekend's Carlton Crush Festival, as well as tending to my sick baby girl and recovering from a yucky flu bug…so I probably won't  do a fun blog  post this week.  But next week I will be back 'on my A game'!

Have a great week!!

fall class schedule copy

BEFORE & AFTER || a sewing table

A few weeks ago I picked up this darling little sewing table at Goodwill.  It was only $8 and I was looking for a little table for our master bedroom.

Now I forgot to take a 'BEFORE' picture, but I took one shortly after I started.  I think it's even better than a true 'BEFORE' because it shows how the first coat of white paint looks.  It looks bad and if you haven't painted with Chalk Paint® or Milk Paint, you may get nervous or discouraged after the first coat.  Fear not, the second coat always looks great!

IMG_4552

IMG_4553

A majority of the table is painted with PURE WHITE Chalk Paint®.  It took two coats, and then I distressed the edges.  This is an old piece and I want it to look old and full of character.

I then painted the doors and the fluted detail on the legs with TROPHY MMS Milk Paint.  After one coat of the Milk Paint, I sanded the doors, I still wanted to see the beautiful (but damaged) wood underneath.  The entire piece received one coat of clear wax and it was tucked into the little corner in my bedroom that afternoon!

IMG_4591

IMG_4594

IMG_4596

One of the many things I love about both of these paints is the fast drying time.  I can finish a piece in one day and have it decorated or functioning that evening!!  I am an instant gratification kind of girl and this paint works perfectly for refinishing a piece quickly!  Love it!

BEING THANKFUL AMONG THE MESSINESS

IMG_4563

IMG_4566

IMG_4559

I am learning to embrace the way I am 'wired'.  Creative, orderly, energetic, hard working, sympathetic and a lover of beauty.  But, I also struggle with not letting these things demand how I will live each day.  Living with people is messy, both physically and emotionally.  I can choose to love on the people around me or get frustrated because they don't allow me the time or the ability to keep things orderly, clean, organized, etc.  I can easily loose perspective!

Everywhere I look we have un-finished and half finished projects.  The chickens are crammed into a little pen with a shanty of a home.  The excavator will break ground this week for Matt's barn.  The basement looks like somebody started construction and then walked away.  And those are all such trivial complaints!   All around me friends are hearing hard medical diagnoses, family and friend's marriages are falling apart, people are loosing jobs, and I can hardly even think of the heartache happening in the Middle East.

IMG_4555

IMG_4557

But, I am learning to embrace the messiness of life and enjoy the beauty in the little moments.  Life is hard and when I start to feel overwhelmed by it all, I kiss my babies and thank God for the goodness around me!

IMG_4568

IMG_4569

IMG_4572

IMG_4575

IMG_4580

PAINTED CERAMIC TILE

Every time I talk to one of you lovely ladies (or gentlemen) who reads the blog, you always say how much you love seeing pictures of our home projects.  Matt and I both love working on our home, so it's fun for me to share pictures and projects!  We have A LOT of 'un-finished' projects, as 'one things leads to another'.  The beauty of this is that all of the sudden a lot of projects will be wrapped up at the same time ;-)

I am slowly working on making changes to our powder room.  I hope to wallpaper within the next couple of weeks and I just finished painting the ceramic floor tile last week.  I thought I would share a few photos and my thoughts on painting tile.

IMG_4513

Here is the 'BEFORE' photo.

Now, let me start by saying my approach with painting the floor tile was that if it didn't turn out, we could rip it out and replace it with new tile.  That wouldn't be ideal, but I knew it was an option.  **I may not have been so brave as to paint the floor tile if I didn't know that we could replace it if it was a total bomb.**  Also, we had some extra floor tile stored in the basement.  I tried painting and sealing several pieces before actually painting the floor.

IMG_4523

IMG_4525

IMG_4524

I began by scrubbing the floor with TSP. I let the floors completely dry and made sure they were clean before I moved onto taping the trim and plumbing fixtures.  Once everything was clean and taped, I painted the entire floor with 'Country Grey' Chalk Paint® decorative paint.  As you know, I love (and sell) Annie Sloan's paint.  I love it and use it on everything!  I have used it on concrete floors, and was curious as to how it would paint and hold up on a tile floor.

After two coats of the 'Country Grey', I cut in the alternating squares with 'Pure White'.  'Pure White' is the bright white offered in the line up of beautiful colors.  I used an artist brush to cut in.  I probably could have used tape to tape off the squares, but I didn't want to risk the tape pulling off the freshly painted grey paint.

IMG_4528

IMG_4527

I cut in (two coats) of 'Coco' Chalk Paint® over the grout lines.  I wasn't loving the look because the grout lines were not straight.  I just looked like painted tile, but not necessarily in a good way.  My sweet and well intentioned husband kept making suggestions and I knew he was trying to think of a polite way to say it look a bit tchotchke.

IMG_4544

IMG_4545

So, I took my own advice…..keep working on it until you love it!  You can always change something to make it more of what you like.  I lacquered the floor with the Annie Sloan Lacquer.  It's an awesome product.  It seals and protects and has a beautiful matte finish.  Not to mention it's water based for easy clean up!

After two coats of lacquer, I applied a light coat of dark wax.  The dark wax provided just the bit of aging and distressing I needed to make the imperfect grout lines look worn and a bit more authentic.  I kept everyone off of the floor tile during this entire process and followed the instructions on the lacquer container.  I also kept everyone off of the finished floor for a week, this little powder room gets a lot of foot traffic and I wanted to give the floor a fighting chance!  So far it looks really great and has held up very well.  And for those of you who know my husband, he is a tough critic!  He likes it and said it looks great ;-)

The last picture makes the wallpaper and floor tile color look a little off.  It actually matches perfectly and looks really good against the oak wood floor which is right outside of the bathroom door.  Hopefully I will have pictures to post soon of the new wallpaper!  Until then, I am off to paint the ceiling of the dining room and living room.  Not super fun but I love what a fresh coat of paint does to a room!!

If you have questions about painting tile, don't hesitate to shoot me an email or ask in the comments section.

xoxo~

Darci

REPURPOSING CABINET DOORS || painted signs

As you may already know, I love to use cabinet doors to hand paint signs.  I love that they are already 'cut and framed'.  No building or prep work, just paint and hang!

IMG_3057

I made these these two last summer and hung them in our covered outdoor space.  Matt used old square-head nails to hang them, they were my favorite.  When we sold our home, we sold it furnished, these two signs were included in the sale.

IMG_3060

Since we have moved, I haven't taken the time to make any new signs.  Last week a friend/client gave me some extra cabinet doors from a kitchen remodel she had done years ago.  She was keeping the doors for a future project, but was finally ready to just clean and purge.  I know that feeling well ;-)  Anyways, she sent me home with four large cabinet doors…..

IMG_4533

IMG_4539

IMG_4537

Simple little reminders.  And they just cost me an afternoon and a little bit of paint!  My kind of project!!

**For any of you who might want to make a similar sign, here are some very technical instructions {wink}…

I painted the cabinet door with two coats of French Linen {Chalk Paint®}.

Typed the wording than printed the wording in black.

Cut the words than traced over them firmly with a ball paint pin.

Used an artist brush and painted the letters with Graphite {Chalk Paint®}.

Distressed with 180 grit sandpaper.

Waxed the entire sign with clear wax.

Happy painting!!

ONE PROJECT LEADS TO ANOTHER || the joys of remodeling your own home

We are loving this sunny, warm weather!  What about you?

We have been working hard, but balancing it out with some fun play too.  Matt is just finishing up a couple bathroom remodels and starting to build the cabinetry for a client's home library, it's going to be a beauty!!  (I hope to get pictures of the bathrooms soon, they turned out really nice.) On the weekends and some evenings, we have been working on our basement.  The playroom is progressing….

IMG_4522

IMG_4519

And one thing always leads to another….Matt has to rebuild the stairs leading to the basement, which leads to new trim work, which leads to 'why not add paneling to the wall', which leads to ' let's make some changes in the powder room since you see the wall and stairs from the powder room'….we have a sickness.  Seriously.  And the worse part is, we feed off of each other!

So, now with all of my other half finished projects, I am going to start on the powder room.  Below is a quick sample board I threw together and a few pictures of the powder room as it sits now.

haneyprm copy

IMG_4513

IMG_4516

IMG_4514

We are going to cover the existing wall paper with a neutral buffalo check wallpaper, add new doors and new trim to the current built-in and then paint it blue, new lights and plumbing fixtures and I am going to attempt to paint the tile.  I am thinking a black and white check?!?  I have seen a lot of painted tile projects online, so I am going to try my hand at it!

In the mean time, I am off to make paper chains with my sweet pea!

Happy Summer!!

THE PLAYROOM || progress

So the 'to-do' list is never ending, as well as the grocery list, the 'project' list, the 'friends we would like to have over for dinner' list and so on.  I have always been a list maker.  But, shortly after we moved in February, I realized the lists had a bit too much control over my mind and my attitude.  What's with that?  That's not how I wanted to live.  I wasn't leaving room in the margins, and if someone or something came between me and crossing off an item on my list, I was snappy.  Not so fun to be around!

All of our house projects are taking a lot longer than we anticipated.  We have hit some speed bumps with the house, but that is just part of any remodeling project!  But you know what?  I have let go of the lists (not all of them ;-))) and it doesn't bother me that the house projects are taking longer.  A lot of things don't bother me like they use to.  This 'letting go' business turns out to be really good for my heart.  And my family appreciates a wife/mama who isn't so project oriented all.of.the.time.

I thought I would post a few photos of the play room.  It's taken quite a while to get to this point, and it will still take me at least another month to get it finished.  But, it's further along than it was when we moved in {wink}.

IMG_4505

IMG_4509

IMG_4508

IMG_4506

IMG_4511

There is no natural light in this space, so it's hard for an amateur like me to get decent photos!  You can see I still have a lot to do!

I am curious to see how the door knobs turn out.  They don't lock, they act as a handle to open the doors.  Once I paint the oak doors, I will wax the doors and the door knobs, I will let you know how it turns out.

The flooring all comes up soon so I am trying to paint everything now while it doesn't matter if paint gets on the floor.  In the mean time, the girls love playing in the space and I can't wait to get it finished for them.  There is something so sweet about siblings playing together, even if it only lasts for 30 seconds at a time ;-)

SUMMER GARDENING || favorite garden recipes

I starting my hand at gardening the first year Matt and I were married.  I was so happy to have my own little house.  A place where I could create a home, love on people and try my hand at 'domestic' things'.  My first attempt at gardening wasn't too successful!  But, once I realized that I was over-complicating it, things seemed to grow!  You put a seed in the dirt, water it and watch it grow.  AMAZING.

IMG_4496

IMG_4494

IMG_4493

IMG_4499

For the past 10 years, I have been gardening out of raised beds.  I am learning how I need to approach things a bit differently when gardening on a large, flat plot of dirt.

 The weeds are killing me!  Definitely using ALOT more mulch next year.  But what a sense of accomplishment to enjoy the fruits of our labor!

IMG_4497

IMG_4483

IMG_4487

Most Saturday mornings, Addilyn helps me in the garden while Savanna naps.  What a joy to listen to her chat, build mud pies, look for worms, pick fruits and veggies and just get dirty in the garden.  It takes 10 times longer to pull weeds and work when she is with me, but it is a special time for us.

I thought I would share a few of our favorite summer recipes, so far this summer.  I am trying to be creative with food we typically don't eat, but are growing in the garden {kale, cabbage, leeks, etc}.  We do a lot of grilling in the summer, and a lot of 'winging it' when it comes to summer meal planning.  I love having a few favorite recipes and then tweaking them a bit according to what I have on hand.

3eb46095b4d31e508011fecf2b9676da

warm kale salad

fff7e3366dcffe0eab7f9af31b0235a5

kale salad with warm garlic and raisin vinaigrette 

cc5e22619e753ea403dde60102ccbd34

grilled roasted corn salad

0f806f1b4c523d553ca535b95608d694

lemon basil pizza with spinach and mozzarella

28e1251b3832f65b679c93663ca9634a

pizza with summer squash and feta

d6111818012aa512d636eb448d4668f4

Mediterranean baked chicken

Enjoy!

4th of JULY || and savoring the little moments

Ever since Addilyn was born, we spend most of the Fourth of July at Cannon Beach.  It's a sweet little tradition that we look forward to every summer.  The bakery, the shops, the darling parade, the sweet smell of the ocean air, it's one of my favorite things about summer.

IMG_4461

I am definitely learning to savor the time I spend with my little family.  The girls are growing so fast.  I want to pour into them and love on them.  And honestly, some days are just hard.  I loose my patience too many times to count.  I snap and nag, and these sweet little ones love on me anyway.

We slowed down for the day.  We sat and enjoyed the parade.  We enjoyed each other's company.  We were present and it was just what this tired mama/wife needed.

IMG_4463

IMG_4458

Little Miss loves to savor everything around her.  Truly.  She inspires me to constantly look at things through a child's perspective.

IMG_4465

IMG_4455

IMG_4473

IMG_4471

After a long {but so great} day at the beach, we headed to my parent's for a BBQ and got to spend more time with family.

Sometimes I can be so overwhelmed with motherhood.

Am I spending enough time with my babies? Am I working too much? Am I teaching them enough? Am I pouring into them enough? How do I carve out time for my handsome husband?

I love my work and I love being with my kiddos at home.  It's a hard balance between loving your job and loving on your kids.  I am working on letting go of the guilt and learning to celebrate the sweet little moments.  I am finally finding peace with my work/home schedule.  Not balance, I don't know that I will ever find that, but peace.  God can fill in the spots where I am lacking, and believe me, there are plenty.

I hope you will be encouraged to let go of the guilt and fill up on God's peace!

A LITTLE GREEN || adding new {magnolia} life to an old wreath

When we moved {a few months ago} I did a lot of purging.  It felt so good.  We accumulate so much stuff!  I don't know if you are like this, but when we moved and lived out of boxes for the first few weeks, I realized how little we needed.  As we remodel our home, I am working at cleaning and organizing as we go.

As I am slowly starting to decorate some of the rooms, I am working hard at re-purposing items I already own.  It's so easy to go buy new {which I seem to do a little too often}.  I am really going to push myself to be creative with what I already own!

IMG_4415

I was cleaning the storage shed last week and just about tossed this wreath into the burn pile.  It survived the 'purge and move' but it was just taking up space and I was ready to toss it.

IMG_4416

I changed my mind set and tried to think of how I could fall in love with this little darling of a wreath.  So, I loaded the girls into the car and we ran to the store in search of some artificial flowers….which can be tough since some look we too artificial.  Especially when I didn't want to have to leave our little town of McMinnville in search of   fake greens.

IMG_4443

Believe it or not, I found some decent magnolia stems and leaves at Wal-Mart.  I directed the flower stems, and hot glued the leaves and one of the  flowers to the wreath. It gives it a little personality, and I spent $10 and less than 10 minutes on the project.

IMG_4442

We are looking at tile to resurface the fireplace.  My top two contenders are...

contemporary-tile

and

Tile

both are from Pratt and Larson.  If you haven't been to Pratt and Larson and you are thinking of adding tile in your home, it is my absolute favorite place to purchase tile.  They have a 'seconds' store which is fabulous for smaller projects.  Their tile is hand made and B.E.A.U.T.I.F.U.L!

IMG_4449

I am slowly adding accessories here and there.  I have a few bigger projects I want to tackle for the living room, but I need to steal doors from the house and a dresser that's being used to hold our tv.  So, I will wait until my new doors are installed and the basement is finished.  All in good time….at least that is what I keep telling myself ;-)

Have a lovely weekend!

MONSTER COOKIES || a sweet treat recipe

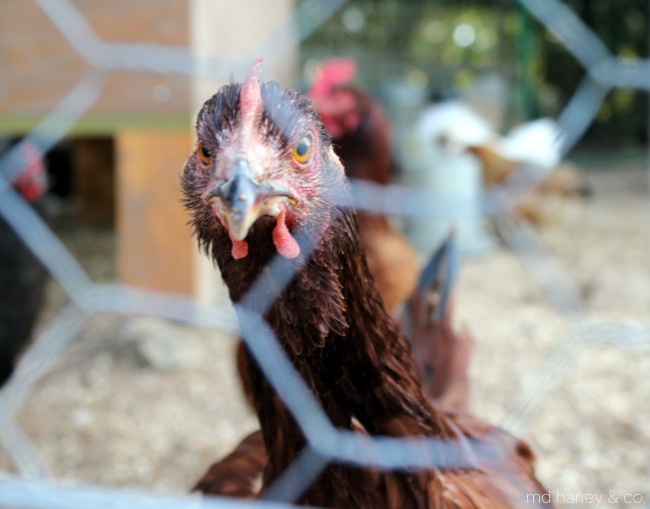
This weekend my sweet hubby pressure washed the garage roof for me.  It's a really steep roof, and it was really dirty, so it was a really big deal to me.

I love to pressure wash!  It's instant gratification....from yucky to clean, in just a matter of minutes.  Matt won't let me get up on a ladder to pressure wash {he is smart man}.  By the time he got the harness, his big ladder, and had pressure washed the roof, the afternoon was gone.  He spent his entire weekend afternoon doing a yucky chore for me.  Such a sweet man.  Anyways, I made sure to have cookies baking in the oven when he walked in the door.

IMG_4417

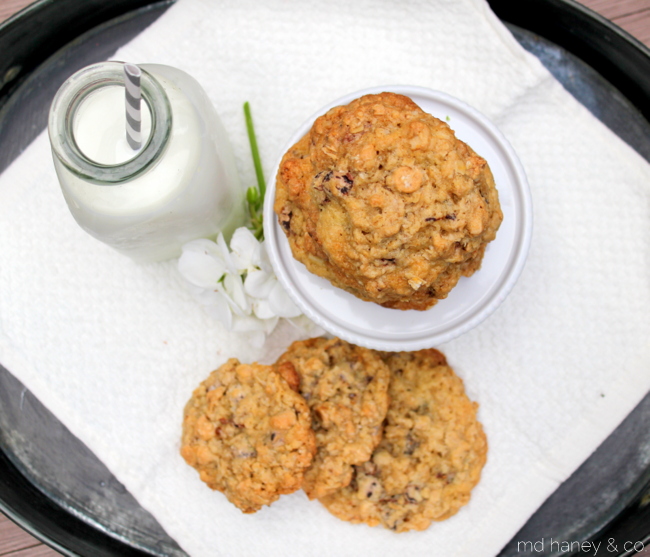
They may be our new favorite cookie.  And we LOVE our chocolate chip cookies around here.

IMG_4421

There is something so special about the yummy smells coming from the kitchen.  Bread, cookies, dinner, whatever is cooking, it just makes a home cozy.

IMG_4424

Go bake these cookies soon.  Your family, especially your sweet little babies, will love you for these!!

IMG_4438

There is something about warm, baked goodness.  It makes hearts happy and makes your home a little extra cozy and sweet.

These cookies take less than 5 minutes to make, and the oven does the rest of the work.  Make them today, and maybe give away half because they make a big batch...and who doesn't love fresh cookies?!?

IMG_4431
MONSTER COOKIE RECIPE::
Pre-heat oven to 325.
Mix 1 cup butter softened, 1 cup sugar, and 1 cup packed brown sugar.
Add 2 eggs and 1 ½ tsp vanilla, mix blend.
In separate bowl: mix 2 cups flour, 1 tsp baking soda, 1 tsp salt.
Combine all ingredients and then ADD:
1 cup choc chips, 1 cup walnuts(or pecans), 1 cup peanut butter chips, and 3 cups quick oatmeal.
Mix all ingredients by hand and drop large, rounded spoonfuls onto baking sheets.
Bake at 325 for 10-12 minutes.
Take them out before they fully cooked.
Enjoy!!

VANITY AND CHAIR || before + after

You know how there are certain things you think will just never happen to you?  For no reason, other than you just don't think they will happen.  Well, my computer crashed last week and of course the only thing I ever backed up was Quickbooks (which is good since I would be in a deep state of depression if I had to muddle my way through re-entering accounting for our personal and two business accounts....ugg.) Anyways, I am slowly getting applications re-installed on my computer and now have a fancy-smacny external hard drive attached at all times.  Lesson learned!

I had some great before + after photos of this darling vanity and chair.  Of course I lost all of those photos and haven't yet re-installed my photo editing program.  But, I still thought I would show a few 'after photos'!

IMG_4405

I picked up this darling vanity and chair at a garage sale a few weeks ago.  It was orange and had IMG_4405

I picked this darling duo at a garage sale a few weeks ago.  It was orange, brown and white.

IMG_4408

I used OLD WHITE {Chalk Paint®} for the vanity with one coat of CLEAR WAX. I sanded the edges lightly because this piece had A LOT of paint layers.  I wanted to add to the history of the piece, not make is look like it was brand new.

IMG_4406

I used LUCKETT'S GREEN {MMS MILK PAINT} without the bonding agent.  I sanded the edges and applied a CLEAR WAX.

IMG_4410

I sell fun knobs at the studio.  I snagged this darling white flower knob for a bit of a feminine touch.  Right now this cutie sits in my bedroom.  I am not sure if it will stay there, but it's the perfect spot to keep my planner and journal.

In other news, I thought I would show a few photos of the basement progress.....

IMG_4411

Matt is busy modifying the cabinet so it can house the TV.  He moved windows and doors so we are changing the layout a bit.  He is going to re-purpose the mantel {taken from a job years ago} and then paint all of the cabinet and woodwork white....

IMG_4412

It's a bit of a mess, to say the least, but we are almost ready to start cleaning up and prepping for paint {walls,ceiling and cabinetry}.  Yahoo!

IMG_4413

The play room is right off of the great room.  I am getting ready to paint the walls and then remove the flooring.  Addilyn already loves cozy-ing up in their soon to be book nook.  Love that girl!  And so fun to create a room just for the girls!  I can't wait to start getting some work done in there!

OK, I am off to work on my computer a bit more, super fun.

xoxo~Darci

BEFORE + AFTER || a few more 'AFTERS'

Matt is doing some work at a home he remodeled two years ago.  We never snapped pictures of the completed project with the landscaping in place.  I asked him to snap a few yesterday and I thought I would share them.

before

This is what the home looked like when the owners contacted us.  They brought the property for the amazing views and the established vineyard.  When they talked to us, their intention was to demolish the existing house and build brand new.  Matt explained how they could still get the house of their dreams while saving the existing home (and saving money on permits, septic, etc).

Framing

When we worked up the design for this home, there were several factors that had to be considered.  I won't bore you with those details!  But, the homeowners wanted a MODERN home with a NORTHWEST/LODGE vibe.    And, they homeowners were, and still are, the best people ever!  They are so kind and were so fun to work with!!

IMG_4384

Now the home completely functions for them and their growing family (and business).  It blends into hills and trees, yet still has some personality.

IMG_4381

This is the new front door and entry.  Looks a little different, right?

IMG_4386

The back side of the home has more of a MODERN look and captures the AMAZING valley and vineyard views.  They are just getting ready to add stone to the bottom level of concrete and that will look really sharp.

IMG_4383

One of these days I will post photos of the interior!

In the mean time, enjoy your week!  I am hoping to wrap up a lot of 'half finished' projects, both for myself and for clients.  I should have a lot of 'AFTER' photos to bomb you with in the next few weeks ;-)