FIRST FRIDAY :: bring your own furniture

A few weeks ago I was chatting with a sweet friend of mine.  {She paints furniture and re-purposes old pieces into little gems.  We met this Spring.....she buys Chalk Paint® from me, and she has become a dear friend! I am so happy our path's crossed!!!} Anyways, she threw out the idea of me opening up the work room to the public.  A space where local people can come create.  I loved it!  Below are the details..... IMG_3362

FIRST FRIDAY || the details

What :: bring your furniture/lamps/frames {whatever you want to paint} and use our work room to paint and create!

When :: the first friday of every month

Time :: 1pm-4pm, come and go as you please during that time period

Where :: the design studio, 543 west main street, carlton

Cost :: $10

Extra Details :: bring your own Chalk Paint® and wax, or purchase when you come.  The work room space, brushes, rags, and tools will be available for you to use.  I will also be around to answer questions!  Not to mention we will have hot drinks and tasty treats ;-)  No need to RSVP, just show up!

IMG_2987

Hope to see you Friday!

OH CHRISTMAS TREE

Matt is working on a remodel for a sweet couple outside of Dayton.  After his first meeting with them at their property {they just bought the home}, Matt started to convince me that we needed acreage. {wink}  Their setting is really neat....private and surrounded by farms.  The front of their property is full of Christmas trees.....

IMG_3454

And they were gracious enough to allow us to cut our tree {s} from their property.  Friday {after Thanksgiving} we headed over to pick out our Christmas tree, Addilyn even got her own darling little tree for her bedroom.

IMG_3459

Aren't those trees beautiful?

IMG_3455

Now, having grown up on a Christmas tree farm, it was never a big deal for our family to get a tree.  My mom would usually just grab one, while my dad was gone at work.

No big deal.

But, since our little family of 4 doesn't live on a Christmas tree farm, it's fun to make a big deal of it!  You know....loud Christmas music, hot chocolate and cookies......

IMG_3477

Can you believe it has taken us over 4 days to decorate our tree?  And we still are not done!  See that rogue baby under the tree?  She is one of the reasons it takes so long to decorate ;-)

IMG_3478

And there she is again, under the tree skirt.....

IMG_3482

Addilyn and I made a paper chain for the tree.  A 10' tree requires a lot of paper chain!!

IMG_3484

Our beautiful tree provided extra fresh greens for a little decorating around the house.

IMG_3483

I actually snagged the cedar from our of our Cedar trees.  I love fresh cedar!!

IMG_3489

A wood crate filled with greens {and a few magnolia sprigs}, flameless candles and a white bird.

IMG_3485

A basket filled with greens, books and birds for our outside dining table.

IMG_3497

Window boxes filled with greens and ornaments {on Matt's wood shop}.

IMG_3492

And a few greens for the front porch!

I have a feeling it may take me all month to decorate for Christmas.....but that is part of the fun!!

PUMPKIN PIE ICE CREAM :: a sweet {FALL} treat + some gratitude

So, I have two things for you on this fine Tuesday afternoon....

#1~ the best pumpkin pie ice cream EVER,

and #2 ~ a little note on gratitude.

I found a great blog via Pinterest.  I pinned the kitchen, and then enjoying looking through the blog.  She just wrote a post titled '20 little attitudes for gratitude.'   And since I am really working towards focusing on being thankful this holiday season, I was inspired to write my own 20-little-attitudes-for-gratitude.  Maybe it will inspire you to write your own list?!?


20 Little Attitudes of Gratitude

  1. Mind your manners. Say please, thank you and excuse me.
  2. Smile when you see your friends and family, look them in the eyes when you are talking.
  3. Always take the time to listen.
  4. Notice when others do kind things for you, show gratitude by action or words.
  5. Gives hugs and kisses freely through out the day.
  6. Extend grace.
  7. Don’t worry about tomorrow. No ounce of worry can change a thing about tomorrow.  Be grateful for right now.
  8. Create gratitude journals to keep track of daily blessings.
  9. Encourage strangers with a smile.
  10. Leave love notes in unexpected places like lunch boxes and under pillows.
  11. Encourage someone with a compliment.
  12. Instead of complaining, verbalize what you are thankful for.
  13. Bake extra of everything, strive to always give away a freshly baked treat.
  14. Remember to thank God for blessings each day.
  15. Surprise your family (or friends) with little gifts or treats to show you thought of them.
  16. No grumbling about minor annoyances around the house.
  17. Do special things to cherish time with your family.
  18. Reflect on happy memories regularly. Make inspiration boards of special times.
  19. Always remember, no one is perfect, have grace with yourself.
  20. Be grateful you have a house to clean.

“Gratitude unlocks the fullness of life. It turns what we have into enough, and more.” –Melodie Beatty

IMG_3439

One of the many things I am grateful for, is my awesome ice cream maker.  It is sooooo easy to make ice cream with this little guy.  Seriously.  It's the best!

This ice cream is really rich.  I think it would also make a great ice cream pie filling....maybe a graham cracker crust?  I will try it and let you know!

IMG_3441

Pumpkin Pie Ice Cream

Ingredients:

  • 1 can (15 ounces) pure pumpkin puree or 1-3/4 cups homemade cooked pumpkin puree, well-draiined
  • 1-1/2 cups heavy whipping cream
  • 1/2 cup brown sugar
  • 1/2 teaspoon salt
  • 1 teaspoon ground cinnamon
  • 1/4 teaspoon ground ginger
  • 1/4 teaspoon ground nutmeg
  • 1/4 teaspoon ground cloves
Place pumpkin puree into a strainer lined with cheesecloth for 15 minutes to drain any excess water.Gently heat heavy cream and brown sugar until small bubbles form around the edge of the pan, stirring often. Add pumpkin puree and spices.  Do not boil. Remove from heat and whisk until the sugar is dissolved. Let cool to room temperature.

Pour mixture into ice cream machine as per your machine's instructions.

Enjoy!!

CINNAMON + VANILLA CHIP SCONES :: a sweet breakfast recipe

IMG_3426

This morning I asked Addilyn what she wanted for breakfast.

'Scones, eggs and a little bacon'.

Awwww, a girl after my own heart.

I LOVE making breakfast on the weekends.  And even more than that, I love that my little sweet pea enjoys helping in the kitchen.  My vote was for pumpkin-chocolate chip scones, but I was vetoed, the  cinnamon-vanilla chip scones won,   2-1.  Fair and square.

IMG_3429

These scones have just the right amount of spice and sweetness.  A little dash of allspice makes this a "fall/winter" scone in my book.

IMG_3430

I was tempted to make a spiced-vanilla glaze, but I stuck with the good -ole powdered sugar glaze.  Next time, I am going to add some vanilla bean and spices to the glaze.   I will let you know how that turns out ;-)

Try making these soon, your family will think you are the greatest!

IMG_3426

Cinnamon + Vanilla Chip Scones

2 cups flour

2 teaspoons baking powder

1/2 teaspoon baking soda

1/2 teaspoon cinnamon

pinch of salt

pinch of allspice

1 stick of butter, cut into small pieces

3/4 cup white, vanilla chips

1/2-3/4 whole milk

1 egg, for egg wash

for glaze: 1 tablespoon melted butter, add 1-2 cups of powdered sugar and 1 tablespoon milk.

Sift together the dry ingredients and work the butter in until the mixture resembles cornmeal. Add in the chips and toss together. Slowly add the milk until the dough just comes together. Roll the dough out into a square that is approximately 1 inch thick. Cut into triangles and brush with egg wash. Bake at 400 degrees for 15 minutes. Let scones cool completely and then drizzle with glaze.

Enjoy!!

A SEASON OF THANKFULNESS

Wednesday night I was hit hard with a stomach bug.  Oh it was bad.  Maybe worse than childbirth?!?  Not sure.  Regardless, it's been several years since I was so sick.  As I laid in bed Wednesday night, I prayed that my little ones wouldn't get sick.

They didn't.

And I was reminded once again that I have so much to be thankful for!

sava2

Thankful that I get to squeeze this face every.single.day.

addi2

Thankful that I get to tuck this one into bed every.single.night.

IMG_3415

Thankful for the luxury of grocery shopping and the ability to fill my refrigerator on a regular basis.

IMG_3406

Thankful for a little chunk of earth to grow a garden.....even in the winter.

IMG_3409

Thankful for a child healthy enough to play outside.

IMG_3422

The door leading to our garage is right next to our kitchen.  I painted part of the door with Chalk Board paint, it's a fun place to right messages and notes.

Every day for the month of November, I have seen this reminder on my kitchen door ~ 'today we are thankful for....'

I often forget that this is the season of intentional gratefulness.  I sometimes have to stop myself in my busy tracks and say thank you.  I take so much for granted.  Motherhood has taught me to be intentional.  To stop and pay attention.    To notice the simple joys in life, because I might not have tomorrow.... 

HOLIDAY SCHEDULE & THE COOKIE EXCHANGE :: updates

Hello friends!

Below is an updated HOLIDAY SCHEDULE for happenings at the design studio.  I will be around this week and next week for appointments if you would like to stock up on Chalk Paint®!  The studio won't be open this Friday {11/22} or next Friday {11/28}, but just call/text/email and I will gladly meet you there!

winterschedule copy

So, the upcoming COOKIE EXCHANGE is going to be a lot of fun!!  I know the holidays can get busy, but I thought this would be a fun way to get together with friends and neighbors.

img_plan-cookie-exchange_1

Here are the details ~

DATE ::  Sunday, December 8th, 2013

TIME ::  6:30-7:30

LOCATION  ::  543 West Main Street, Carlton {the design studio/cottage}

WHAT TO BRING  ::  3 dozen cookies ~ 1 dozen to share and 2 dozen to exchange

I will have drinks, appetizers, a packaging station for your sweet treats and a warm, cozy fire ;-)

Hope you can come!!

SNAP AND SHARE :: a fun Chalk Paint® contest

Pre-contest Promo  

Annie Sloan has come up with a fun and creative contest!  They are asking customers to take their photo in front of their local stockist Chalk Paint® display, submit the photo online, and then encourage friends and family members to vote.  The wining contestant wins $1500 worth of Annie Sloan product.  How fun is that?!?

Can you imagine $1500 worth of product?!?  So fun!!

If you want to participate, you can always call or email and I will be happy to meet you at the shop.  I will even take your picture for you ;-)

OK, I am off to go bake some cupcakes with my little helper,  and cheer on the Trojans!!  Go USC!!

Have a great weekend!!

THANKSGIVING DECORATING :: some inspiration

Don't you just love this time of year?!?  I do!  The hustle and bustle, the reasons to celebrate with friends and family, and a time to reflect on all of our abundant blessings!

I am always amazed at how Thanksgiving seems to sneak up on me.  Especially now with little ones in tow!!  We still don't have our Thanksgiving plans finalized, but I thought I would post a few of my favorite inspiring Fall/Thanksgiving spaces and decorating ideas!

1-thanksgiving-table-setting-how-to-set-a-formal-place-setting-diagram

 source

FallDecor-PumpkinTabletopDisplay_zpsf815a286

source

FallDecor-WhiteandBlueGrayPumpkins_zpsb30cb968

source

dreamywhitesfalldecorating_zpsa3d0712f

source

pumpkintopiaries_zpsbe490f44

source

stonegablewhitepumpkins_zpsa509e401

source

So pretty!

Have a great weekend!!  Oh and I hope to have some BEFORE + AFTER photos for you next week!

xoxo~Darci

WOOD FLOORS :: the great debate

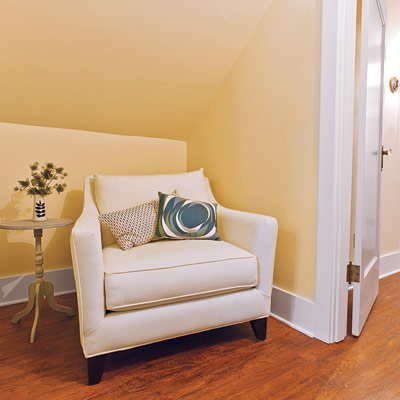
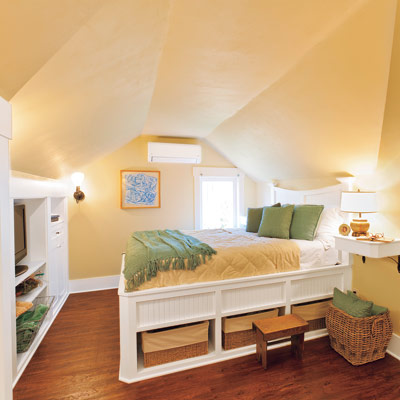
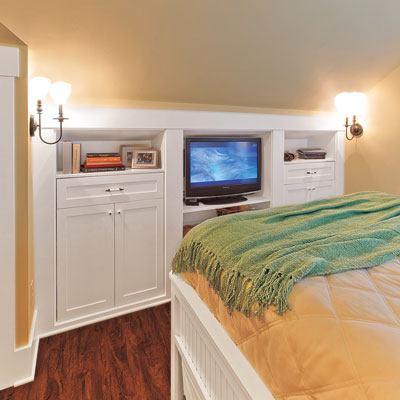
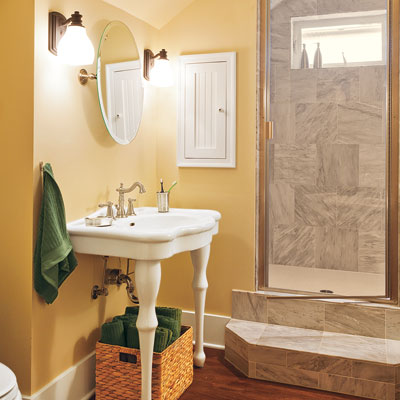
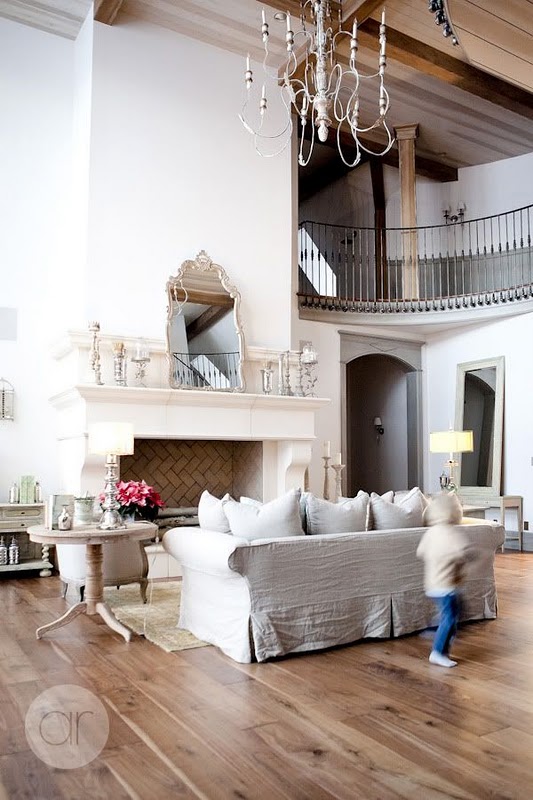
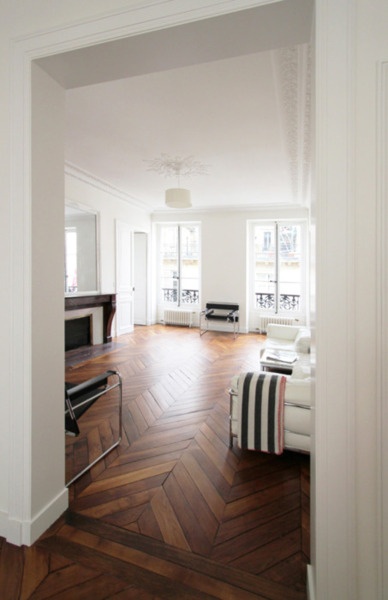
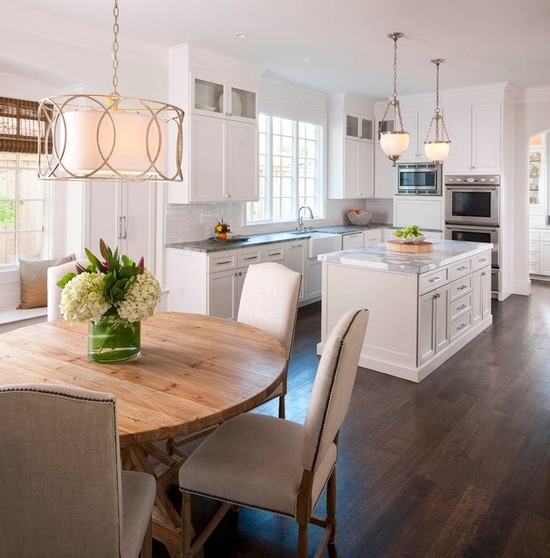
I feel like more and more of our clients are choosing wood floors for their remodels/new home.  I thought I would start working on a few 'resource' posts.  One place were you can find resources, tips and ideas for your home!

The biggest question we get asked {regarding wood floors}.....Are pre-finished floors right for us?

2080612976Horizontal_Hickory_Wave_Tofino_5_3_16_S_low

Pre-finished floors, like any product, have PROS and CONS.  Let's start with the PROS!

1c06c72d88bdf7b9b8b80c4759e6ab59

PROS ::

It's easy to install.  There are not numerous steps involved with pre-finished floors like there are with unfinished wood floors.

It's lasts, and looks great for a long time.  Most pre-finished floors have factory applied UV-cured finishes and can be sanded and refinished multiple times.  To refinish an older floor, there must be at least 1/8 inch left between the top of the boards and the tongue.

dark hardwoods

CONS ::

It can still scratch and dent.  You can conceal most minor scratches with a manufacture's touch up kit, but for major scratches/dents/issues, you will need to refinish.

It's more expensive than carpet, most vinyls, laminate and most ceramic tiles.  However, it is an easier DIY project than installing tile tile or carpet!

It's affected by weather.  All wood expands and contracts with changes in moisture.  Boards may cup in high humidity and gap during dry weather.  Solid wood shouldn't be installed below grade, and you really want to think twice before installing it in bathrooms or laundry areas.

e37f5373f7e50acb514438a03d94f7f6

What's the difference between unfinished hard wood, engineered wood and laminate?

ENGINEERED WOOD 

It's looks like solid wood, but it is made up of wood veneers glued together and topped with a factory finish.  Engineered wood is great for DIYers, but the durabiltiy can vary depending on how thick the top veneer is.  Typcially, engirneered wood can withstand 2-3 sandings, where hard wood floors can be refinished many times.  The cost ranges from $2-$12 per square foot.

UNFINISHED HARD WOOD

It's solid wood.  Bare wood strips and planks are sanded, usually stained and topped with protective coasts after they have been installed.   The entire process takes several days and is best handled by a professional.  The great thing about hardwood floors is that when it's time to refinish, the floors can be refinished many times.  Bare wood typically ranges from $2-$12 per square foot, plus installation/labor.

LAMINATE

It's made of a sheet of fiberboard topped with a high resolution wood grain image on paper and coated with melamine.  It typically has a texture to help achieve a 'wood floor' look.  The clear top coat resists scratches and stains, but this type of floor can not be refinished.  You may also notice a hollow sound when you walk on the floor, laminate is a 'floating floor' and it's also thin.  Laminate is very DIY friendly.  It's also about half the cost of wood, ranging from $1-$6 per square foot.

4256b2fac22970cbb79cd5f3b31def9a

To estimate the cost of a new pre-finished wood floor, measure the room's square footage and add a percentage for cuts and waste {typically 5% for strip and 7% for planks}. Multiply that by the price per square foot.

dark hardwood floors ellen grasso and sons

Hope this helps some of you who are thinking of different flooring options!  I will be sure to do a few follow up posts soon!

xoxo~Darci

Image Sources :: , 2, 3, 4, 5, 6

HONEY WHOLE WHEAT BREAD :: a bread recipe

When the seasons change, and the weather turns cold, there is nothing better than warm, home made bread...right out of the oven.  It's my favorite.  My family's too!

IMG_3394

This honey whole wheat bread recipe is so easy.  If you are intimidated by yeast, don't be!  Once you start baking with it, you will get more comfortable with it....I promise!  {Not to say you won't have total 'flops', at least I seem to 75% of the time ;-}  Try this, your family will love you for it!!

IMG_3392

HONEY WHOLE WHEAT BREAD

Ingredients::

2 cups warm water

1/3 c. honey

1/3 c. canola oil

1 T. yeast

1 t. salt

2 c. whole wheat flour

5 (or so) cups of all purpose flour  (add until the dough pulls away from the sides and is no longer sticky).

Directions ::

Grease (I use butter) two loaf pans.

Pour 2 cups of warm water into your mixing bowl.  Add the oil THEN the honey.  Use the same liquid measuring cup and your honey will come right out of the cup.  Start your mixer on low.  Then add yeast, salt and 2 cups of whole wheat flour.  When those are incorporated, start adding the all purpose flour until  the dough pulls away from the sides of the bowl and is no longer sticky to the touch.  It usually takes about 5 cups.  

When the dough is just right, turn it onto a clean, floured surface and knead it for 5-10 min, or use the dough hook  of your mixer.  The longer you need it the more dense it becomes.  I knead this bread (on low, in the KitchenAid mixer) for 7-8 minutes.  Put some oil into the bottom of the mixing bowl and then add the dough back to the bowl to rise.

 My oven has a proofing setting for the rising phase but you could also heat your oven to 200 when you begin and then just turn it off so that the oven is a little warm but not hot.  I place a warm towel over the bowl and let it rise until it’s doubled in size.  It usually takes 45 minutes to an hour in the oven.   After it’s doubled, divide it into two loaves, shaping it into loaves by tucking the sides under, and then place into greased loaf pans.  Let rise again until it’s just to the top of the pans.  Bake at 375 for 25-30 min.

***This recipe makes two loaves so it’s perfect for sharing.  If I don't give away my second loaf, I wrap it in plastic wrap, then pop it into a freezer bag.  It's stays fresh in the freezer for quite a while, although mine never stays in the freezer longer than 2 weeks.**

recipe adapted from here

COME PAINT :: first Friday of every month

I am really enjoying being 'open' at the design studio on Fridays!  The girls and I are there every Friday from 9am-6pm.

I have a few exciting things up my sleeve for the studio.  The first one :: I have decided to open up the back work room to you....my lovely customers!

IMG_3362

Yep, a time where you can bring your project{s}, ask questions, learn tips and paint away.  I have found that sometimes it's just easier to work on a project at a designated time and/or location.

IMG_2987

I am hoping that by making the work room available to you guys, you will be inspired to create!!

IMG_2986

Here are the details....

BRING YOUR PROJECT || EVERY FIRST FRIDAY

WHEN ||  every first Friday of the month

TIME  ||  open~come any time from 1pm-4pm

WHERE  ||  543 West Main Street, the work room

WHAT  ||  Bring your own project to work on.  Use our space, brushes and rags. I will be available {in between customers} to answer questions and offer tips.

COST ||  $10.  Feel free to bring you own Chalk Paint® and wax, or you can purchase it when you arrive. We won't have our opened paints and waxes available to use, as we do with our classes.

** no need to rsvp, just come and go at your convenience during the designated hours**

I truly value your input and ideas.  I want the studio to serve as a place of creativity and inspiration!  Please feel free to throw out ideas and thoughts on what you would like to see offered!!

PUMPKIN DUMP CAKE :: a sweet treat recipe

IMG_3350

I thought I would share one of the easiest dessert recipes E.V.E.R.  Most of the desserts I make are easy, I don't do complicated!  Takes too much time, and I would rather be spending my time eating the desserts instead of baking them ;-)

If you have never heard of dump cake before, it was a recipe that became popular in the 80′s by church cookbooks and potlucks.  You basically dump a few cans of fruit in a pan, cover it with cake mix and butter and bake it.

This is the same idea, only I used pumpkin instead of fruit!

IMG_3348

Pumpkin Dump Cake

 Ingredients
  • 1 15 oz can Pumpkin Puree
  • 1 10 oz can Evaporated Milk
  • 1 cup light brown sugar
  • 3 eggs
  • 3 tsp pumpkin pie spice
  • 1 box yellow cake mix
  • 1 cup (2 sticks) butter melted
  • 1 cup coarsely crushed graham crackers or pecans
  • 1/2 cup toffee bits (optional)

How to Make

  1. Preheat oven to 350
  2. Spray a 9×13 baking pan lightly with cooking/baking spray
  3. In a large bowl combine the pumpkin, evaporated milk, sugar, eggs and pumpkin pie spice. Stir to combine.
  4. Pour into your prepared pan.
  5. Sprinkle your entire box of cake mix on top, followed by your nuts or graham crackers and toffee chips.
  6. Pour your melted butter evenly on top.
  7. Bake for 45-50 minutes until center is set and edges are lightly browned.

** serve with sweetened whip cream or ice cream, I served mine with my vanilla honey ice cream **

THE DESIGN STUDIO :: a few Fall touches

I have added a few Fall touches to the cottage, and am just now getting around to posting a few photos.

I would categorize my holiday decorating style as simple.

IMG_3330

I found these 'carve-able pumpkins' at Joanne's Fabric.  They were bright orange, and I wanted something a little more muted.  I slapped on two coats of 'VERSAILLES' Chalk Paint®, buffed them with wax, and called it good.  I think it took less than 30 minutes!

IMG_3328

They sit proudly on the kitchen countertop, next to the sink.

IMG_3343

Last winter we painted the fir hutch 'CHATEAU GREY' {Chalk Paint®}.  It adds a warm touch to the room and looks great with the bold colors of the paint samples.

IMG_3344

This winter I plan on painting the inside of the hutch.  I can't decide if I should add some fun color, or just stick with the 'CHATEAU GREY'.

IMG_3342

I did have cute little pumpkins scattered on this trunk, but I just realized my little helper must have moved them ;-)

1021_514321011998048_1383990635_n

And a few Fall touches outside!

Now I am off to go bake a pumpkin dump cake!  I will post the recipe and photos tomorrow!!

xoxo~Darci

EASY HALLOWEEN NIGHT MENU :: easy home made dinner

IMG_2674.jpg

I love to host parties and have friends and family over for any occasion.  Sometimes I have the time to prepare food and decorate, other times I don't.  I always want my focus to be on just spending time together, now how perfect everything looks or tastes!  I have found the more complicated I make food and entertaining, the more I am stressed and tired, and the food typically doesn't even turn out that good! We are having a few friends over for a quick Halloween dinner.  We all have littles to take trick-or-treating, so it will be a quick dinner, a stop in between the Halloween festivities!

I know we all have our 'go-to' easy-peasy meals, but I thought I would share a couple of my favorites!  These dishes have to pass the test of easy, tasty and can-be-made-in-advance!

Here is our Halloween menu ::

home made HERBED RICOTTA with pita chips

IMG_2673

This home made herbed ricotta is so good....and so easy!!!  {I use the ricotta for the lasagna.}

EASY LASAGNA

Easy-Lasagna

I love this lasagna because it is easy and versatile.  I can make it the night before and just keep it in the refrigerator until an hour before dinner!

CRANBERRY & AVOCADO SALAD

Cranberry-Almond-Salad2

 PW CHEESY GARLIC BREAD {half with garlic and half without garlic for the kiddos}

3321945944_bafae2f8ac_o

And for drinks :: HOT COCOA and HOT APPLE CIDER

I figure we won't have any dessert since we will probably be eating too much candy ;-)

I hope have a great Halloween!!

THE 'M' BEHIND MD HANEY & CO.

2013familyphoto
You all know my sweet husband is the 'M' of MD HANEY & CO.  The master contractor behind the studio's constant renovations.  We have been married for 11 years and we have worked side by side for 10 of those years.
Our first project together was a darling little home in McMinnville.  An old bungalow;  and we added a master suite.  That led to building a new home in the historic part of McMinnville.  It was a new home, built to look old.  Full of character and style.....our favorite!  It was a fantastic example of Matts' technical building abilities, creativities, and eye for design.
We have been so blessed to be able to 'do what we love'.  There are hard days, challenging projects, and really long to-do lists.
But, Matt is able to do what he loves,  I am able to do what I love, and we work hard at supporting each other.
We have some exciting things in the 'works', and I can't wait to see what the future holds!
Thank you friends, family, customers and clients for being so supportive!!
girlsmattbw

NOW OFFERING :: balloons

IMG_3315

 I think it's safe to say that we all love a good party!

I have been slowly adding party and entertaining items to the shop.  Growing a collection of items that I use, and want to make readily available for all of you!

IMG_3319

With the various events I have hosted and coordinated, I have always had a problem getting balloons.  I can't find the color or shape I want, and I am limited to how many I can purchase {because of the helium shortage}.

IMG_3316

So, I just decided to purchase balloons in bulk and lease a helium tank.  Now I always have access to balloons!!

You can also purchase them for your next event!!  So fun right?!?  I will have more details to come.  In the mean time, we are enjoying balloons for every occasion ;-)

OLIVE OIL PUMPKIN BREAD :: a quick bread recipe

pumpkin bread  

I am still baking anything and everything that calls for pumpkin!

I LOVE pumpkin and find I really only bake/cook with it in the Fall.

I thought I would share an easy olive oil pumpkin bread recipe I found online.  It's tasty and I love that it uses olive oil and honey, instead of vegetable oil and sugar.  **Full discloser, I added a powered sugar glaze and it adds just a perfect extra hint of sweetness.  A cream cheese frosting would be good too!**

Pumpkin Bread Recipe

INGREDIENTS

  • 1 1/2 cups flour
  • 1/2 teaspoon of salt
  • 1 cup honey
  • 1 teaspoon baking soda
  • 1 cup  pumpkin purée*
  • 1/2 cup olive oil
  • 2 eggs, beaten
  • 1/4 cup water
  • 1/2 teaspoon nutmeg
  • 1/2 teaspoon cinnamon
  • 1/2 teaspoon allspice
  • 1/2 cup  chopped walnuts or pecans

* To make pumpkin purée, cut a pumpkin in half, scoop out the seeds and stringy stuff, lie face down on a foil or Silpat lined baking sheet. Bake at 350°F until soft, about 45 min to an hour. Cool, scoop out the flesh. Freeze whatever you don't use for future use. Or, if you are working with pumpkin pieces, roast or boil them until tender, then remove and discard the skin.

METHOD

1 Preheat oven to 350°F. Sift together the flour, salt, and baking soda.

2 Mix the pumpkin, oil, eggs, 1/4 cup of water, honey and spices together, then combine with the dry ingredients, but do not mix too thoroughly. Stir in the nuts.

3 Pour into a well-buttered 9x5x3 inch loaf pan. Bake 50-60 minutes until a thin skewer poked in the very center of the loaf comes out clean. Turn out of the pan and let cool on a rack.

Can easily double the recipe.

Can easily add a powered sugar glaze or cream cheese frosting to add extra sweetness.

BEFORE + AFTER :: our cottage {the magazine photos}

I thought I would post a few before + after photos of our little cottage on Main Street.  This is what the little cottage looked like when we bought it :: over-grown, in need of repair, but really sweet bones.

232323232fp53243>nu=34568>289>25;456837-236ot1lsi

The back of the house had a funky addition.

We tore it down because we just couldn't figure a good use for the space.

232323232fp53269>nu=3247>259>6;7>WSNRCG=34-6<-62<7327nu0mrj

The upstairs attic had drywall and carpet, but the ceilings were too low for the space to be livable.  We ripped everything down to the studs.

232323232fp53258>nu=3247>259>6;7>WSNRCG=34-7324;83327nu0mrj

Matt had to install load bearing beams downstairs to gain the extra height needed to make the upstairs space livable.

232323232fp53269>nu=3247>259>6;7>WSNRCG=34-7536567327nu0mrj

Four years later, our little cottage was featured on the cover of This Old House magazine.

Mar12-cover

They also did a separate article on our upstairs space.

We turned half of the upstairs space into an office, and the other half into a master suite.

04-attic-remodel

Matt built shelves, file drawers and countertops to fit the space perfectly.

02-attic-remodel

The flooring is a vinyl flooring.

It was in-expensive, easy to install and easy to clean.  I loved it!

03-attic-remodel

We had this funny little space at the top of the stairs, we turned it into a little sitting area.

00-attic-remodel

Matt built everything for the master suite.

The stairs of the house are narrow, and we knew we couldn't get furniture up the stairs.  He sure comes in handy ;-)

05-attic-remodel

The bed is built in and has basket storage underneath.

We really utilized every inch of space upstairs.  Space wasn't a luxury we had with this house, so we had to get creative!

06-attic-remodel

We were able to fit a walk in shower, two sinks, a toilet, two built-in medicine cabinets and a floor to ceiling linen closet all in this little space.

***

I have more pictures to post of the rest of the house, but I will have to add those later as I hear a sweet little toddler is just waking up from her nap!

In the mean time, have a lovely day!!


NEXT CHALK PAINT® CLASS :: and a few pictures from this weekend

I hope you had a lovely weekend.  The weather here was A.M.A.Z.I.N.G!  Love Fall!!

Just a quick note to say that the next Chalk Paint® {bring your own piece} class is Monday, November 4th.

IMG_2988

These classes are a lot of fun!  You get to use our supplies, learn tips and tricks for working with Chalk Paint® {and the wax} and you go home with your own little finished piece of furniture!

I have quite a few 'maybes' for this class, if it fills up fast, I will offer another one towards the end of November.

And, since it's pretty boring to just post about an upcoming class, I thought I would share a few photos from this weekend....

IMG_3265

We skipped church Sunday morning {Addilyn had a little cold} and headed up to Saint Honore Bakery.  Have you been there???  It's our favorite!!

IMG_3267

Addilyn LOVES pastries....but she REALLY LOVES her daddy.

Sweet.

IMG_3272

We also like to go walking around the lake {Lake Oswego} and the fountains.

Costco was also on our list.

We nailed it!

They had good samples and we left with a cart full of ridiculous groceries and spending way too much money.  As soon as we got the car loaded with food, and girls buckled in, Addilyn informed us she needed to go potty.

Oh boy.

Have a great week friends!!

PUMPKIN SPICE MUFFINS :: a recipe

I thought I would share a scrumptious pumpkin spice muffin recipe.  Last week I made some to-die-for pumpkin + molasses cookies.  Seriously, I couldn't stop eating them!!  I will post the recipe, I just didn't get any photos, but I promise, you will want to eat the entire batch!!

Anyways, I had some left over pumping puree to use up.  A little breakfast treat sounded good, so I made some pumpkin spice muffins.

IMG_3258

Pumpkin Muffins from Smitten Kitchen

1 1/2 cups all-purpose flour 1 teaspoon baking powder 1 cup canned solid-pack pumpkin (from a 15 ounce can) 1/3 cup vegetable oil 2 large eggs 1 teaspoon pumpkin-pie spice 1 1/4 cups plus 1 tablespoon sugar 1/2 teaspoon baking soda 1/2 teaspoon salt 1 teaspoon cinnamon

Put oven in middle position and preheat oven to 350°F. Put liners in muffin cups.

Whisk together pumpkin, oil, eggs, pumpkin pie spice, 1 1/4 cups sugar, baking soda, and salt in a large bowl until smooth, then whisk in flour mixture until just combined.

Stir together cinnamon and remaining 1 tablespoon sugar in another bowl.

Divide batter among muffin cups (each should be about three-fourths full), then sprinkle tops with cinnamon-sugar mixture. Bake until puffed and golden brown and wooden pick or skewer inserted into the center of a muffin comes out clean, 25 to 30 minutes.

Cool in pan on a rack five minutes, then transfer muffins from pan to rack and cool to warm or room temperature.

pumpkin muffin

Addilyn loves to help in the kitchen.  She picked out the muffin liners ;-) and she takes her role of taste testing very seriously.  Don't step between the girl and her muffin batter {or cookie dough, or cake batter or anything with butter and sugar}.

And on a separate note, I am loving my 'FALL' sign that I got from Anne.

Isn't it darling?

We did a little bartering after the SALE and I was thrilled to come home with this ;-)

sign

Now go bake some muffins....your family will love you for it!!

xoxo~Darci