FALL VINTAGE SALE :: a few pics

On Friday, the Queen Bee {Emily and Anne} and I hosted a Fall Sale.  It was A.LOT.OF.WORK but so much fun!!  It was too crazy busy Friday night to snap any pictures of the actual sale, or any pictures with us girls.  But, I did snap a few photos as we were setting up....

IMG_3253

We lucked out with AMAZING Fall weather.  Especially considering the nasty windy and rainy weather we had for the 10 days leading up to the sale!!

IMG_3252

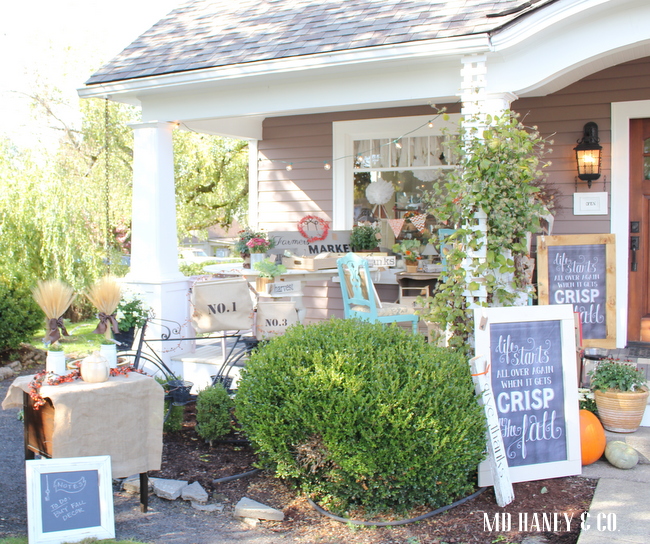
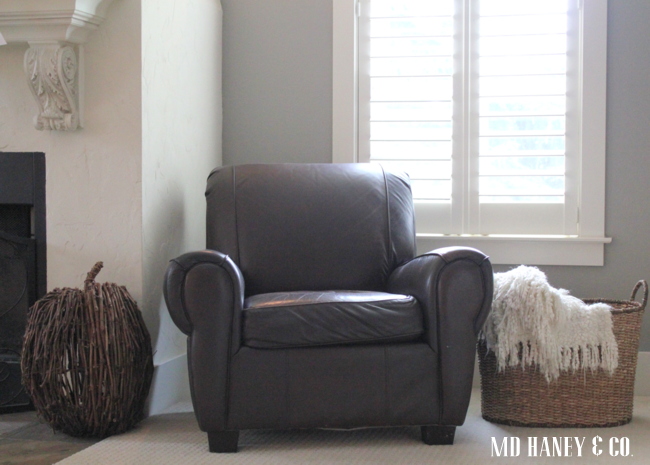
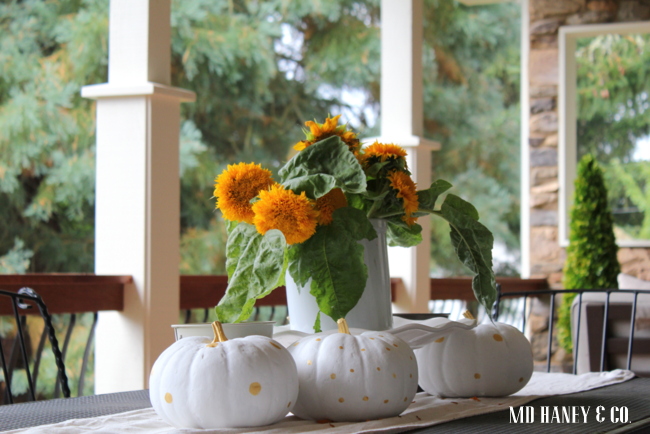
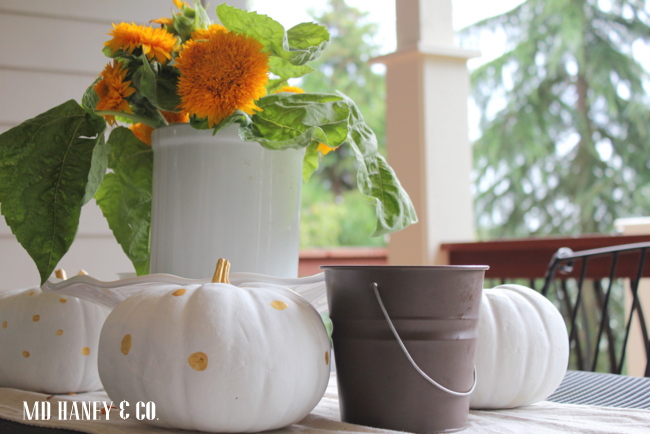
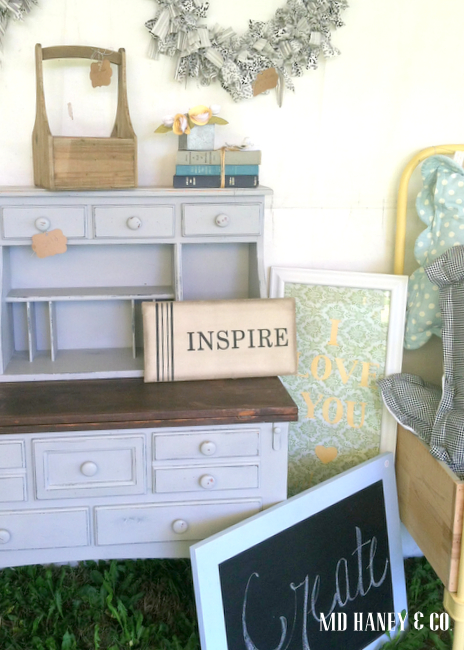
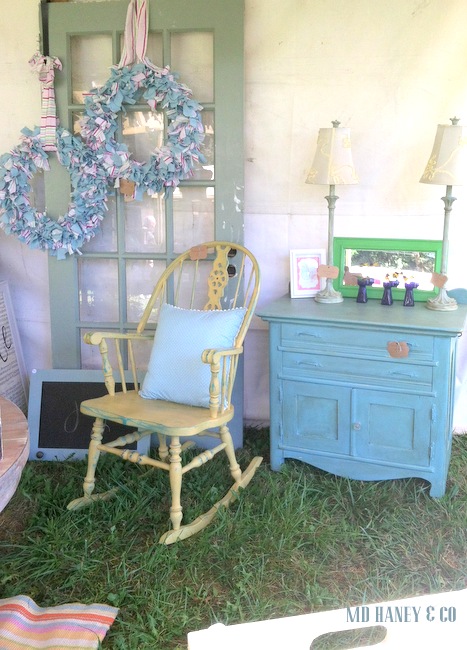
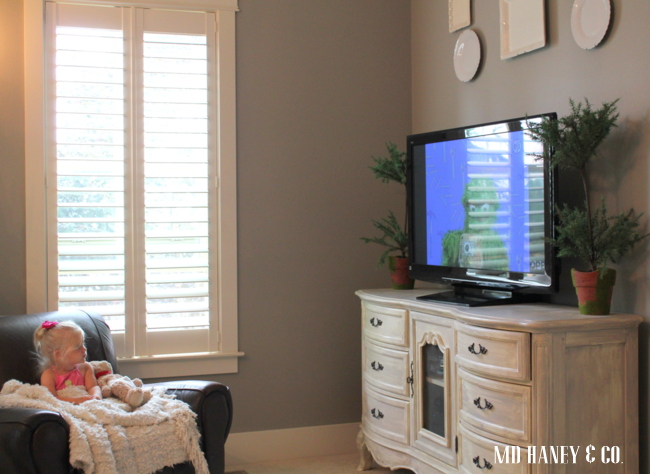
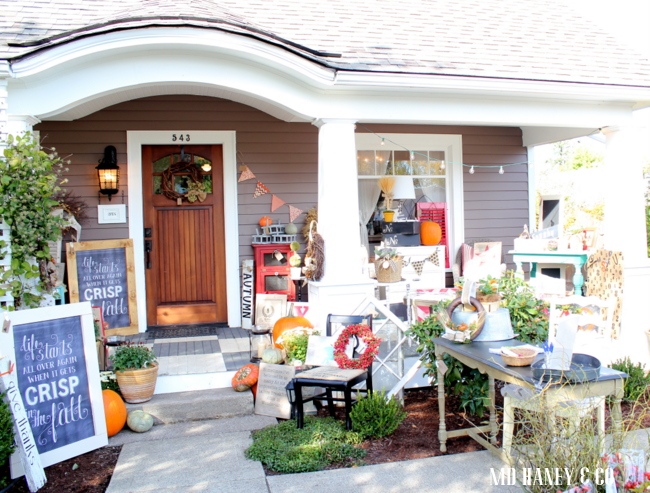
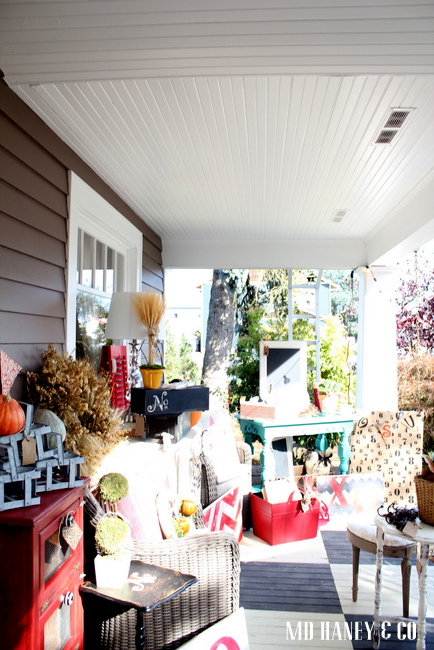
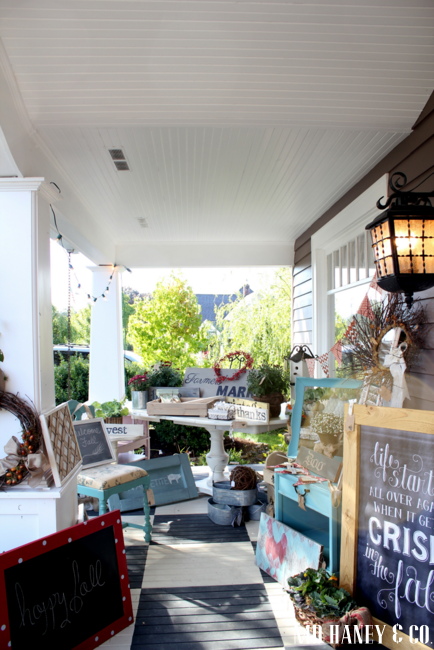
We loaded the front porch with treasures and we had some fun things out in the front yard as well.

IMG_3251

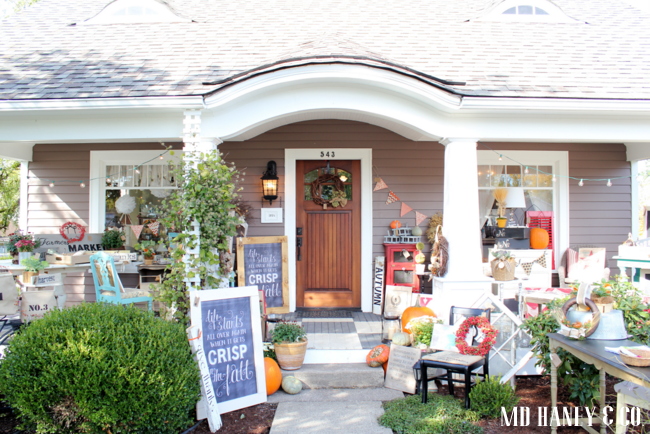
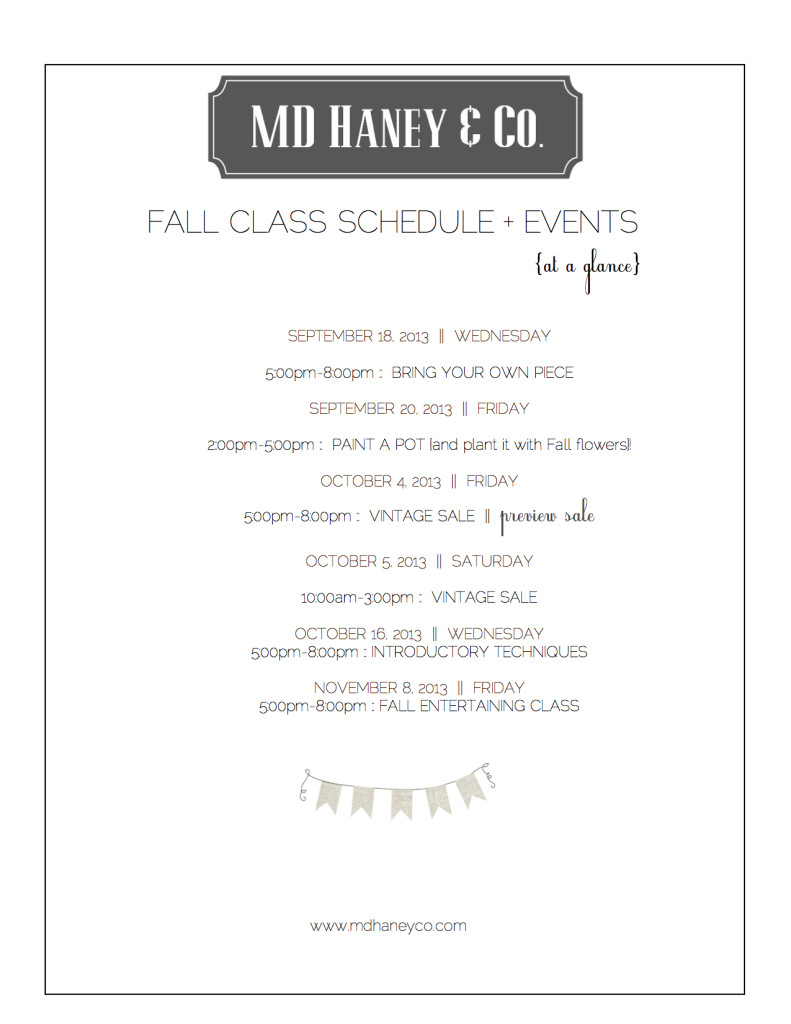
Friday night's preview sale was crazy!  People started filtering in around 4:45 {it started at 5pm} and we didn't have a minute to breath until 8:15 {it ended at 8pm}!

IMG_3254

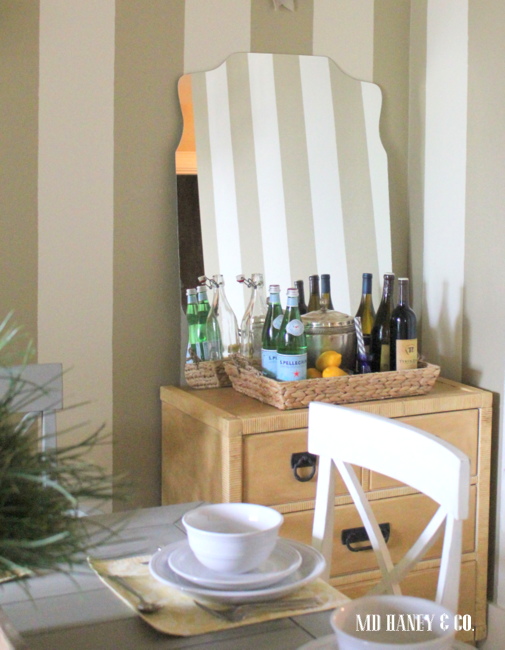
Anne and Emily brought some beautiful furniture pieces!!

IMG_3249

We had 7 vendors {including me and the Queen Bee girls}.  All of the girls were so easy to work with!!  Not to mention hard workers and super creative.  I am bummed that I didn't snap a picture of Amy with all of her beautiful baked goods!!

IMG_3250

Fun.....right?!?!

IMG_3243

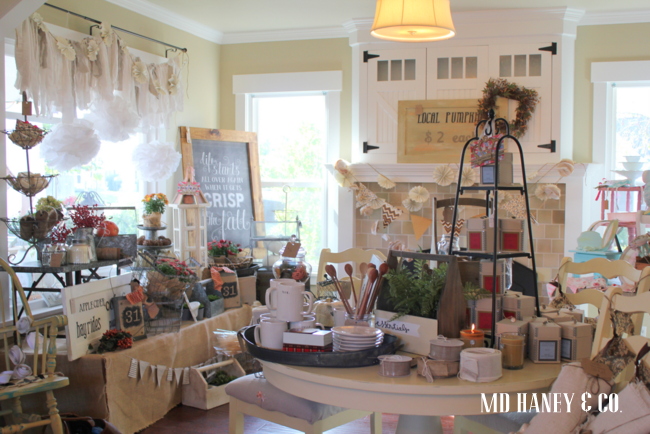
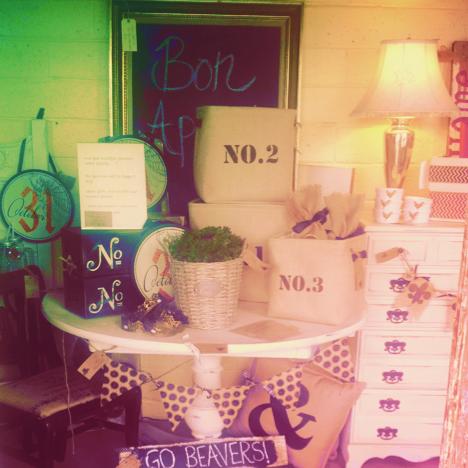
The interior of the studio was filled to the brim!

IMG_3244

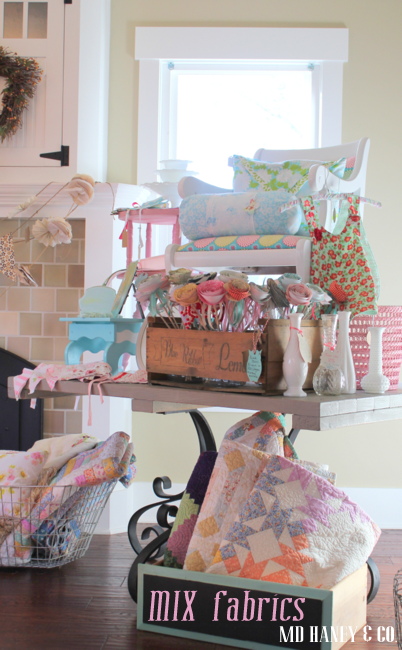
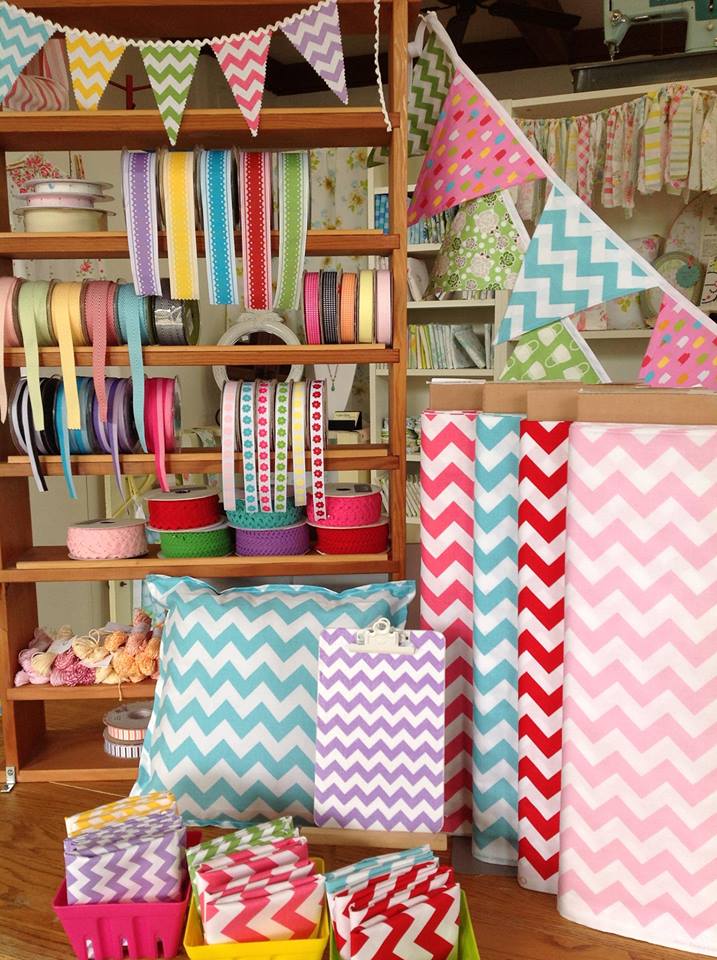
MIX fabrics is this adorable new fabric shop in Lafayette.  Super cute fabrics and fun vintage + handmade items!!

IMG_3245

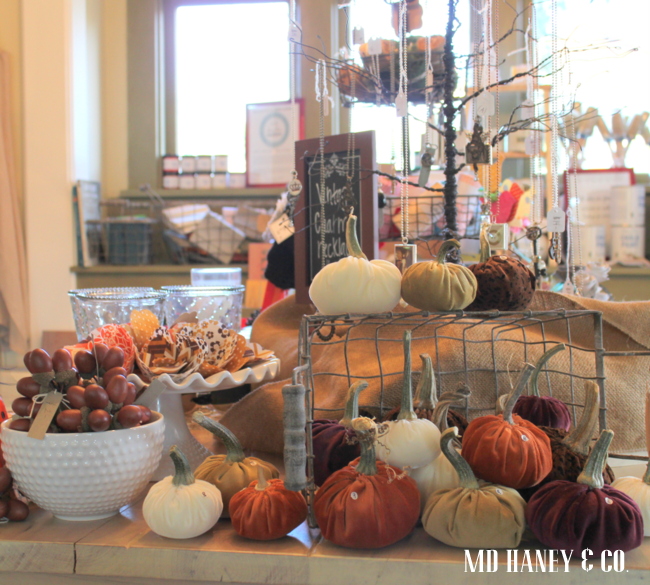
Anne's mom {Barb} made these beautiful velvet pumpkins.  Aren't they beautiful?!?

IMG_3246

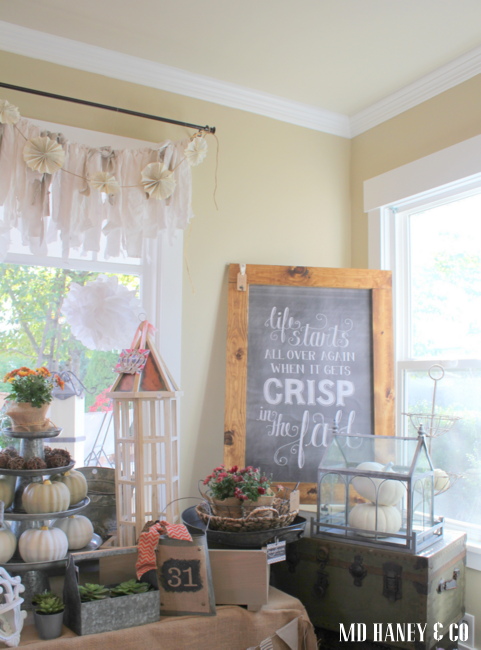
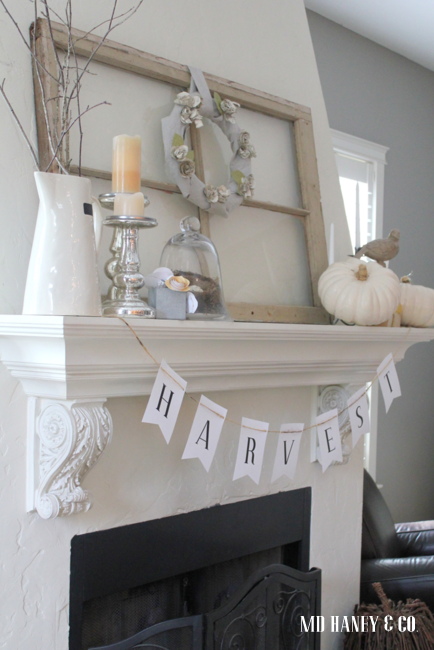
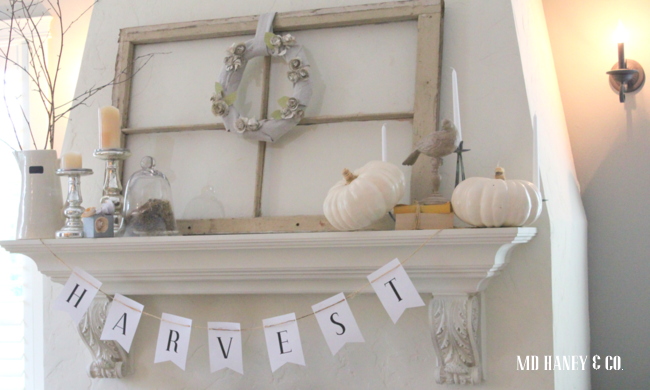
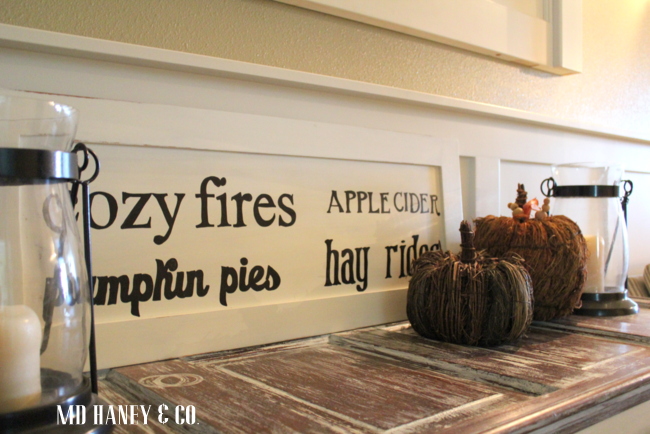
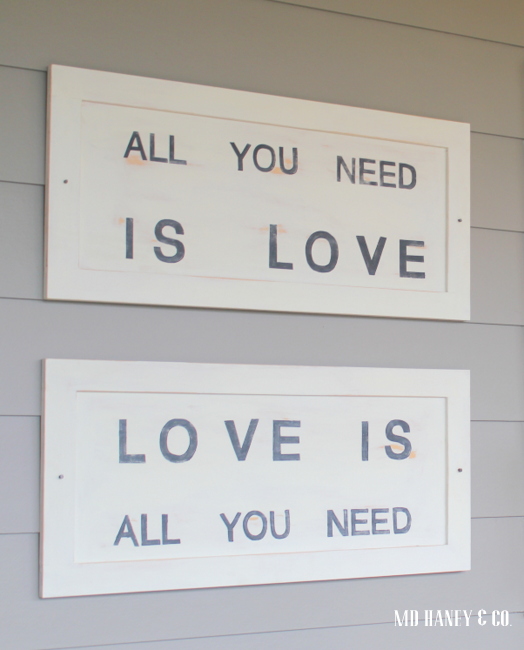
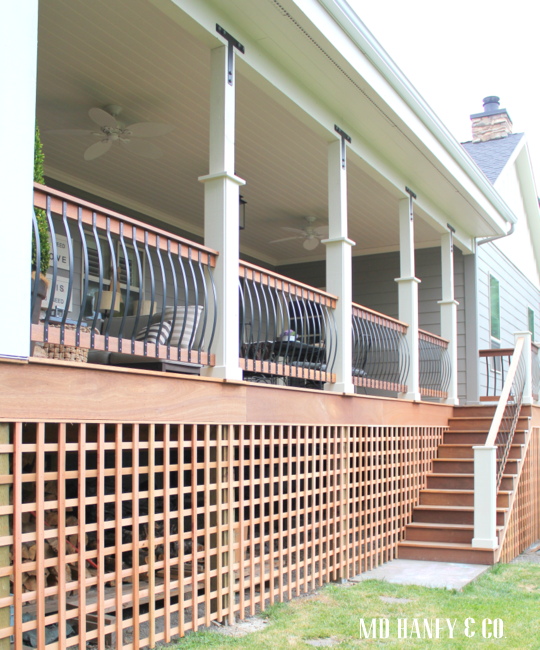
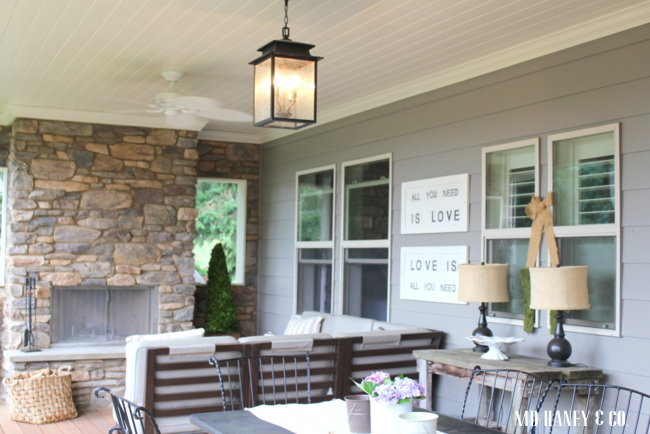
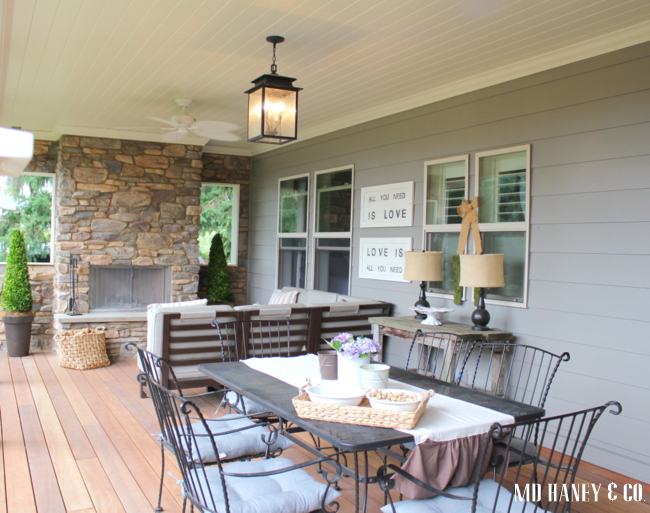
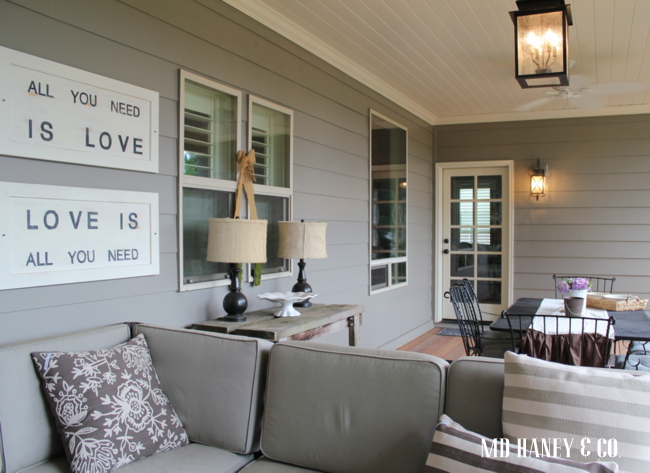
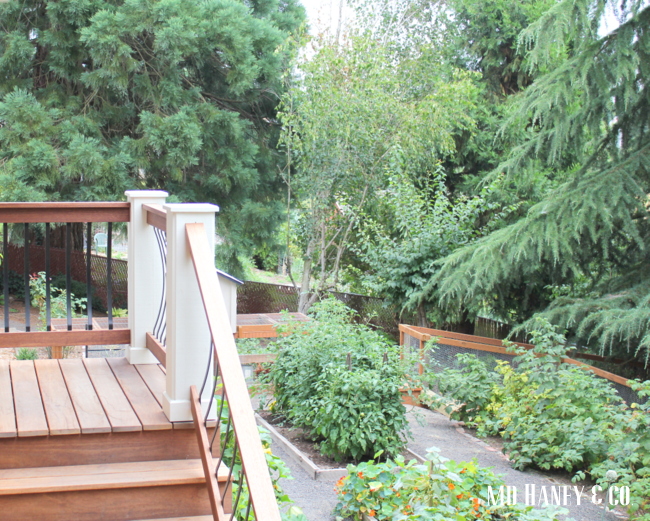
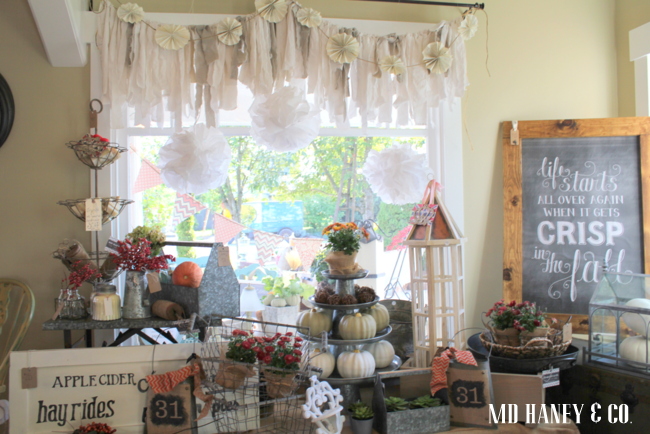
Anne made these darling Fall signs....I now have one on my back deck and I love it!!

IMG_3247

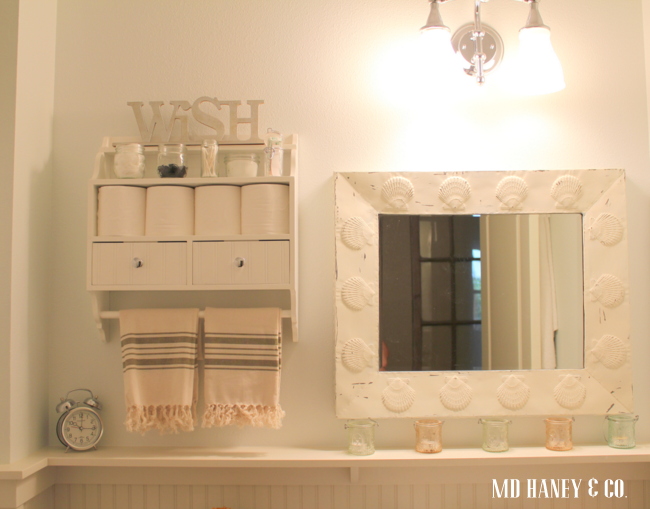
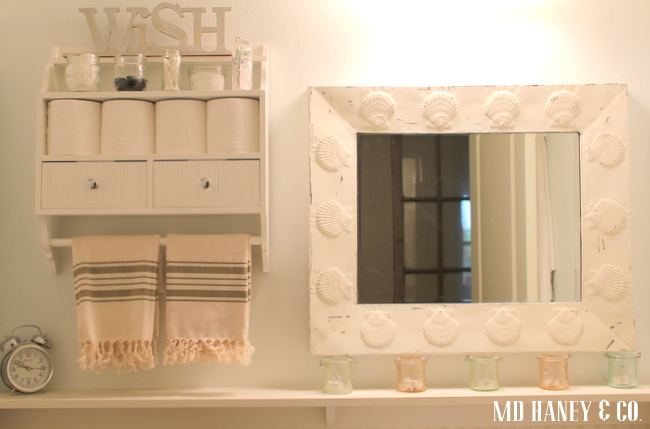
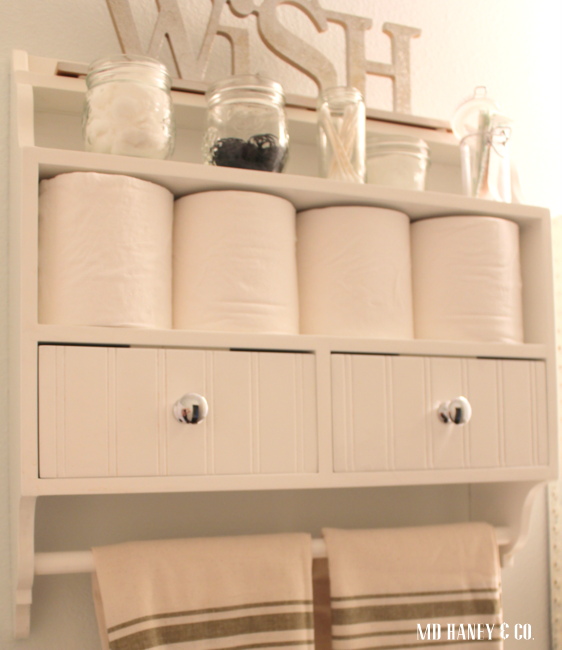
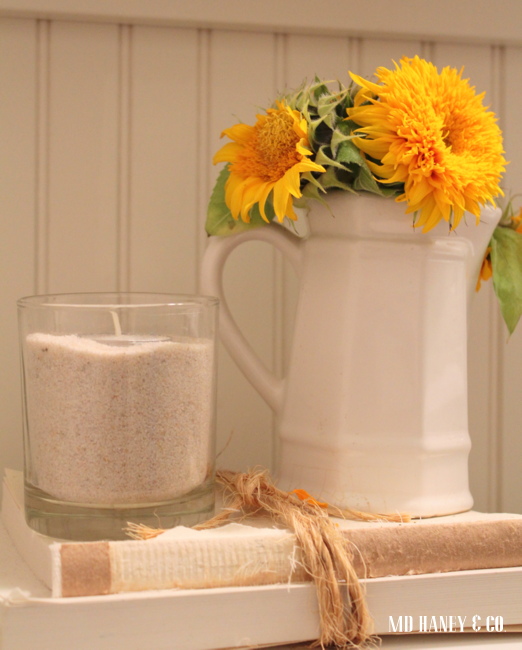
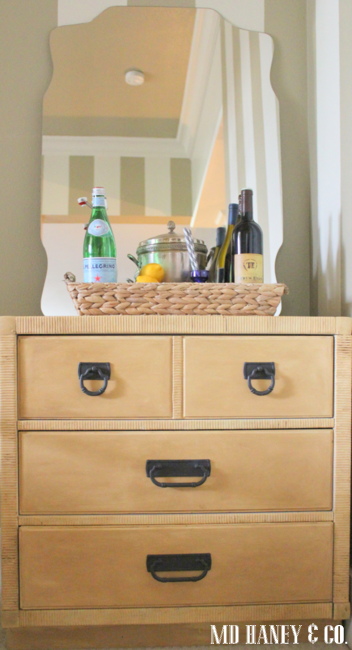
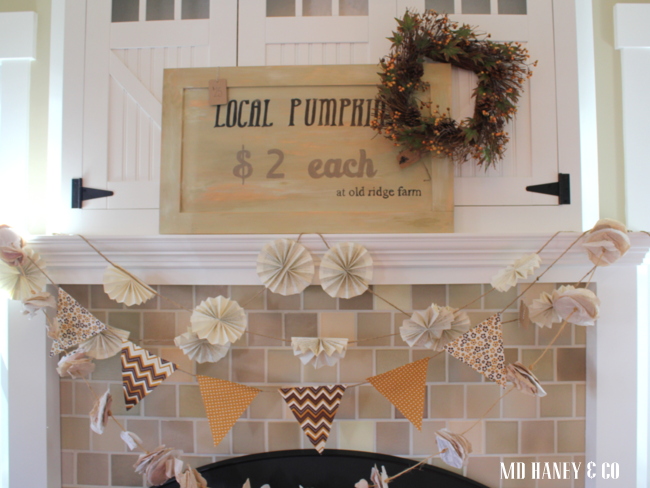
I made some signs, bunting, garlands, wreathes, and had other home decor items from the studio.

IMG_3248

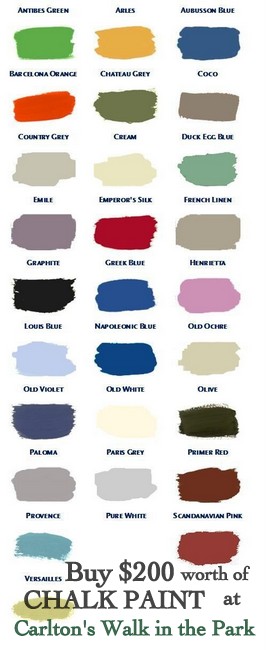
I also had the chance to talk 'Chalk Paint' with some new customers.  It was a wonderful weekend!!  But, I am happy to now have extra time to snuggle and love on my littles!  They were great sports {not to mention my amazing husband} to put up with me being gone so much over the weekend.

I am so very blessed to be surrounded by lovely friends and a wonderful family!!

The Queen Bee girls and I are tired....but there was a little talk of a Christmas event.....who knows.....{wink wink}

xoxo~Darci

BEFORE + AFTER :: exterior

Hello friends!

I am knee-deep in projects, but that just seems to be how I roll these days ;-)  Since I don't have any 'finished' project photos to share this week, I thought I would share a few BEFORE + AFTER photos of one of the homes we remodeled in Carlton.

When we purchased this home {8 years ago!} we bought it with the intention of living in it for a few years and then buying acreage and eventually building a new home.  We have been here for 8 years {on and off} and love it here!

The home sits on a double lot, just on the outskirts of town.  And, it has a work shop.  The shop is where Matt works his construction magic!

before

This is how she looked when we bought her.  Over grown, moldy and falling apart.  A little 900 s.f. four square with a funky addition out the side and the back.  She needed a lot of work!  Matt saw the potential, and we were both willing to work hard!!

before

We had to do quite a bit of de-construction and demo.

232323232fp53266>nu=3247>259>6;7>WSNRCG=34-7538959327nu0mrj

Matt did a lot of the work himself. It took us just 1 year to get most of the work done.  My hubby is one hard working worker bee!!!  We spent a lot of late nights working on this little place.

exterior

We still have a lot of projects that we would like to do!  But doesn't everyone?!?

exterior

To the left of this little pop-out is where the original front door was located.

cupula

Matt had planned on building this cupola with windows.  It serves as ventilation.   But,it was going to take a.long.time for him to custom build windows that would work for this space.  We opted for the louvers and I love them!

IMG_3225

The work shop really is the reason we purchased the property!  We skinned the front of the work shop with cedar siding and built a large sliding door.

exterior

The sides and back of the work shop are metal siding.  It's all painted one color and it really is hard to tell that the entire shop isn't sided with cedar siding.

exterior

This home has served us well over the past 8 years!

Since living here, we have fixed up 2 other homes in Carlton, but that is for another post ;-)

xoxo~Darci

FALL VINTAGE SALE :: the vendors

We are getting last minute preparations finished for our Fall Vintage Sale. It's going to be a great weekend....and the weather forecast looks promising!!

FALL SALE

I have been working on little projects for the sale.

I can't wait to see what THE QUEEN BEE girls bring!!  Anne and Emily are so talented....and they are super sweet!

539731_234994436649247_1855554403_n

The girls of MIX FABRICS are bringing their love of fabric to the sale.  They have a great collection of vintage dishes, awesome fabrics and all sorts of ridiculously cute items.  I can't wait to see how they set everything up!

1000965_410441195734357_771482941_n

Blue Raven is going to be selling their delicious pies...and there equally delicious {and even cuter} mini pies.

Kristen will be ushering in Fall with her beautiful Fall floral arrangements and other creative items.....Amy will be baking some delicious sweet treats......

It's going to be a fun time.  And, from the way things are shaping up, you may want to come Friday night to be sure to have first dibs at all of the goods!!

See you next weekend!!

xoxo~Darci

FALL DECOR & COOKIES :: a fall cookie recipe

This weekend was stormy and cool, the perfect weekend to bake in the kitchen and begin adding a few Fall touches around the house.

The girls and I worked in the kitchen and had several dance parties as we decorated.  It was so good for my heart!!

harvest mantel

It's hard work running a business.

Especially when you are a driven personality, a bit of a perfectionist, very little time to actually work, and a little family who you adore and want to spend your time with.

harvest decor

So, we celebrate the little moments.....

harvest chair

Like being home all weekend with the rain blowing outside.

IMG_3215

Extra time with out-of-town family.

sunflowers

A chance to do a bit of Fall decorating.

polkadot pumpkins

Some time to gather goodies from the garden before the rain beats everything down.

IMG_3210

Extra snuggles with my littles.

IMG_3210

Some time to work on projects.

IMG_3211

And just sit and enjoy the quiet moments.

fireplace

I am really working on enjoying the little moments and living with the fact that I can't get everything done on my to-do list.

I want my day to be about building relationships, and not always accomplishing tasks.  I know I am not the only one who battles with this struggle!!  And so, I am thankful for the un-expected 'slow' weekends/days/moments, the chance to take a deep breath, and just be thankful.

***

And so, I leave you with a yummy GINGER COOKIE recipe.

I love baking cookies!!  They make the house smell delicious, and they warm the hearts and tummies of family and friends.  I love packaging up half the batch of the cookies and giving them away.  It's a simple gesture....and a great excuse to get to bake another batch ;-)

gingersnaps

Ginger Cookies

Ingredients 2 1/4 cups all-purpose flour 1 teaspoon baking soda 2 teaspoons ground cinnamon 1 1/2 teaspoons ground cloves 1/2 teaspoon ground nutmeg 1/2 teaspoon ground ginger 1/4 teaspoon kosher salt 1 cup dark brown sugar, lightly packed 1/4 cup vegetable oil 1/3 cup unsulfured molasses 1 extra-large egg, at room temperature 1 1/4 cups chopped crystallized ginger (6 ounces) Granulated sugar, for rolling the cookies

Directions Preheat the oven to 350 degrees. Line 2 sheet pans with parchment paper.

In a large bowl, sift together the flour, baking soda, cinnamon, cloves, nutmeg, ginger, and salt and then combine the mixture with your hands. In the bowl of an electric mixer fitted with the paddle attachment, beat the brown sugar, oil, and molasses on medium speed for 5 minutes. Turn the mixer to low speed, add the egg, and beat for 1 minute. Scrape the bowl with a rubber spatula and beat for 1 more minute. With the mixer still on low, slowly add the dry ingredients to the bowl and mix on medium speed for 2 minutes. Add the crystallized ginger and mix until combined.

Scoop the dough with 2 spoons or a small ice cream scoop. With your hands, roll each cookie into a 1 3/4-inch ball and then flatten them lightly with your fingers. Press both sides of each cookie in granulated sugar and place them on the sheet pans. Bake for exactly 13 minutes. The cookies will be crackled on the top and soft inside. Let the cookies cool on the sheets for 1 to 2 minutes, then transfer to wire racks to cool completely.

'NO KNEAD' FRENCH BREAD :: a bread recipe

bread

I love baking bread!

I love the way my home smells while it is in the oven.....I love a warm piece slathered with butter for a late afternoon snack.....and I love teaching my little sweet pea how to bake and navigate her way around the kitchen.

I have a few recipes that are my standbys.  This recipe is one of them!!  With the weather changing and soup season upon us, I thought I would share this recipe.  Seriously, you will see that it is so easy to make home made bread any time!!

bread dough

It's as easy as mixing the ingredients in a large bowl, letting the dough rise, shaping it and baking it.

bread

I usually make two loaves.  A large one for us to eat right out of the oven, and a smaller one to give away or freeze.

bread

No Knead French Bread From Artisian Bread in 5 Minutes a Day via The Ivory Hut


3 cups of lukewarm water 
1 1/2 tablespoons active dry yeast 
1 1/2 tablespoons coarse salt
 6 1/2 cups all-purpose flour

Grab a very large mixing bowl, or a large container that you can cover. In it, mix the water, yeast, and salt. You don’t have to heat up the water to a precise optimal temperature for the yeast. I’ve even used just regular tap water, and it’s worked well for me. Just let that sit together for a while (you don’t have to wait for the yeast to dissolve completely), then dump the flour all at once and stir with a wooden spoon. You don’t need to knead this, and you’re not looking to make it come together into a dough ball. You just want everything mixed well, with no streaks of flour left, and you’re done.

Leave it in your container, covered (but not airtight, or it’ll pop), for a few hours. When it has risen and then deflated a bit, your dough is done. It’s ready to be used or stored in the refrigerator.

To bake the bread, just grab a chunk of dough, about the size of a grapefruit. Dust your hands with flour to help prevent sticking, and gently pull the sides of the dough toward the bottom, rotating the dough, until you get a roundish shape with a smooth surface. It should only take you about a minute or less to do this. The dough won’t be entirely in the bottom, where it may look bunched up, but don’t worry about it.

Put it on a cutting board that’s been dusted with cornmeal to prevent sticking, and let it rest for at least 40 minutes. No need to cover it. If the dough has been refrigerated, it helps to let it rest a little more, until it’s no longer chilled.

Twenty minutes before you are ready to bake, put a cast iron skillet (or a pizza stone) in the middle rack of your oven, and put a broiler pan (I used a cookie sheet) in the bottom rack. Preheat your oven to 450 degrees. Dust some flour on the top of your loaf, and slash the top, about 1/4-inch deep.

After twenty minutes of preheating, it’s time to bake. (You can put the bread in after 20 minutes, even if your oven hasn’t reached 450 degrees yet.) Slide the loaf onto the baking stone, and then quickly pour 1 cup of hot tap water into the broiler pan. Then quickly shut the oven door to keep the steam inside. Bake for 30 to 40 minutes, until you get a nice brown crust. Remove and let cool completely, if you can wait that long.

OUR HOME :: the girl's bathroom

As I mentioned a few weeks ago, I am slowly trying to get more pictures of our home on the blog.  I am always changing things, so I am sure as soon as I get pictures of the different rooms, they will be outdated ;-)

The weather has been so nice, we have been soaking up the last days of summer!  Which means I haven't had much time to work on finishing up my dining room wall.  So, I thought I would post a few photos of the girl's bathroom instead!

This bathroom is located in the original part of our 1908 home.  The original home was around 900 s.f., and we added about 1200 s.f. {plus a garage}.

bathroom

My favorite thing about this bathroom, are the original wood floors.  They aren't perfect {at all} but I love all of the history and character!!

girls bath

It's a simple little bathroom.  It's not flashy, but it serves it's purpose well.

bathroom

It's really hard to photograph because it's surrounded by hallway with no natural light!

Matt installed  wainscoting around the bottom half of the walls.  All of our trim work in the house is painted off white.  I love that it's clean and bright, but not a crisp white.  Our house is an oldie, with a lot of different materials and textures.   Pure, bright white  just didn't seem appropriate for our trim work.

bathroom

I love this ruffle shower curtain.  It adds just a bit of a femininity.  And since it's the girl's bathroom, I figured that was appropriate ;-)

bathroom

A little stool so my little Miss can go potty and wash her hands.  And a little basket full of washcloths...

bathroom

I found this mirror on clearance years ago at Marshalls.  It's metal; it was dented and painted a hideous color. I just painted a fresh coat of paint on it and distressed the edges....perfect!

bathroom

The hand towels are from Cost Plus, they launder really well!!

IMG_3177

This little cabinet houses rubber bands, bandaids, cotton balls, toilet paper and more in those itty-bitty little drawers.

IMG_3175

Any girl loves fresh flowers in her bathroom!

bathroom

These cute little candle holders where a gift when we sold one of our vacation rentals to the sweet couple from Texas.

bathroom

Marketing works I tell ya! Addilyn had to have the Seasame Street toothbrush and toothpaste!

bathroom

I made these little paper flowers to fill up a little space.....simple and cute...

********

When we moved back into our home last year, I didn't want to spend a lot of money on this bathroom because I know in a couple of years when we re-do the girl's bedroom, we will re-do the girl's bathroom!

Thanks for taking a peek at our simple little guest bathroom!  I hope to snap more photos soon!!

xoxo~Darci

BEFORE + AFTER :: a sidewalk treasure

 A few weeks ago, I was on my early morning walk.  I walked past a neighbor's house and she had just set out a dresser with a FREE sign on it!  I promptly walked my little self home, grabbed the car and wen to pick it up.  It's kind of funky, but I have been looking for a little drink station in the dining room.  I figured it was free, so if I don't like it, it's no big deal!

deskbefore

You can see the side of my little helper in this picture.  She seems to think anytime the camera is out, it's to take a picture of her!

desk

I used Chalk Paint® to paint this little guy.  I mixed 1 part Pure White and 1 part Arles.

dresser hardware

I applied a coat of Clear Wax and then a coat of Dark Wax.

IMG_3163

I painted the existing brass knobs Graphite and then applied a Dark Wax.

IMG_3160

I added a mirror and a little drink basket, then loaded the drawers with linens.  I am sure I will change things up soon, but this is a start ;-)  I don't love it, but it will serve just fine until I find something I do love!

IMG_3162

Next week I will snap some photos of the dining room and share them.  But, girls are sleeping so I better get some work done!!  Oh, and I have to meet the delivery man at the studio soon, I have a really fun package arriving later today, I can't wait to share all about it!

xoxo~Darci

FALL SPECIAL :: the loft {nightly accommodations in wine country}

I hope you had a wonderful Labor day weekend!!  We sure did....we labored, played and rested....it was just perfect!

addi

We have been trying to soak up these last few days of summer.  We went to the Farmers' Market last week and had rain, crazy winds and beautiful, warm sunshine, all within 15 minutes!!

bannerlinenI have been busy with a few different design projects so I just thought I would pop in to say hello and offer a special for the LOFT.

IMG_2550

The LOFT has been crazy busy this summer.  A huge blessing as I wasn't sure how travelers would respond to renting just one room, as opposed to the entire house.  While it was great having a couple of our homes as vacation rentals, it was A.LOT.OF.WORK.  The LOFT is much easier to clean/manage/maintain.  As a huge thank you to our wonderful guests, we are offering a free night October 15th-November 15th.  Just mention the 'website fall special' when booking two nights, and you will get a third night free!

I plan to take a few more house photos and post them soon!!  I just need to wrap up my design projects and spend my extra time loving on my little family....

xoxo~Darci

S'MORES BROWNIE :: a sweet treat

I made these ooey-gooey s'mores brownies last weekend and they are slightly addictive.

A perfect treat for your Labor Day weekend, especially if you won't be camping but still want to savor some of the last of summer's treats!  And really, who doesn't love chocolate + graham crackers + more chocolate + marshmallows??

brownie

Ingredients

  • Nonstick cooking spray
  • 9 broken in half (18 pieces) whole graham crackers, divided
  • 1 package chewy fudge brownie mix
  • 1/4 cup water
  • 2/3 cup vegetable oil
  • 2 large eggs
  • 2 cups (12-oz. pkg.)  Semi-Sweet Chocolate Chips,divided
  • 2 chocolate bars, roughly chopped
  • 2 cups miniature marshmallows
  • chocolate (for melting), 1 cup semi-sweet chocolate chips, chocolate bar or whatever your heart desires

Directions

PREHEAT oven to 350° F.

LINE 13 x 9-inch metal baking pan with foil leaving an overhang on two sides. Spray foil with nonstick cooking spray.

PLACE 15 graham cracker halves into bottom of pan, overlapping slightly. Break remaining graham cracker halves into 1/2-inch pieces; set aside.

COMBINE brownie mix, water, oil and eggs in medium bowl until blended. Stir in 1 cup chocolate chips.  Spread over graham crackers in pan.

BAKE for 25 to 30 minutes or until wooden pick inserted into center comes out still slightly sticky; remove from oven.

PREHEAT broiler.

SPRINKLE remaining graham cracker pieces, broken chunks of chocolate bar and marshmallows over warm brownies. Broil for 30 to 45 seconds or until marshmallows are light brown. Watch carefully as browning occurs very fast! Sprinkle immediately with remaining 1 cup chocolate chips and drizzle melted chocolate over the bars.

COOL for at least 1 hour at room temperature. Lift out by foil edges to cutting board. Carefully remove foil. Cut into bars with wet knife. Store in tightly covered container.

brownie
I would recommend sharing these with friends because I promise you, it will be hard to stop eating them!!
Enjoy!!
xoxo~Darci

CHOCOLATE CRINKLE COOKIES :: a sweet treat

chocolate cookie

These tasty little treats taste like brownie batter.  They are so good, trust me, you won't be able to eat just one!

RECIPE

4 tablespoons unsalted butter 2/3 cup packed brown sugar 1 tablespoon of oil   1 large egg 1 tablespoon milk 1/2 cup all-purpose flour 2/3 cup cocoa 1 teaspoon baking powder 1/8 teaspoon salt 1/2 cup powdered sugar, for coating

In a mixer, cream together butter and sugar.  Add oil, egg and milk and stir until combined.  Add flour, cocoa, baking powder and salt.  Stir with mixer just until combine - don't over mix.  Chill dough for 30 minutes.

Preheat oven to 350.

To scoop out cookies, use a tablespoon and roll the cookies in powdered sugar, twice.  Place on a parchment lined baking sheet 8 minutes.

chocolate cookie

FALL EVENTS & CLASSES :: at a glance

IMG_3117.jpg

Hello and happy Saturday!

I am just popping in to let you know that I updated the FALL SCHEDULE.  I will be sure to showcase each event as the time gets closer.  I am really excited for the Vintage Sale October 4th and 5th.  I am teaming up with some super talented ladies and we are going to have ourselves a fun, Fall inspired Vintage Sale.  And of course I LOVE hosting the entertaining classes, it's going to be a fun Fall for sure!  More details to come!!

Have a lovely weekend!

Fall event schedule


OUR HOME :: my home office

Good morning!

Well, as I mentioned last week, I am trying to be better about snapping photos of our home and projects I am working on.  Today I thought I would show you a few photos of my little home office.  It's a hard working little room with a lot of bright light.... and a squeaky old wood floor....and I love it!

office view

Our home office is just at the front of the house, only a few steps from the front door.

office door

When we remodeled our home, we thought having the home office near the front door would be great in case we ever met clients there.  We never meet clients here, but I still love where it's located ;-)

computer

This is usually where I spend  at least 2 hours every afternoon while the girlies are napping.

IMG_3138

We get fabulous lighting in this room.  A major bonus when you are attempting to get work done!  I found some great organizing pieces at Staples, Martha Stewart has a fun line of office products.  I just noticed Staples has 40% off of Miss Martha's line of products, but this week only!  I might have to make a late night run because I can never be too organized!!

calendar

Speaking of organization, I am old school and still like to write things in my calendar.  I am sure some day I will know how to enter dates into my phone....

IMG_3140

One wall of the office is painted in Chalkboard paint.  It provides a lot of entertainment for little hands!

cozy chair

I also have a cozy reading chair.  It was never intended for the office, but when we moved back into this home, we didn't have any other place for it!

sewing machine

Matt built me some fun shelves that flank two of the four walls.  They provide a lot of extra storage without making the tiny room feel even smaller.

IMG_3136

I have random cubbies and trays for all types of little trinkets!

IMG_3135

And a basket filled with little 'tools'.

wrapping station

I threw this little 'wrapping station' together one morning when I was wrapping birthday gifts for Matt.  It's a bit rinky-dink, but it keeps my wrapping paper from getting wrinkled!

flooring samples

I usually have piles of flooring/wall covering/fabric samples all over.  I typically just have 1-2 design jobs going at a time, but I sure seem to clutter up my limited counter space in no time!

Speaking of clutter, I better get to work!  Thanks for taking a look-sie at my little home office.

xoxo~Darci

A WALK IN THE PARK :: a few photos

This was my first year participating as a vendor in Carlton's a Walk in the Park.  I have volunteered and attended in the past, but never participated.  It was a blast!  There is no way I could have done it, or enjoyed it so much, if it wasn't for my dear husband.  He is most definitely a keeper!!

booth1

Of course I forgot to snap any photos after I set up, or after the first day.  I snapped a few photos on Sunday {the second day of the event} but I had already sold half of my pieces so the tent was looking a bit sparse!

booth2

It was such a fun time and I have to say it exceeded my expectations.

booth3

What a blessing to live in such a great community!!

And, on a second note....we randomly picked the winner of the Breakfast Basket!  I am not very technical, I wrote all of the names {there were 78.....thank you!!!} on old business cards and Addilyn drew them out of a basket!

IMG_3117

I will contact you Miss Lori Jones!

Have a lovely day!!  The girls and I are off to go re-organize the design studio....it looks like a tornado blew through there!!

~Darci


OUR HOME :: living room + kitchen

Hello and happy Tuesday!

I hope you had a great weekend!  Last week Matt and I had a fun interview.  The interviewer asked if I had photos of our home on the blog.....oops.....I realized I don't have many photos of our home!  Soooo, I thought I would post a few over the next couple of weeks.  It's a great incentive for me to tidy up and finish a few projects!

We renovated our home almost 9 years ago. but I will share those photos and details on another post.

Today, I thought I would share our living room and kitchen.

IMG_3086

We have a long hallway/entryway.  When you 'round the corner', the space opens up to our living room and kitchen.

IMG_3101

My oh-so-talented hubby built the cabinets.  They have held up really well to all of the abuse I give them.  But, we do plan on repainting them this winter...

IMG_3102

When we remodeled this home, we were young newlyweds with a small budget.

I would have done things a little differently if our budget had allowed.  Our one splurge in the kitchen, was the 36" dual-fuel WOLF oven.  I use that baby everyday and I am so glad we scraped our pennies for her!

IMG_3095

I LOVE my island!  Matt milled down quarter-sawn white oak to make a countertop that can comfortably seat six.

IMG_3097

This is a hard working island!

If I am not using it for cooking, we are eating at it, doing crafts on it, or some other ridiculously, crazy project.

IMG_3099

You can see the microwave is tucked into the island.  I love that it is out of eye sight, but still easy to use.

IMG_3098

When we repaint the cabinetry this winter, I am thinking of painting the island a lighter color.  What do you think?  Stay dark, or lighten it up a bit?

IMG_3104

The kitchen opens right up to the living room.  This space truly is the heart of our home!

IMG_3107

I am always changing out the pillows.  I have a ridiculous stash!

IMG_3115

I usually sew my own pillow covers.  It's less expensive than always buying new, and I can pick the perfect fabric for the look I want.  I found these pillows at Pier 1 and I had to snag them!  Sometimes a girl just wants to buy a pillow and not have to sew:-)

IMG_3117

Love fresh flowers in the house, especially sunflowers!

IMG_3121

I am always changing out the decorations on the mantel.  As soon as Autumn arrives, I will change everything up again!

IMG_3110

This window seat is Addilyn's favorite area.

IMG_3109

We keep toys and books in the open cubbies.  Kids can easily get to the toys, and I can easily throw them back in the baskets at the end of the day.

IMG_3112

It's a great little 'kids' corner that is tucked to the side of the living room.  It can get messy, but it's out of the main walking path, so it's not a big deal to have books and toys scattered about.

IMG_3113

The living room leads to our new covered deck.  I love that the covered deck almost doubled our living space!

IMG_3118

And, just in case you thought I was neglecting my sweet-peas during my little photo session, they were right there in the middle of it ;-)

IMG_3120

We love us some Sesame Street at our house.  Addilyn gets to watch TV for an hour, and I get some work done...it's a win-win for both of us!

Thanks for taking a peek into our little home.  Come back next week for more photos!  Until then, have a lovely day!

~Darci

A COUPLE OF GIVE AWAYS :: to celebrate Carlton's Walk in the Park

IMG_2939.jpg

Hello friends,

We are super excited to be participating in Carlton's a Walk in the Park this year!  We have volunteered and attended almost every year, but never participated.  In all honesty, I feel completely overwhelmed at trying to get a booth together, but I know it will all work out.....it always does!  Matt is going to help me at the booth all weekend, and we always have fun together, so I am looking forward to spending some time with my man!!

IMG_4312

 We will have some special incentives, gifts and give-aways for you guys, it's going to be great!

IMG_3044

Sign up {via the blog} to receive blog posts directly to your inbox, and 'like' us on FACE BOOK, and you will be entered for a chance to win a breakfast picnic basket.

The basket will be full of great breakfast items.....coffee, baked goods, jam, honey and more....a $75 value.

**If you already receive our blog via email, and have "liked" us on FACEBOOK, just leave a comment and I will enter your name in the drawing.**

bannerlinen

color_swatch_new

1011807_10151499549638511_889108044_n

Come visit us as Carlton's a Walk in the Park.

Purchase $200 work of Chalk Paint supplies, and receive a free FARM BELLE  jam, honey creame or marion berry syrup.

Farm Belle products are locally made and they are sooooo tasty!

bannerlinen

We will also have Chalk Paint demonstrations, custom painted furniture {for sale} and all sorts of fun things!  Looking forward to seeing you next weekend!

Oh, and the design studio will not be open next Friday, August 16th.

We will be setting up our booth.  If you need supplies, just call or email and I can meet you at the design studio and get you stocked and ready to paint!

xoxo~Darci


DIY WOOD SIGN :: made from a cabinet door

IMG_3056.jpg

 Hello and happy Monday!

I didn't take any photos to document how I made the wood signs for our covered deck {big surprise...wink}.  I am just awful at documenting things!  However, it was really simple, so I thought I would share a few tips.

IMG_3056

Being that my sweet hubby is a {very talented} cabinet maker, we usually have new cabinet doors laying around the shop.  Doors that didn't fit or work for a job, for whatever reason.  You could use any cabinet door really.  But, the shaker style work best.  It already has a 'frame', no modifications need to be done!

IMG_3055

  • I took two matching cabinet doors and painted two coats of OLD WHITE Chalk Paint®.  The paint covered the laquer finished, maple cabinet wood perfectly.
  • Next, type your phrase onto a blank document.  I used the HELVETICA font, and the font size I chose for my sign was 200.

Screen Shot 2013-08-05 at 2.07.42 PM

  • With a pair of scissors, cut each word.  If the word didn't fit onto the printed  page, roughly cut the letter to be able to make the word.
  • Tape any letters together that need to be taped, and lay the entire word onto the painted cabinet door.
  • Move the words around until you like the spacing.
  • Once the words are right where you want them, tape them to the cabinet door.

IMG_3057

  • Once the words are taped, with a pencil, trace the outline of each letter.  Press hard!  You want the letter to be outlined on the wood door.
  • Once your words are traced, fill in the letters with a paint pen {I use these} or an artist brush and paint.
  • At this point, you may be done!  Wasn't that easy?
  • I took a fine grit sand paper and distressed my sign.  I wanted the words to look a little 'worn and tired'.  Then, I coated the entire sign with clear wax, asked my hubby to hang the signs and we were good to go!  Matt had some really neat old nails, we found them when we remodeled our home {a 1908 foursquare}.  My guess is that they are original to the house!  Anyways, he centered the signs and attached them with the old nails.....

I love them!

Do you have a different way of making a wood sign?  I would love to hear!!

xoxo~Darci

BEFORE & AFTER :: the back deck

As you may remember, I showed a few photos of our recently finished back deck.  Matt still had some details to finish, but I was excited to post some photos.  Well, yesterday he finished the back deck!

IMG_2214

See how tall the deck is off of the ground?  Well, for months now, this area has just been open {and ugly}.

IMG_3043

We couldn't put siding back up because it would trap the moisture and just be a big, yucky problem down the road.  We still wanted to be able to use the space for firewood storage, so we needed something accessible, yet pretty to look at.

IMG_3047

Matt built this trellis our of cedar.  It will turn a soft gray as it weathers.  He is going to spread bark dust under the deck, so when you do peek through, you see a nice clean layer of bark.

IMG_3050

When I watch Matt work, he makes everything look so effortless.  This would look awful if I attempted to try it!

IMG_3054

It truly is one of my favorite spots to sit and relax.

IMG_3053

We eat dinner out here almost every night!

IMG_3060

I needed something between the windows so I made these two signs from cabinet doors {we have a few extras laying around}!  Next week I will do a 'non-tutorial' on how I made the signs, they were super easy!

IMG_3062

The garden is growing like crazy!

IMG_3044

And I can't forget to share a photo of my little assistant!

xoxo~Darci

SAVANNA LYNN :: a few photos

untitled-25

 About a month ago, we had some photos taken of our sweet little Savanna Lynn.

untitled-10

Addilyn affectionately calls her 'baby Vanna.'

untitled-7

I never thought motherhood would be so amazing.

It's hard, fun, messy and rewarding...all at the same time.

untitled-5

This little one has captured my heart.

untitled

Everyone was right, you have room in your heart to love more than one child.

feet

Some days are harder than others, but I wouldn't change it for the world!

What a privilege and blessing to be able to raise two little ladies.

Oh....and in other news,  Matt just bought a dirt bike....I think it's a coping mechanism for being the only guy in the house :-)

xoxo~Darci

'HOMEMADE' CINNAMON ROLLS :: a sweet {breakfast} treat

IMG_3032  

Every Friday morning, I bake a batch of 'homemade' cinnamon rolls.

I make a big pan for our breakfast, and a mini pan for guests staying at the LOFT.  The guests are always asking for the recipe so I thought I would share it.  You won't believe how easy these are!!

CINNAMON ROLLS

2 loaves of frozen bread dough, thawed (I use RHODES, they come 5 to a bag) 6 tablespoons of butter, softened 1 cup of brown sugar 4 tablespoons of cinnamon 1/3 cup of sugar butter icing glaze (recipe below)

Thaw two loaves of frozen bread dough in the refrigerator or on the counter - I just follow the directions on the bag.  Allow the thawed dough to rise for 1-2 hours in a warm area covered with a damp cloth.  Roll the dough out into a rectangle onto a floured surface.  Spread softened butter on the rolled out dough.  Sprinkle sugar, brown sugar and cinnamon over the dough.  Roll up the dough into a log.  Slice into 2-inch thick rolls.  Place into a buttered pan.  Cover with a warm damp towel and allow to rise 2-4 hours (or overnight) in a warm area.  When the rolls have doubled in size, bake them at 350 degrees for 15-18 minutes until they begin to brown.  Top with Butter Icing Glaze.

BUTTER ICING GLAZE

 tablespoons of butter
2 tablespoons of milk
powdered sugar
Melt butter with milk in the microwave for 30 seconds.  Add powdered sugar until the glaze is the right consistancy - it just be perfectly smooth - no lumps.
Enjoy!!
PS ~ I found the recipe here