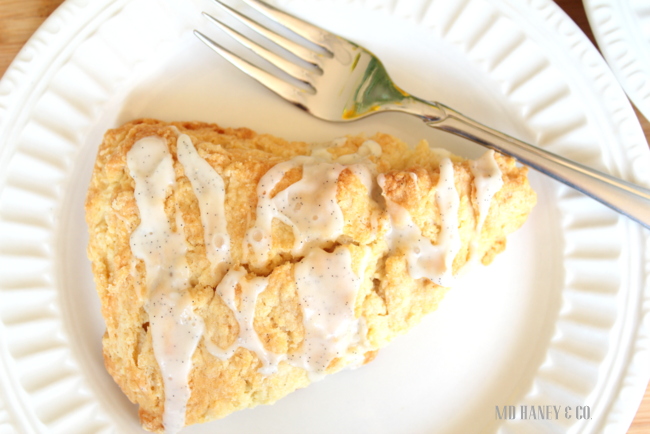
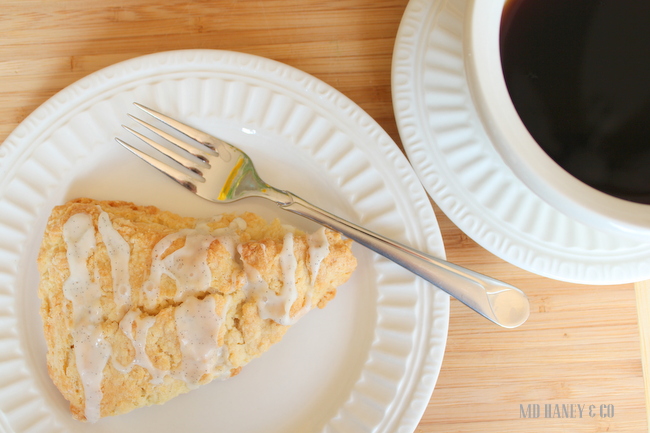
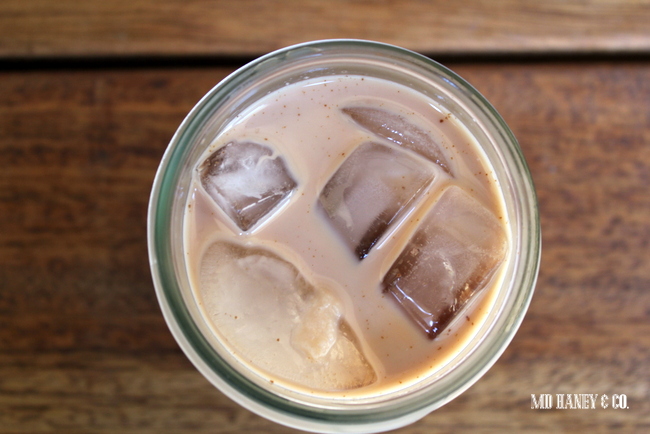
ICED COFFEE :: made at home

I don't know about you, but come 3ish in the afternoon, I am craving something sweet.

My go to afternoon treat is usually a home made iced coffee.  The recipe is from the ever so talented Pioneer Woman.  I don't often have time to read through her blog, but when I do, I always walk away laughing and feeling inspired.

IMG_2884

Iced Coffee ::

1/2 pound of good ground coffee

1 gallon of filtered water

milk, half & half

chocolate syrup

ice cubes

:: Grind 1/2 pound of coffee beans.  In a large bowl {or container} pour in your ground coffee, add 1 gallon of filtered water.  Stir the coffee and water together.  Cover with lid or dishtowel and let it sit for 8-24 hours.

Take a fine mesh strainer, or add a couple of layers of cheesecloth to a larger stainer.  Slowly pour the coffee mixture through the stainer.  Be sure to not let any coffee grounds escape through the strainer, I know from experience.....iced coffee doesn't taste good if you are chewing coffee grounds!

Store the coffee goodness in your refrigerator.  It will last a few weeks, although, I go through mine much faster than that!  

When you are ready to make a drink::

Fill your glass with ice.

Fill your cup 1/2 full with the coffee goodness.

Top off your cup with milk, 1/2 & 1/2, or a little bit of both.  

If you like a little sweetness, add some chocolate syrup, or any flavored syrup, and then give it a good stir.

I usually add some whip cream to mine.....

And there you have it, the perfect iced coffee!

Enjoy!!!

PS ~ If you want really detailed instructions, pop over to Pioneer Woman's blog.  She is much funnier and more detailed than I am!!

before + after :: BACK DECK

When we renovated our home 7 years ago, we decided to add a concrete back deck.  It was about 5 feet off of the ground and underneath was covered/enclosed storage.  The deck is on the South side of the house and gets hit hard with sunshine and pounding rain.  Eventually, the concrete started to leak.....

IMG_2214


We 'ignored' the problem for a couple of years, last summer, Matt decided we needed to address the issue.  Let me tell you, it was a big issue!  All of the existing concrete deck had to be removed.  We decided to go ahead and cover the deck....while we were at it {wink}, so we could enjoy the outdoors more than 3 months out of the year!

IMG_2217

It took Matt about 6 months {working the occasional evening and weekends} to finish the space.  I still have decorating to do, but I thought I would show you the new covered deck.

IMG_2880

The weather has been amazing for the past few weeks.  I can't tell you how much I have enjoyed sitting out here, cuddling with my sweet little babe!

IMG_2881

Like I said, I still have some decorating to do.  But, let's be honest, I am not sure when I will get to that ;-)

Have a lovely day!!

FAMILY :: new baby Savanna Lyn

I thought I would take a quick moment to post a photo of our newest little addition.....

IMG_2866

Sweet little Savanna Lyn was born Tuesday {April 23rd} at 7:30pm.  She was the perfect size...7 lbs + 3 oz and 19 1/2 inches long.

We love her to pieces and are soaking up every moment of down time.  I promise to post regularly in a week or so.  We have a lot of fun projects in the works and I can't wait to share photos!!

THE LOFT :: busy season

  IMG_2550


Well, the month of May signals the beginning of the busy season for us in wine country.

The the past five years, the vacation rentals have kept me super busy from May until November.  I am really enjoying just have the LOFT space to rent out, it is quite a bit more manageable than two vacation rentals!

I was thinking this morning of a few of our favorite little weekend get-away places here in Oregon, I thought I would share them with you!

The Inn at Canon Beach

cannon-beach-hotel-inn-at-cannonbeach

Canon Beach is one of my favorite beaches along the Oregon coast.  There are many lovely places to stay, but The Inn at Canon Beach is fabulous.

Camp Sherman

100-2408.JPG.1140x481_0_153_5937

I have great memories of staying in Camp Sherman with dear friends.  I know that wonderful memories make a place seem so much sweeter.  But, Camp Sherman is a beautiful and charming place to stay or camp if you want some Oregon sunshine and fresh mountain air!

Timberline Lodge

timberline_lodge1

It's been years since I have stayed at Timberline Lodge, but it is a beautiful and magical place to stay, especially during the holidays.  When I last stayed, we went snow skiing all weekend, but I know it would be a great place to stay even if you didn't ski or snowboard!

I am sure other fabulous places will come to mind, and there are so many great places all over Oregon!  I would love to hear of other places you have stayed in Oregon!!

FAMILY :: taking some extra time to love on my little one

So, baby #2 is due any day.  We are beyond thrilled to be blessed with another little life to take care of.  I may have irregular posts over the next two weeks as I soak up time with my sweet family.

IMG_2678


I will be having #2 at home, just as I did with Addilyn.  I feel incredibly blessed to have an amazing mid-wife, a very supportive husband and a wonderful family.

IMG_2679


I promise to post pictures when #2 arrives.....

Until then, have a wonderful weekend and enjoy your precious time with your family too!

shop update :: adding CHALK PAINT decorative paint soon!

Matt gets back late tonight from a two day training in North Carolina.  Why would a sweet man like my husband fly all the way across the US just days before our new little bundle of joy is due???  Because I encouraged him too...and we are crazy like that!!  {Well, anyone who knows us knows we are not crazy, actually a bit too practical and even boring at times!!;-}  And, it's a really cool product that we want to be able to stock sooner than later!

We are really excited to be offering Chalk Paint decorative paint at the shop.  This product is amazing.  Seriously, I can't wait to share more about it.  If you haven't heard of it, you should check out the website.  

I hope to have the online shop updated {with the Chalk Paint} by the end of the week.  I will keep you posted!!

Look at a few of these beautiful furniture pieces done with chalk paint....

020_cb321_sloan5_final_1__gallery_full

100_-cb321_sloan27_final_01__gallery_full

cb234_nettlebed_16__gallery_full

cb234_wotton_17__gallery_full

 All of these beautiful images are from the Annie Sloan website.

Aren't they lovely?  Soon I will post a few pieces that I have refinished and currently have sitting in the shop.  We plan on opening shop next month....I promise to share more details soon!

In the mean time, have a lovely Spring day!

VANILLA BEAN SCONES :: a sweet treat recipe

We celebrated Matt's birthday on Wednesday!

He likes things pretty simple.  When I asked if he wanted to go out to celebrate, or have me cook a birthday dinner, he decided he wanted to stay in and enjoy a birthday dinner at home.

Fine by me!

He asked for beef tacos with corn tortillas....corn tortillas that are deep fried.  I {obviously} complain about how labor intensive the tortillas are, because for him it was a real treat......sweet guy.

Anyways, for his birthday breakfast, he asked for Vanilla Bean Scones.  I thought I would share the recipe.  They are really simple and they always turn out perfectly!  These scones have a hint of sweetness, and the perfect amount of vanilla.  The perfect compliment to a cup of hot coffee or tea!

IMG_2696

VANILLA BEAN SCONES

Ingredients ::

2 cups plus 1/4 cup all-purpose flour 1/4 cup sugar 1 tablespoon baking powder 1/2 teaspoon sea salt 12 tablespoons cold unsalted butter, diced 2 extra-large eggs, lightly beaten 1/2 cup cold heavy cream 1 vanilla bean, scraped, or 2 tsp. of good vanilla extract

GLAZE :: 1 vanilla bean, scraped  ||  1/2 cup confectioners' sugar  ||  2 tablespoons of cream or milk

In a mixer, combine flour, vanilla sugar, baking powder and salt using the paddle attachment.  Cut the cold butter into 1/2 inch pieces.  Add the butter to the dry ingredients and mix on low until the butter is mixed in and is the size of peas.  In a separate bowl, mix together eggs, whipping cream and scraped vanilla bean goodness with a fork.  Turn the mixer on low and slowly add the cream and egg mixture.  Turn off the mixer once added.

Dust the counter with flour.  Turn the dough out onto the floured surface.  Add some flour onto the top of the dough, then pat it out into a disk - about 8-9 inches in diameter.  Cut the disk into 6 pieces like a pie.

Separate the pieces and put them on a silpat or parchment lined baking sheet.  Bake at 400 degrees for 15-17 minutes.

To make the glaze, stir together cream,  vanilla bean goodness and powdered sugar.  Glaze them while they are still hot.

Enjoy!!

IMG_2697

What I am reading now :: gardening and canning resources

Things are busy here at the Haney household as I try to wrap up last minute design projects, stock the shop and prepare for baby #2!  I thought I would just pop in to share what I am reading.  I know you would love these books, especially if you love gardening and cooking!!

cookbook-cover-350

FOOD IN JARS is a fabulous read/cookbook if you want to learn more about, and experiment with canning.

Organic-Gardeners-Companion

ORGANIC GARDENER'S COMPANION is a wonderful resource for planning, planting and tending to your organic garden.

P9780600620877

ORGANIC GARDEN BASICS is great for the beginning gardener and the seasoned gardener!

With the temperature warming and the sun shining a bit more here in the Pacific NW, I am anxious to get outside and start working in the garden.

PEANUT BUTTER + JELLY BARS :: a sweet treat recipe

I thought I would share an easy {and really tasty} dessert bar recipe.  This recipe is from Ina Garten, one of my all time favorite cooks and food network stars.  I just adore her, not to mention she is incredibly talented!!

IMG_2686

These bars are the perfect combination of salty {peanut butter} and sweet {jelly + sugar}.  They are great for an extra sweet breakfast treat, or a yummy dessert treat.

IMG_2690

Ingredients::

  • 1/2 pound || 2 sticks|| unsalted butter, at room temperature
  • 1 1/2 cups sugar
  • 1 teaspoon pure vanilla extract
  • 2 extra-large eggs, at room temperature
  • 2 cups creamy peanut butter, {I used ADAMS creamy}
  • 3 cups all-purpose flour
  • 1 teaspoon baking powder
  • 1 1/2 teaspoons kosher salt
  • 1 1/2 cups raspberry jam or other jam
  • 2/3 cups salted peanuts, coarsely chopped

Directions::

Preheat the oven to 350 degrees F.

Grease a 9 by 13 by 2-inch cake pan. Line it with parchment paper, then grease and flour the pan.

In the bowl of an electric mixer fitted with the paddle attachment, cream the butter and sugar on medium speed until light yellow, about 2 minutes. With the mixer on low speed, add the vanilla, eggs, and peanut butter and mix until all ingredients are combined.

In a small bowl, sift together the flour, baking powder, and salt. With the mixer on low speed, slowly add the flour mixture to the peanut butter mixture. Mix just until combined.

Spread 2/3 of the dough into the prepared cake pan and spread over the bottom with a knife or offset spatula. Spread the jam evenly over the dough. Drop small globs of the remaining dough evenly over the jam. Don't worry if all the jam isn't covered; it will spread in the oven. Sprinkle with chopped peanuts and bake for 45 minutes, until golden brown. Cool and cut into squares.

Enjoy!!

YUMMY WATER :: a great resource for flavored water

I thought I would share a fun website that someone sent me....a website with different ways to flavor water!  I am always looking for ways to drink more water.  This is an easy way to get everyone in the family to drink more water!  Plus, it is so pretty!

The Yummy Life

4679

Right now, we are loving the Pineapple Mint flavored water.

4691

Hope you feel inspired to create some beautiful, healthy flavored water!

**both images are from the yummy life website**

BEFORE & AFTER :: a master bathroom remodel

232323232 fp53257nu324725967WSNRCG34-666327nu0mrj.jpg

I guess this isn't technically a 'before + after' post, because I can't seem to find any 'before' photos!  So, below are a few 'after' photos of the master bathroom Matt remodeled for the lovely clients who live on the golf course.  Their other two bathrooms were the most recent 'before + after' posts.....

232323232fp53274>nu=3247>259>6;7>WSNRCG=34-6<;6;<5327nu0mrj

The finished bathroom now has two vanities, a his + hers.

232323232fp53239>nu=3247>259>6;7>WSNRCG=34-6<;-;32327nu0mrj

The window adds great natural light and the plantation shutter add plenty of privacy.

232323232fp53269>nu=3247>259>6;7>WSNRCG=34-6<;6;<8327nu0mrj

The walls and floor received new stone....

232323232fp5323->nu=3247>259>6;7>WSNRCG=34-6<;6;<;327nu0mrj

More of the split faced marble that we saw in their den bathroom.  Isn't it beautiful?!?

232323232fp53262>nu=3247>259>6;7>WSNRCG=34-6<;-;37327nu0mrj

232323232fp53257>nu=3247>259>6;7>WSNRCG=34-6<;6;<6327nu0mrj

The pendants add a lovely feminine touch.

I am so sorry that I don't have 'before' photos!!  I hope you enjoyed the few 'after' photos that we snapped!

Have a lovely Easter weekend!

~Darci

HERBED RICOTTA :: an easy recipe

One of the recipes I made for the SPRING ENTERTAINING CLASS , was an herbed ricotta on toasted baguette.  I would venture to say it was everyone's favorite thing to eat that night.

IMG_2670

 The ladies all went home with the recipe, but I thought I would be sure to share it here.

IMG_2673

HERBED RICOTTA

  • 4 cups whole milk
  • 2 cups heavy cream
  • 3 tablespoons white wine vinegar
  • 1 teaspoon sea salt
  • 1 teaspoon cracked pepper
  • 3 tablespoons chives, chopped
  • cheesecloth
  • baguette, crackers, toast {and olive oil and garlic to rub on the baguette or toast}

In sauce pan, heat milk and cream until boiling.  Remove from heat and stir in vinegar.  Let sit for 2 minutes. Drape cheesecloth over large glass bowl, pour milk mixture into cheesecloth.  Allow the liquid to drain, leaving the cheese curds.  Let it drain an additional 30 minutes.  Transfer cheese to a clean bowl, discard whey or save for use in other recipes.  Add chives, salt and pepper to cheese, mix.  If spreading on baguette or toast, heat broiler to high. Drizzle baguette or toast slices with olive oil.  Toast on baking sheet 1-2 minutes, just until it browns.  Remove from oven and rub with garlic clove, serve with dolloped with ricotta.  It will keep 3-4 days, covered, in the refrigerator.

Enjoy!

IMG_2674

xoxo~Darci

Spring Entertaining Class :: a few photos

Hello and happy weekend!!  As usual, I didn't snap many photos of last night's event.  However, I thought I would share just a few that I did snap before the ladies arrived.

IMG_2666

The classes were scheduled to be outside in our new outdoor space.  However, the Spring weather was just a bit too cold this week!  So, we moved it inside which worked out perfectly.

It's always such a joy to spend time with the ladies that attend our classes.  I have made new friends, and I have an excuse to see old friends.

IMG_2669

I would say the favorite food of the night was the home made herbed ricotta.  I will be sure to share the recipe later this week.  The ricotta was really easy to make and it tasted so good!

IMG_2668

Thanks to the lovely ladies who attend our entertaining classes.  It is truly a lovely time, and I feel so blessed to be able to create, share and inspire!


SHOP UPDATE :: dash + albert

I figured it has been a few weeks since I have given a shop update!  My how time flies!

I am still busily working on filling our little shop space.  I really want this space to be unique and full of items that I love.

SIDE NOTE **We are going to be offering a product that I am super excited about.  I can't quite spill the beans yet......we won't be able to stock the product until the middle of April......so we are planning on a late May grand opening.  I will be sure to keep you posted!**

In the mean time, I want to show you a line of fabulous rugs, pillows, and throws that we will be offering.

Unknown

dash + albert

Unknown-1

Clean, fun, fresh and full of color.

Unknown-2

Aren't they so fun?  And you won't believe how durable they are!  Oh, and did I mention they come in so many different color options??  What's not to love?!?

They will be available on our website and at the shop.

I will be sure to keep you posted!

xoxo~Darci

BEFORE + AFTER :: a den bathroom makeover

232323232 fp53273nu324725967WSNRCG34-6699327nu0mrj.jpg

Remember last week when I showed you a few BEFORE + AFTER photos of a lovely guest bathroom remodel we completed in McMinnville?

Well, I thought I would show you a few BEFORE + AFTER photos of a second bathroom we remodeled at the same home.  This bathroom is located right off of the den.  Again, the homeowner had exquisite taste and the bathroom turned out beautifully!

Here is a BEFORE photo..

232323232fp53253>nu=3247>259>6;7>WSNRCG=34-6<;6;-9327nu0mrj

and here is AFTER....

232323232fp53273>nu=3247>259>6;7>WSNRCG=34-6<;6;99327nu0mrj

That's a split-face marble tile on the wall.  Isn't it beautiful?

232323232fp53266>nu=3247>259>6;7>WSNRCG=34-6<;6;-2327nu0mrj

It's a small bathroom.  There are a lot of different textures, but it all works together perfectly.

232323232fp53247>nu=3247>259>6;7>WSNRCG=34-6<;6;9-327nu0mrj

Matt built a simple, rustic vanity top and bottom shelf.  It warms up the space and provides enough room for a few accessories and bathroom essentials.

232323232fp53272>nu=3247>259>6;7>WSNRCG=34-6<;6;-3327nu0mrj

So simple, but so beautiful!

232323232fp53272>nu=3247>259>6;7>WSNRCG=34-6<;6;-7327nu0mrj

232323232fp53257>nu=3247>259>6;7>WSNRCG=34-6<;6;-4327nu0mrj

One more shot of the lighting attached to the mirrors.  That little trick makes the small room feel larger and gives such a clean look.

Hope you enjoyed the photos......I love showing off Matt's work.  He is a pretty humble fellow, so it's fun for me to show you his handy work!

Have a great weekend!

HONEY VANILLA ICE CREAM :: a homemade ice cream recipe

We love ice cream here in the Haney house!

Last year, my sweet hubby bought me a great ice cream maker.  Since making ice cream is now as easy and mixing the ingredients together, I really don't have an excuse not to make it!!

I thought I would share my 'go-to' honey vanilla ice cream recipe.  It's super easy, the results are always perfect, and I know exactly how to pronounce all of the ingredients that we are eating!

IMG_2660

Homemade Honey Vanilla Ice Cream 

makes 1 1/2 quarts

1 cup whole milk {chilled}

1/2 cup honey

2 cups heavy cream {chilled}

1 vanilla bean + 1 tsp. of vanilla extract

{or 2 teaspoons of vanilla extract if you don't have any beans}

1. Mix the milk and honey over low heat in medium size pot.

2. Once the honey has mixed in well with the milk, add the cream and vanilla.  Mix just until all of the ingredients are well combined.  Don't let the mixture boil!!  You just want all of the ingredients to mix together.

3. Refrigerate ice cream mixture 4-24 hours.

4. Pour into your ice cream maker, turn on, mix for approximately 30 minutes.

5. The ice cream will be very soft, you will want to freeze it for at least 2 hours before serving.

6. Enjoy!!

IMG_2659

BEFORE & AFTER :: guest bath remodel

232323232 fp5325nu324725967WSNRCG34-6-66327nu0mrj.jpg

It's been a little over a year since we completed three bathroom remodels for some lovely clients in McMinnville.

They have a beautiful Ranch style home on the golf course.  They had updated the kitchen a few years ago and it was time to update the bathrooms.

What fun!!  Below are 3 BEFORE pictures.....

232323232fp5323->nu=3247>259>6;7>WSNRCG=34-6<;6;--327nu0mrj

This bathroom was classic 1970's, complete with a purple toilet, sink and bathtub....

232323232fp53245>nu=3247>259>6;7>WSNRCG=34-6<;6;;2327nu0mrj

The bathroom had one window...perfect for allowing a bit of natural light!!

232323232fp53257>nu=3247>259>6;7>WSNRCG=34-6<;6;;3327nu0mrj

The bathtub was in really good shape, we opted to have it refinished instead of replaced.

AFTER::

232323232fp53259>nu=3247>259>6;7>WSNRCG=34-6<;-;3;327nu0mrj

Lovely, don't you think?

Matt built beautiful, distressed, hickory cabinetry.  I love how the cabinetry really warms up the space.

232323232fp53256>nu=3247>259>6;7>WSNRCG=34-6<;-;47327nu0mrj

It took a few tries to find the perfect stain color.  The persistence paid off, don't you think?

hickory vanity

I love the marble countertops!  Clean, classy and timeless.

232323232fp5325;>nu=3247>259>6;7>WSNRCG=34-6<;-;44327nu0mrj

And the marble floors.....so classic.

232323232fp5326->nu=3247>259>6;7>WSNRCG=34-6<;-;49327nu0mrj

The tub finished out really well, it looks brand new!  If your bathtub is in good shape, refinishing is such great way to save money.

Notice the white subway tile wainscoting in the back ground?  Subway tile is still one of my favorite tiles!

232323232fp53256>nu=3247>259>6;7>WSNRCG=34-6<;-;64327nu0mrj

The homeowner installed grasscloth wall paper.  The texture is a beautiful addition to the bathroom!

232323232fp53273>nu=3247>259>6;7>WSNRCG=34-6<;-;45327nu0mrj

One more photo of the vanity......

If you love this bathroom, wait until I show you the other two!  The homeowner had great taste, it was so fun to work with her!

Until then, have a wonderful weekend!

xoxo~

Darci

SPRING PLANTING :: what's happening in the garden {zone 8}

The last couple of days have been beautiful here in the Willamette Valley.  I am itching to get outside and work in the garden!!  Yesterday was beautiful, I worked some of my raised beds and got a few seeds into the ground.

IMG_2028

Over the years I have done a lot of research for vegetable gardening.  I am by no means an expert, or a master gardener!  But, I thought I would share the few things I am doing in my garden, in hopes that it might inspire others to grow their own fruit, vegetables and herbs this year.

This beautiful little corner of Oregon is a zone 8b for gardening.  Knowing the zone definitely makes it easier to know when to plant seeds and starts!

We have raised beds so they heat up and dry out {from the rain} a bit faster than just planting straight into the ground.  After tilling the beds, I planted.....

6468578201p

swiss chard ::

I use swiss chard in egg dishes, soups and pasta dishes.

kale-packet-481x640-443x590

kale ::

I am not a huge kale fan.  I know it's so good for me, but still.  Anyways, I will add it to soups and smoothies.  I will also juice it.....

sassy_salad_mesclun_lg

lettuce & mesclun ::

I {obviously ;-} use this in salads.  I usually plant a new row of lettuce and/or mesclun every 2-3 weeks so we always have fresh greens growing.  Once it gets too hot {June/July}, these little darlings will bolt and be of no use but to feed the chickens!

Pea_sugar_snap_org_lg

sugar snap peas ::

I love sugar snap peas!  I will eat them straight off of the vine and forget to pick any for dinner!!  We usually eat sugar snap peas in salads and Chinese food/stir fry dishes.

I sure hope that helps to inspire you to plant a few spring vegetables.  They are so easy to care for!  Really, you just plant, water and let the rain do the rest!

Happy gardening!

xoxo~Darci

COCO & BUBBLES:: all natural soy candles

So, the shop is finally coming together.  I still have a lot of little details to work out, but it is finally taking shape!   We have some really exciting lines and products that we will be carrying!!  I thought I would share with you one of my {many} favorite new products we will be carrying.

01_LIGHTING-cocobubbles_636x431

COCO & BUBBLES || all natural soy candles

These are the best.

Seriously.

I have one burning nearly every day :: they smell delicious, but not over powering :: they burn forever, and they burn clean :: the fragrance is Phthalate free {something that is very important to me, especially with little ones in the house!}

And, don't you love their packaging?  Simple, clean and fresh.  When you bring one {or two} of these little darlings home with you, I even place them in their own little burlap bag...so cute!

twitterprofile

I can't wait to be able to offer them to you!!

Soon friends, very soon.....

In the mean time, have a lovely weekend!!

**both images are from the COCO & BUBBLES website**


A FEW PHOTOS OF EASTER & A WINNER

Does anybody else have about 1 million projects going at once, and can't seem to finish one??

That's me.  

I thought I would snap a few photos of Easter decorations that are popping up around the house.  Problem is, in the background of every picture was an un-finished project!

Case in point #1.....

egg wreath

My hard working hubby is 99% finished with our covered deck/outdoor area.  It's now my job to furnish and decorate....it's been my job for a few weeks......it sits as a half-finished project......

rabbits

I have a half sewn dining room table cloth, and fabric for new dining room curtains.  The whole bunch of which are sitting collecting dust in my little office.

flowers

My sweet hubby bought me these beauties for my birthday.

They sit on the coffee table with three pillows next to them waiting for new fabric covers.

And that is just the beginning.....

Thankfully my life and worth aren't measured by what I accomplish on my 'to-do' list!

bannerlinen

On a separate note, KATHIE ORIET is the winner of the Spring Entertaining Class giveaway. I am so excited to have her join us for a night of fun, food and inspiration.

There is still room left in the Friday, March 22nd class, and we would LOVE to have you!!

xoxo~Darci