BEFORE + AFTER :: our dining room furniture

 Happy Tuesday friends!

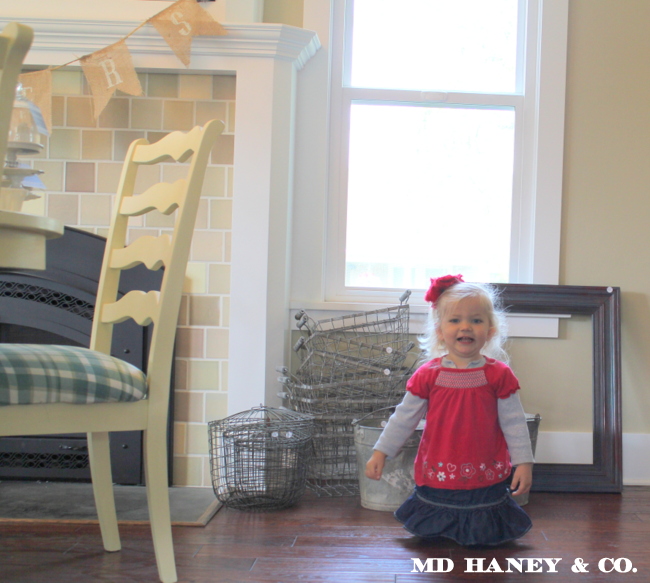
I thought I would show you a few photos of our dining room furniture.  I am in the middle of re-decorating {or really just shopping the house and re-arranging} our dining room.

Confession ::  I would love to buy a long, rustic dining room table.  Pair it with linen slip covered chairs and I would be a happy girl.  But,  it's hard to justify that when we have a dining room set that works just great!

I thought I would try painting our furniture to see if I would like it a little better.  If I hadn't been introduced to Chalk Paint®, I would have never dreamed of tackling our dining room furniture!  What a pain!  Sanding, priming, several coats of painting, yucky fumes.....just doesn't sound appealing.  However, with the ease and beauty of Chalk Paint®, I was willing to give it a try.

IMG_2960

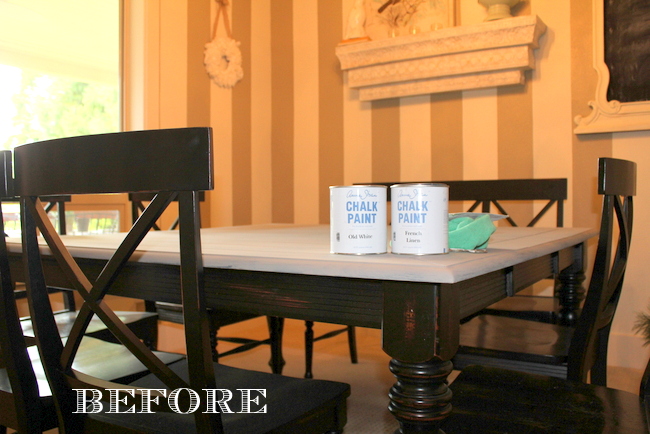
I tried a coat of 'French Linen' on the table top.  I was curious to see how well it would cover.

IMG_2973

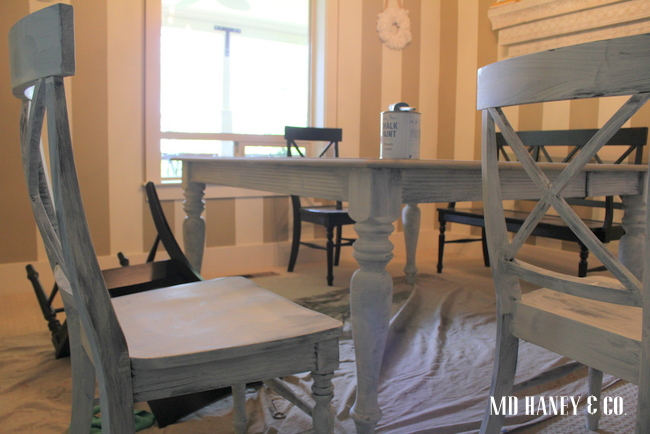
Two coats of paint on the top, and I was convinced it was worth it to paint it!

IMG_2974

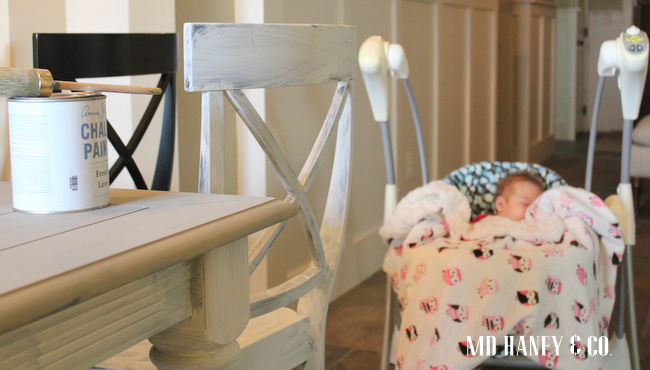
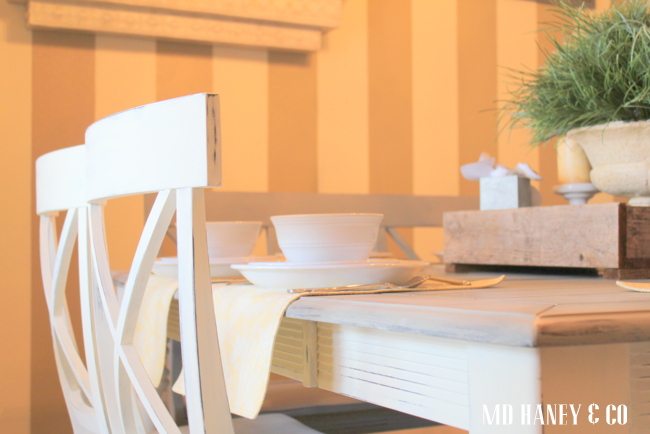
I painted the table top and bench a gray...."French Linen".  The chairs and base of the table are painted a soft white..."Old White".

IMG_2975

Sweet little Pea was quite the helper.

She happily slept in the swing and gave me a solid two hours of painting time!

IMG_2992

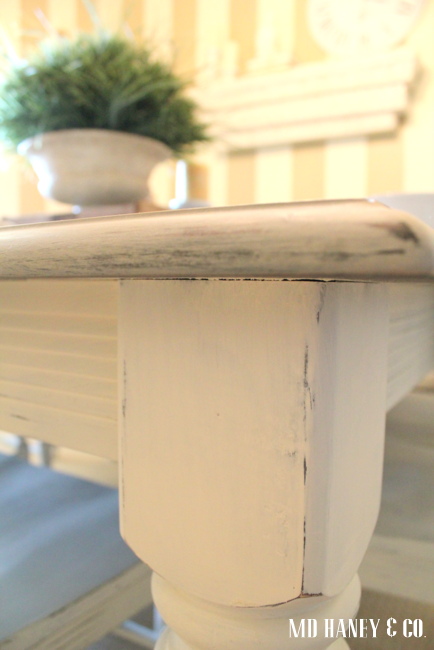
I distressed the edges and table top.  I wanted the original black to show through,  but just a little bit.

IMG_3001

I applied a coat of Clear Wax, and called it good!

IMG_2997

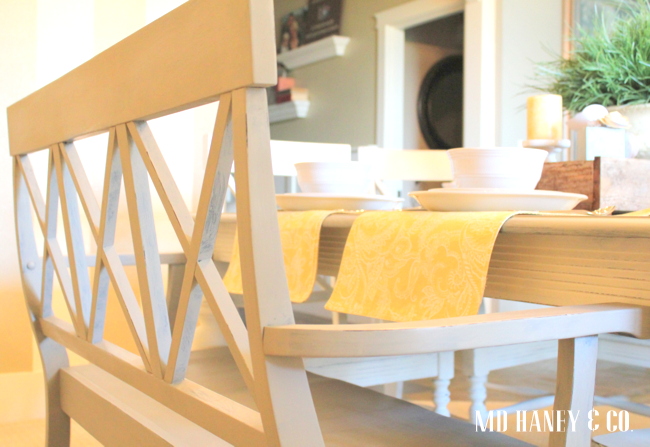
The table, bench and six chairs, took about eight hours to complete.

Start to finish.

And, I was able to do the entire project right in the dining room!  I am so lazy when it comes to painting.....yet another reason I love this paint!

IMG_2995

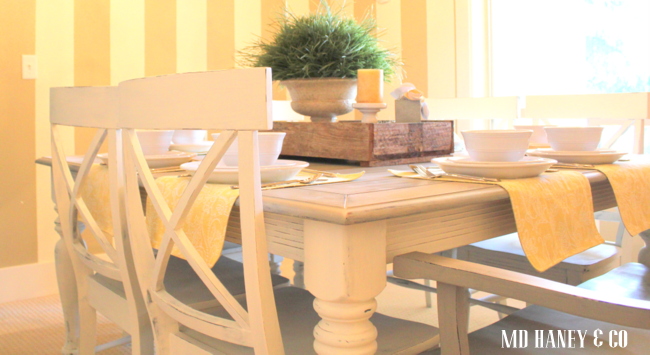
I still have a ways to go until I get the dining room put back together, but at least the furniture is painted...

IMG_2998

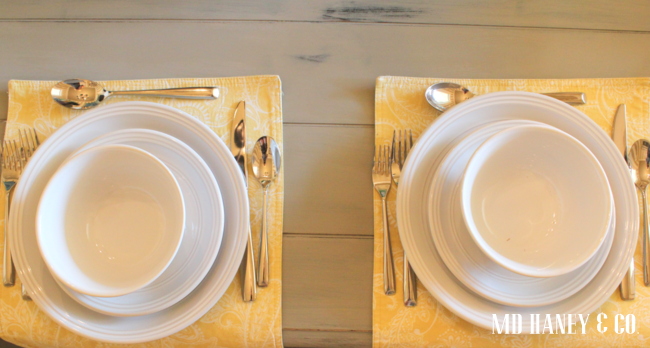
 and the table is set!

Now all I need to do is prepare dinner!

xoxo~Darci

TV CABINET :: to build or not to build

IMG_2966

Matt has designed and built numerous TV cabinets for different clients.  As you all know, custom built-ins can make such a difference in a living space!  When we remodeled our home, we talked about doing an entire wall of cabinetry in the living room.  But, life happens and living room cabinetry falls to the bottom of the priority list. IMG_2967 So, we use this cabinet.

It has served it's purpose well.  It's nothing fancy or custom.

IMG_2970

It holds cozy blankets, electronics, bibles and books that we are currently reading.

IMG_2968

Matt modified the door {with wire mesh} so that the remote can still register with the electronics.

IMG_2972

It works just great.

I vote that we save our money, time and energy for a summer vacation.

But talk to me this winter and my answer may be different {wink}!

SWEET TREAT :: strawberry + balsamic ice cream

Our strawberries are just getting ripe.  It's pretty hard to beat sun-ripened strawberries, fresh from the garden.

I think the only thing that "beats that", is watching little ones hunt for the tasty red treasures!

IMG_2939

We picked a few extra strawberries so that we could make a tasty frozen treat.....Strawberry + Balsamic Ice Cream.

Delish!!

I made it a few weeks ago with store bought strawberries.  Let me tell you, fresh-from-the-garden strawberries make all the difference!

IMG_2941

STRAWBERRY BALSAMIC {AND ROSEMARY} ICE CREAM

Ingredients (1 quart): - 1 pint strawberries - 2-3 tablespoons granulated sugar (depending on how sweet your strawberries are) - 1 tablespoon balsamic vinegar - 2 cups heavy cream - 1 cup whole milk - 3/4 granulated sugar (use a little more if you like really sweet ice cream) - 1 large sprig of fresh rosemary - pinch of sea salt - 4-5 egg yolks - 1 teaspoon pure vanilla extract

Preheat your oven to 425 degrees. Hull and slice the strawberries and then place them on a baking sheet lined with foil. Sprinkle with 2-3 tablespoons of sugar and balsamic vinegar and let them macerate for about 15 minutes. Roast in oven for 10-15 minutes. Roasting them helps remove excess water, which can make for overly “icy” ice cream.

Mash with potato masher. If you prefer a smoother ice cream, puree in a blender or food processor. {I mash mine}. Cool and place berries and accumulated syrup into a container and refrigerate.

Heat cream, milk, sugar, salt and rosemary on the stove until very hot, but not boiling. Whisk egg yolks in a separate bowl and add about a 1/2 cup of the warm cream mixture into the eggs while whisking. This will help “temper” them so they don’t scramble. Return egg mixture to the pan and cook, stirring constantly, until mixture is thick enough to coat the back of a spoon.

Remove rosemary and strain. Stir in vanilla extract. If you pureed your strawberries, you can mix these now as well, otherwise, leave them separate. Refrigerate for at least four hours or overnight. It’s very important that both the custard and the strawberries are very cold before putting them in the ice cream maker.

Freeze in an ice cream maker according to manufacturer’s directions, adding the strawberries during the final five minutes (unless you pureed them). Enjoy immediately if you prefer a “soft serve” consistency, or freeze for an additional couple hours for more traditional ice cream consistency.

recipe adapted from here

Enjoy!!

OPEN HOUSE :: and inspiring creativity

IMG_29131.jpg

Thank you to all of the lovelies who made their way to Carlton to help us celebrate our Open House!  Friday marked our first official day of this new chapter in our business.  I have dreamed {for years} of having a creative space to inspire others and work on projects.  I feel so blessed to now be at that point in my life! candles

Every Friday, the design studio will be open from 9am-7pm.

My little collection of home decor, vintage items and handmade goods continues to grow.  My hope is to have items rotating every week.  So, for the fabulous gals {and men} who want to stop by every week, there will always be something new and different.  We will have our various classes every month in the new workroom Matt remodeled.  Once I have finished decorating the workroom, I will post pictures!

partysupplies

I am really excited to offer unique and fun party supplies!  I always struggle with finding items I want when it comes time to throw a party.  I searched high and low to find my favorite items.  There are still items I want to add, but this way it is super easy for YOU to find little treasures when you are ready to throw a party!

helper

My little assistant truly is a joy to be around!  She loves helping and 'painting'.  What a treat to get to be with my sweet little girls all day.  Some days they drive me crazy, but I know before long they will be in school and I will miss all of our times together!

Thanks again to new friends and old friends that made their way to Carlton this weekend, it truly was a treat!

Have a lovely holiday!

FAMILY :: new baby Savanna Lyn

I thought I would take a quick moment to post a photo of our newest little addition.....

IMG_2866

Sweet little Savanna Lyn was born Tuesday {April 23rd} at 7:30pm.  She was the perfect size...7 lbs + 3 oz and 19 1/2 inches long.

We love her to pieces and are soaking up every moment of down time.  I promise to post regularly in a week or so.  We have a lot of fun projects in the works and I can't wait to share photos!!

FAMILY :: taking some extra time to love on my little one

So, baby #2 is due any day.  We are beyond thrilled to be blessed with another little life to take care of.  I may have irregular posts over the next two weeks as I soak up time with my sweet family.

IMG_2678


I will be having #2 at home, just as I did with Addilyn.  I feel incredibly blessed to have an amazing mid-wife, a very supportive husband and a wonderful family.

IMG_2679


I promise to post pictures when #2 arrives.....

Until then, have a wonderful weekend and enjoy your precious time with your family too!