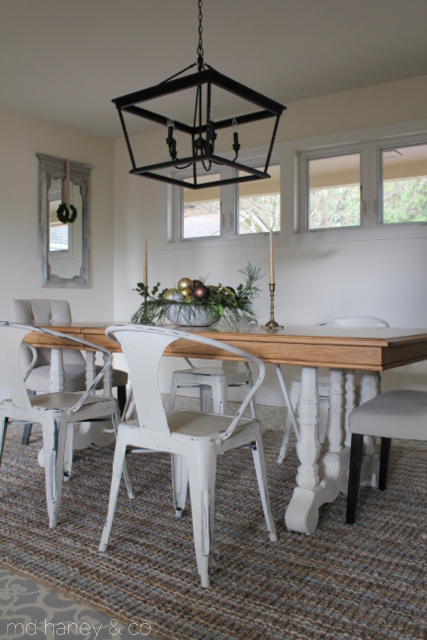
STENCILING A CONCRETE FLOOR || our dining room

We have been in our home for almost two years now.  The time sure does fly!!  We have some fun remodeling plans in the future and one space we would like to remodel is the dining room.  However, that won't be happening for a few years, so we decided to spruce the room up until we save up enough money to do our major renovations.

IMG_6282

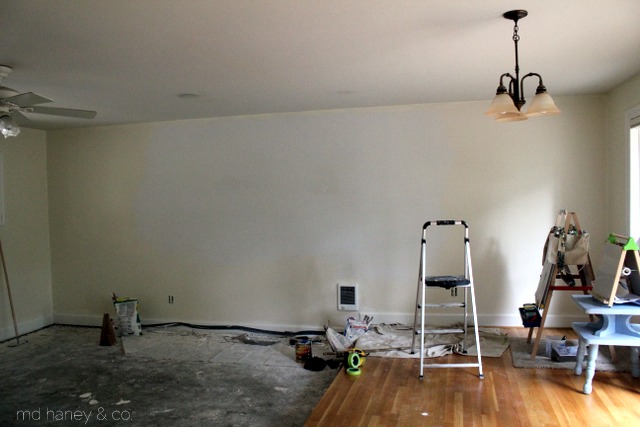
This room is right off of the kitchen.  It was a sunken living room and we have decided to turn it into our dining room.  Eventually, we would like to tile the kitchen and dining room space and add French doors to open to the outside.  Until then, paint is our best friend!

IMG_6307

After painting the walls, we scraped, patched and cleaned the concrete floor.  I have always wanted to try to stencil,  I thought this would be a great time to try!

2015-12-04 02.04.13

2015-12-04 02.03.50

2015-12-04 02.04.59

2015-12-04 02.05.13

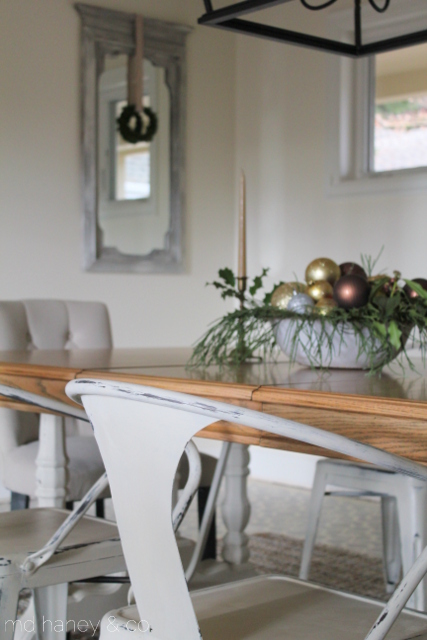
Here are the details on stenciling the concrete floor...

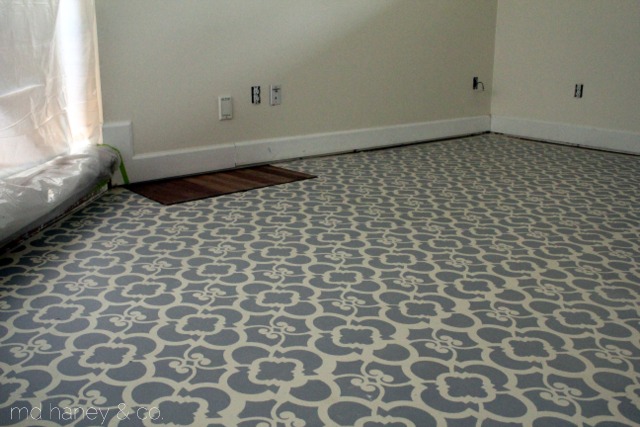
-We scraped, patched and cleaned the concrete floors before painting.

-We applied (with a roller) two coats of Chalk Paint® decorative paint, the color is OLD WHITE.

-We purchased the stencil from RoyalDesignStudio.com.  We opted for the "professional" size and I am so glad we did!  The stencil was easy to clean and very easy to use!!  I highly recommend their stencils.  They have some beautiful designs.

-We used Chalk Paint® for the stencil paint as well, the color is PARIS GREY.

-We applied (with a roller) two coats of Annie Sloan lacquer.  It's a water based lacquer with a matte finish.  It seals the floors beautifully and makes cleaning the floors very easy.

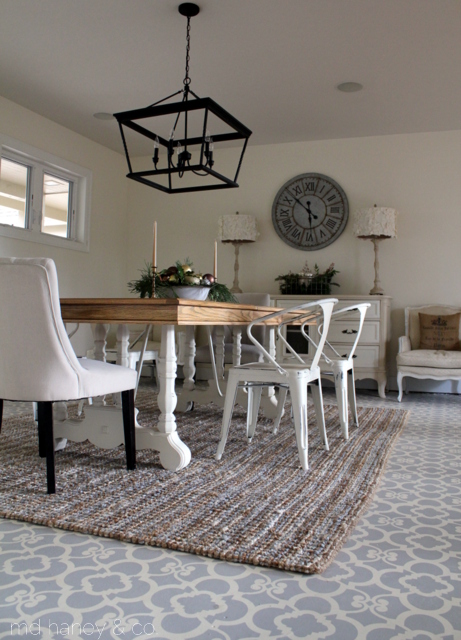
Overall, I am very happy with the results.  With less than $400 worth of supplies, some time and a lot of elbow grease, we transformed our concrete floor.   The space feels cozy and clean and now I am contemplating painting and stenciling my ceramic tile in the laundry room.  ;-)

Chalk Paint® decorative paint || FRENCH LINEN side tables

I often don't take the time to take pictures of spaces I have helped design, or custom painting I do for customers.  When it's my own house and my own painting projects, I can take the time to take pictures while the girls are playing or napping.  At this stage in my life, it's just more convenient to take pictures of my own projects!  However, I painted these sweet little side tables for a customer and it was easy to bring them into my home and snap a few photos!

2015-11-19 21.04.03

The side tables were in really good shape.  They belonged to my customer's Grandmother.  They mean a lot to her and she wants to keep them, just update them a bit with paint.

2015-11-25 04.46.35

2015-11-25 04.48.27

2015-11-25 04.48.57

I painted these little cuties with Chalk Paint® by Annie Sloan.  I used the color French Linen, lightly distressed the edges, sealed the sides with clear wax and sealed the top with Annie Sloan lacquer.  I antiqued the tables with a small amount of dark wax, put the existing hardware back on and packaged up care instructions with a sample of clear wax for my customer to take home.

I hope she enjoys these little tables for years to come!

painted side tables || Miss Mustard Seed Milk Paint + Annie Sloan Chalk Paint®

I bought two night stands years ago at a garage sale.  I used them in the girl's bedroom for a while and then for the past few years they have been sitting in the garage.  I finally decided to paint these little guys....

2015-10-27 01.37.58

The blue color is BERGERE {Miss Mustard Seed Milk Paint} and the white detailing is OLD WHITE {Chalk Paint® decorative paint}.  I distressed the piece and then waxed it with Miss Mustard Seed Antiquing wax.

2015-10-27 01.33.39

2015-10-27 01.37.21

2015-10-27 01.35.21

2015-10-27 01.36.11

I priced them and plan on taking them to La Bella Casa.  However, I brought them into the living room to photograph them and now I kind of love them in the space.  They might stay here for a while....we shall see ;-)