lemon thyme shortbread cookies | recipe
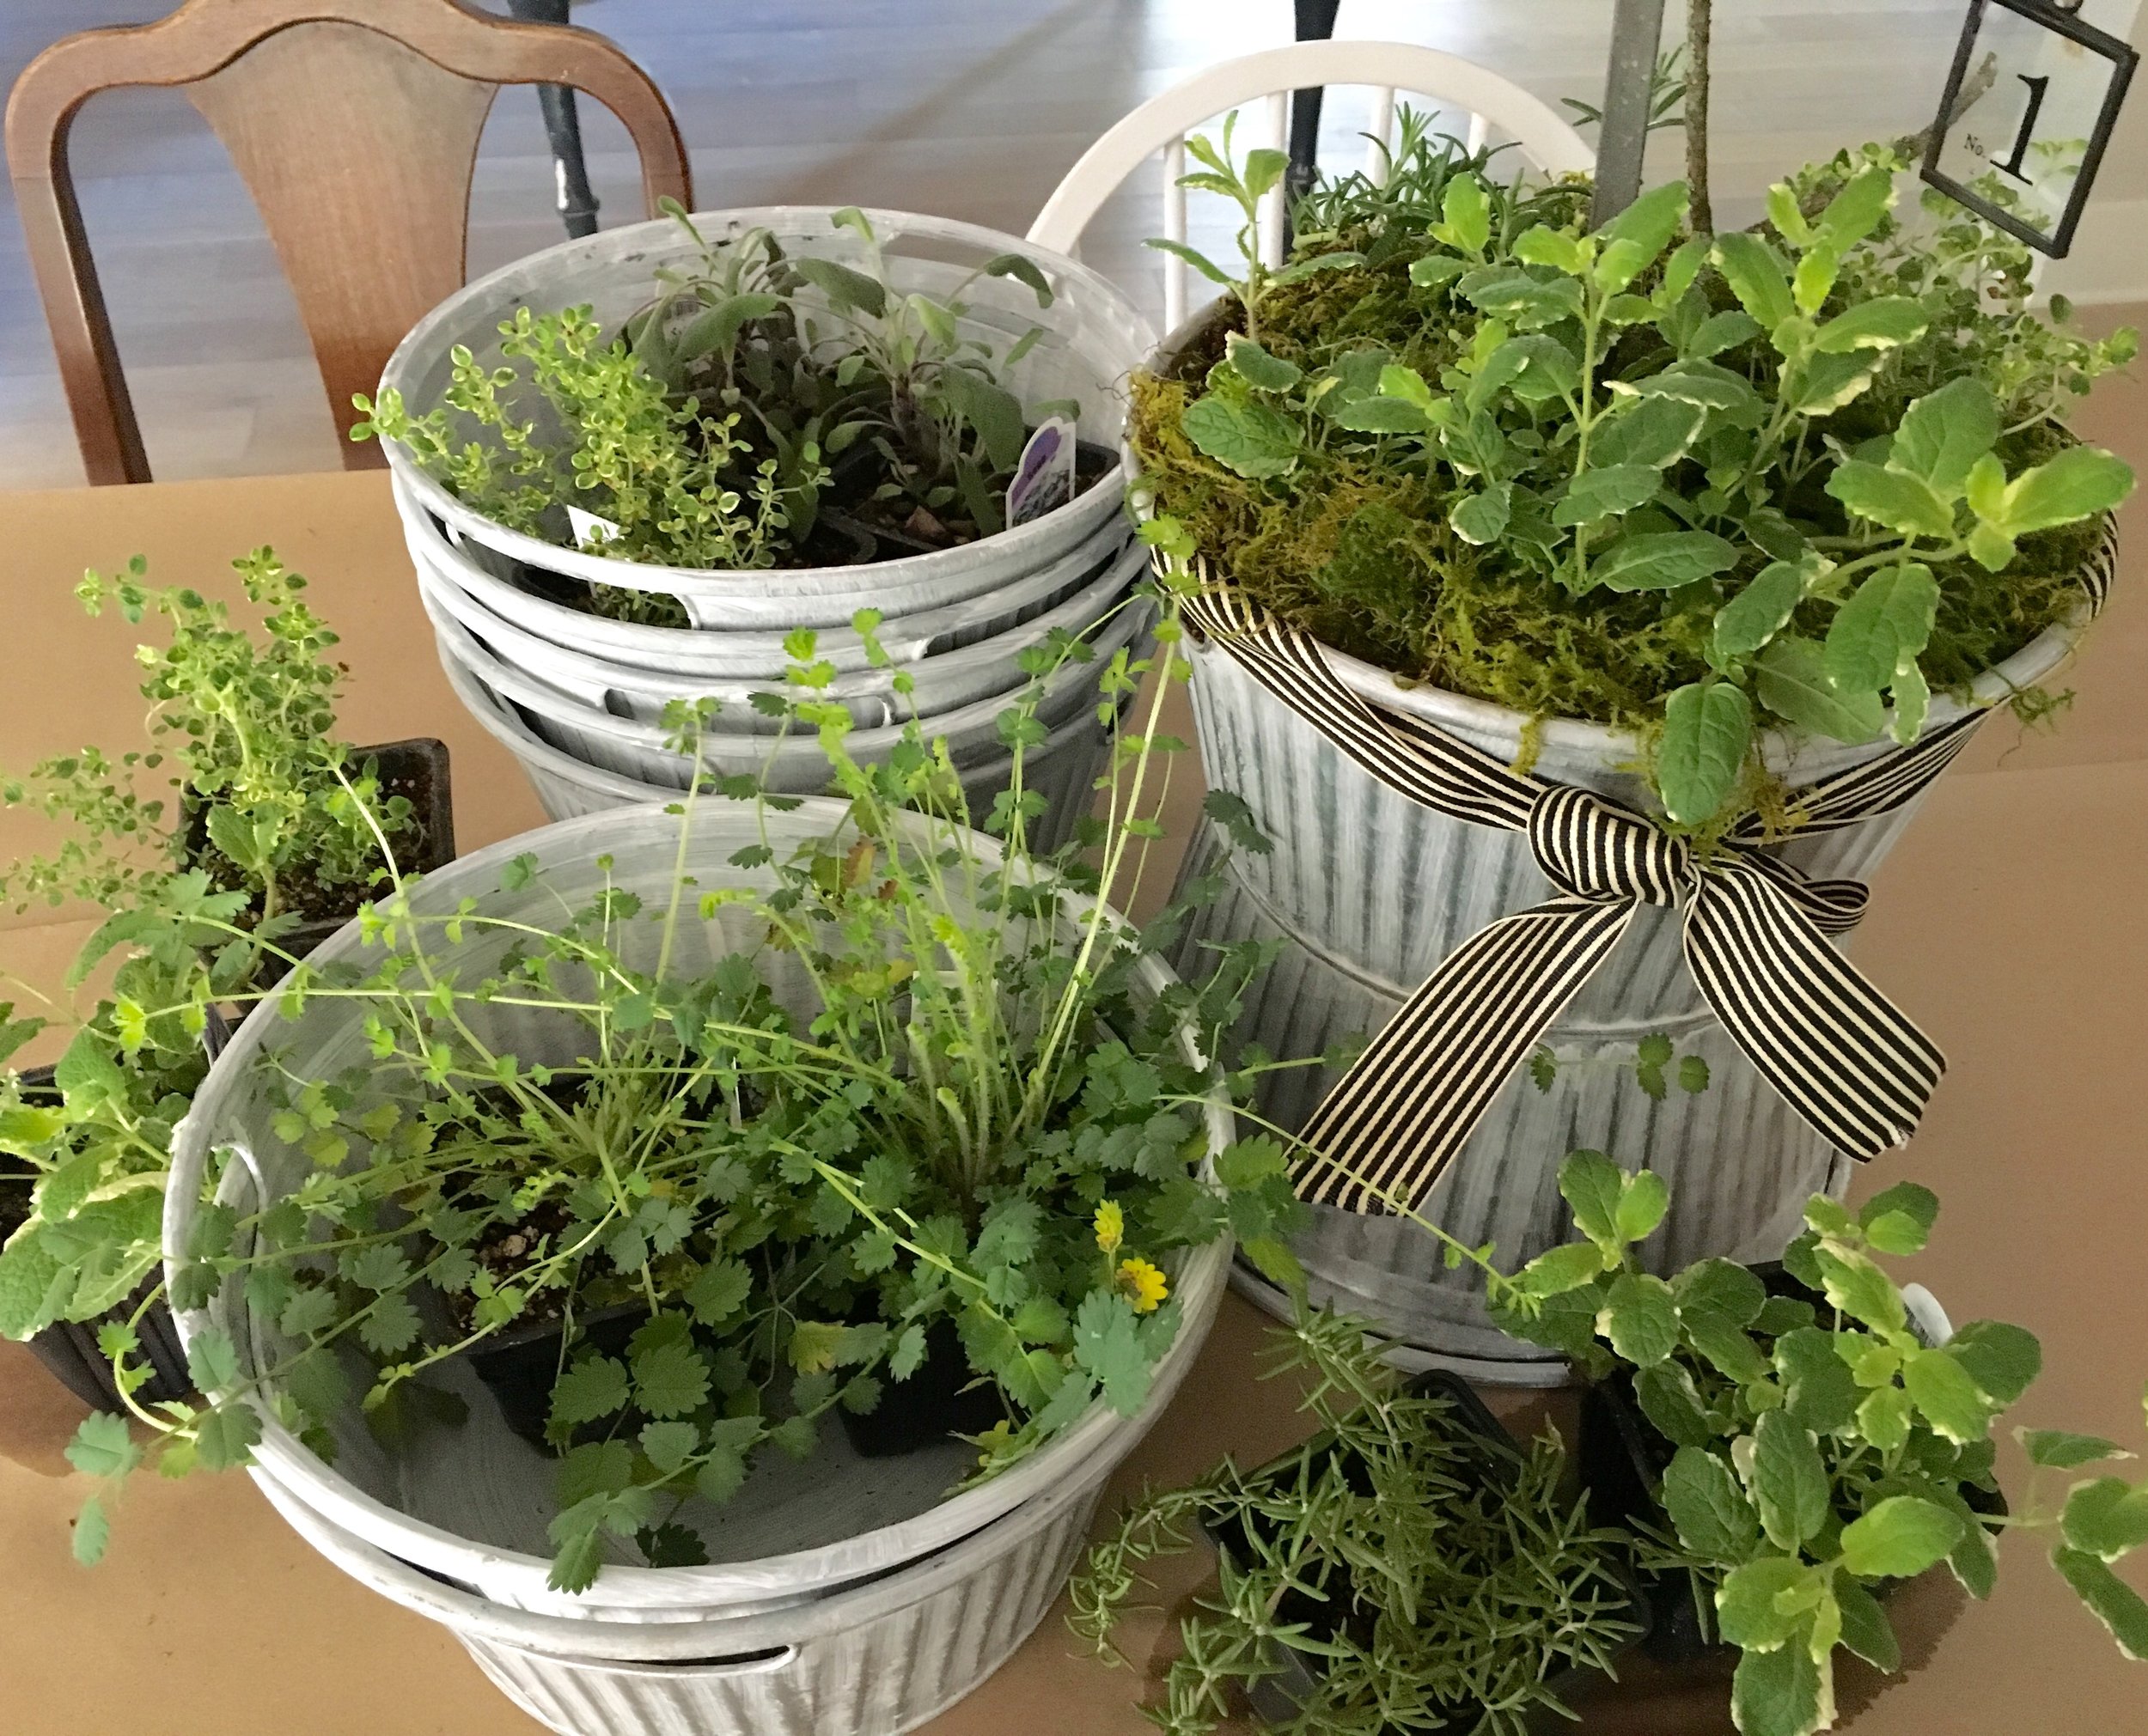
It's been a while friends!  We are starting to adapt to our new routine (with the shop) and it feels so good to be back to baking and cooking, tending to the yard and cleaning my home!  Last Friday night I hosted an Herb Gardening Class.  We planted container gardens, shared tips and tricks and enjoyed rosemary + grapefruit water and lemon thyme shortbread cookies. herbclass

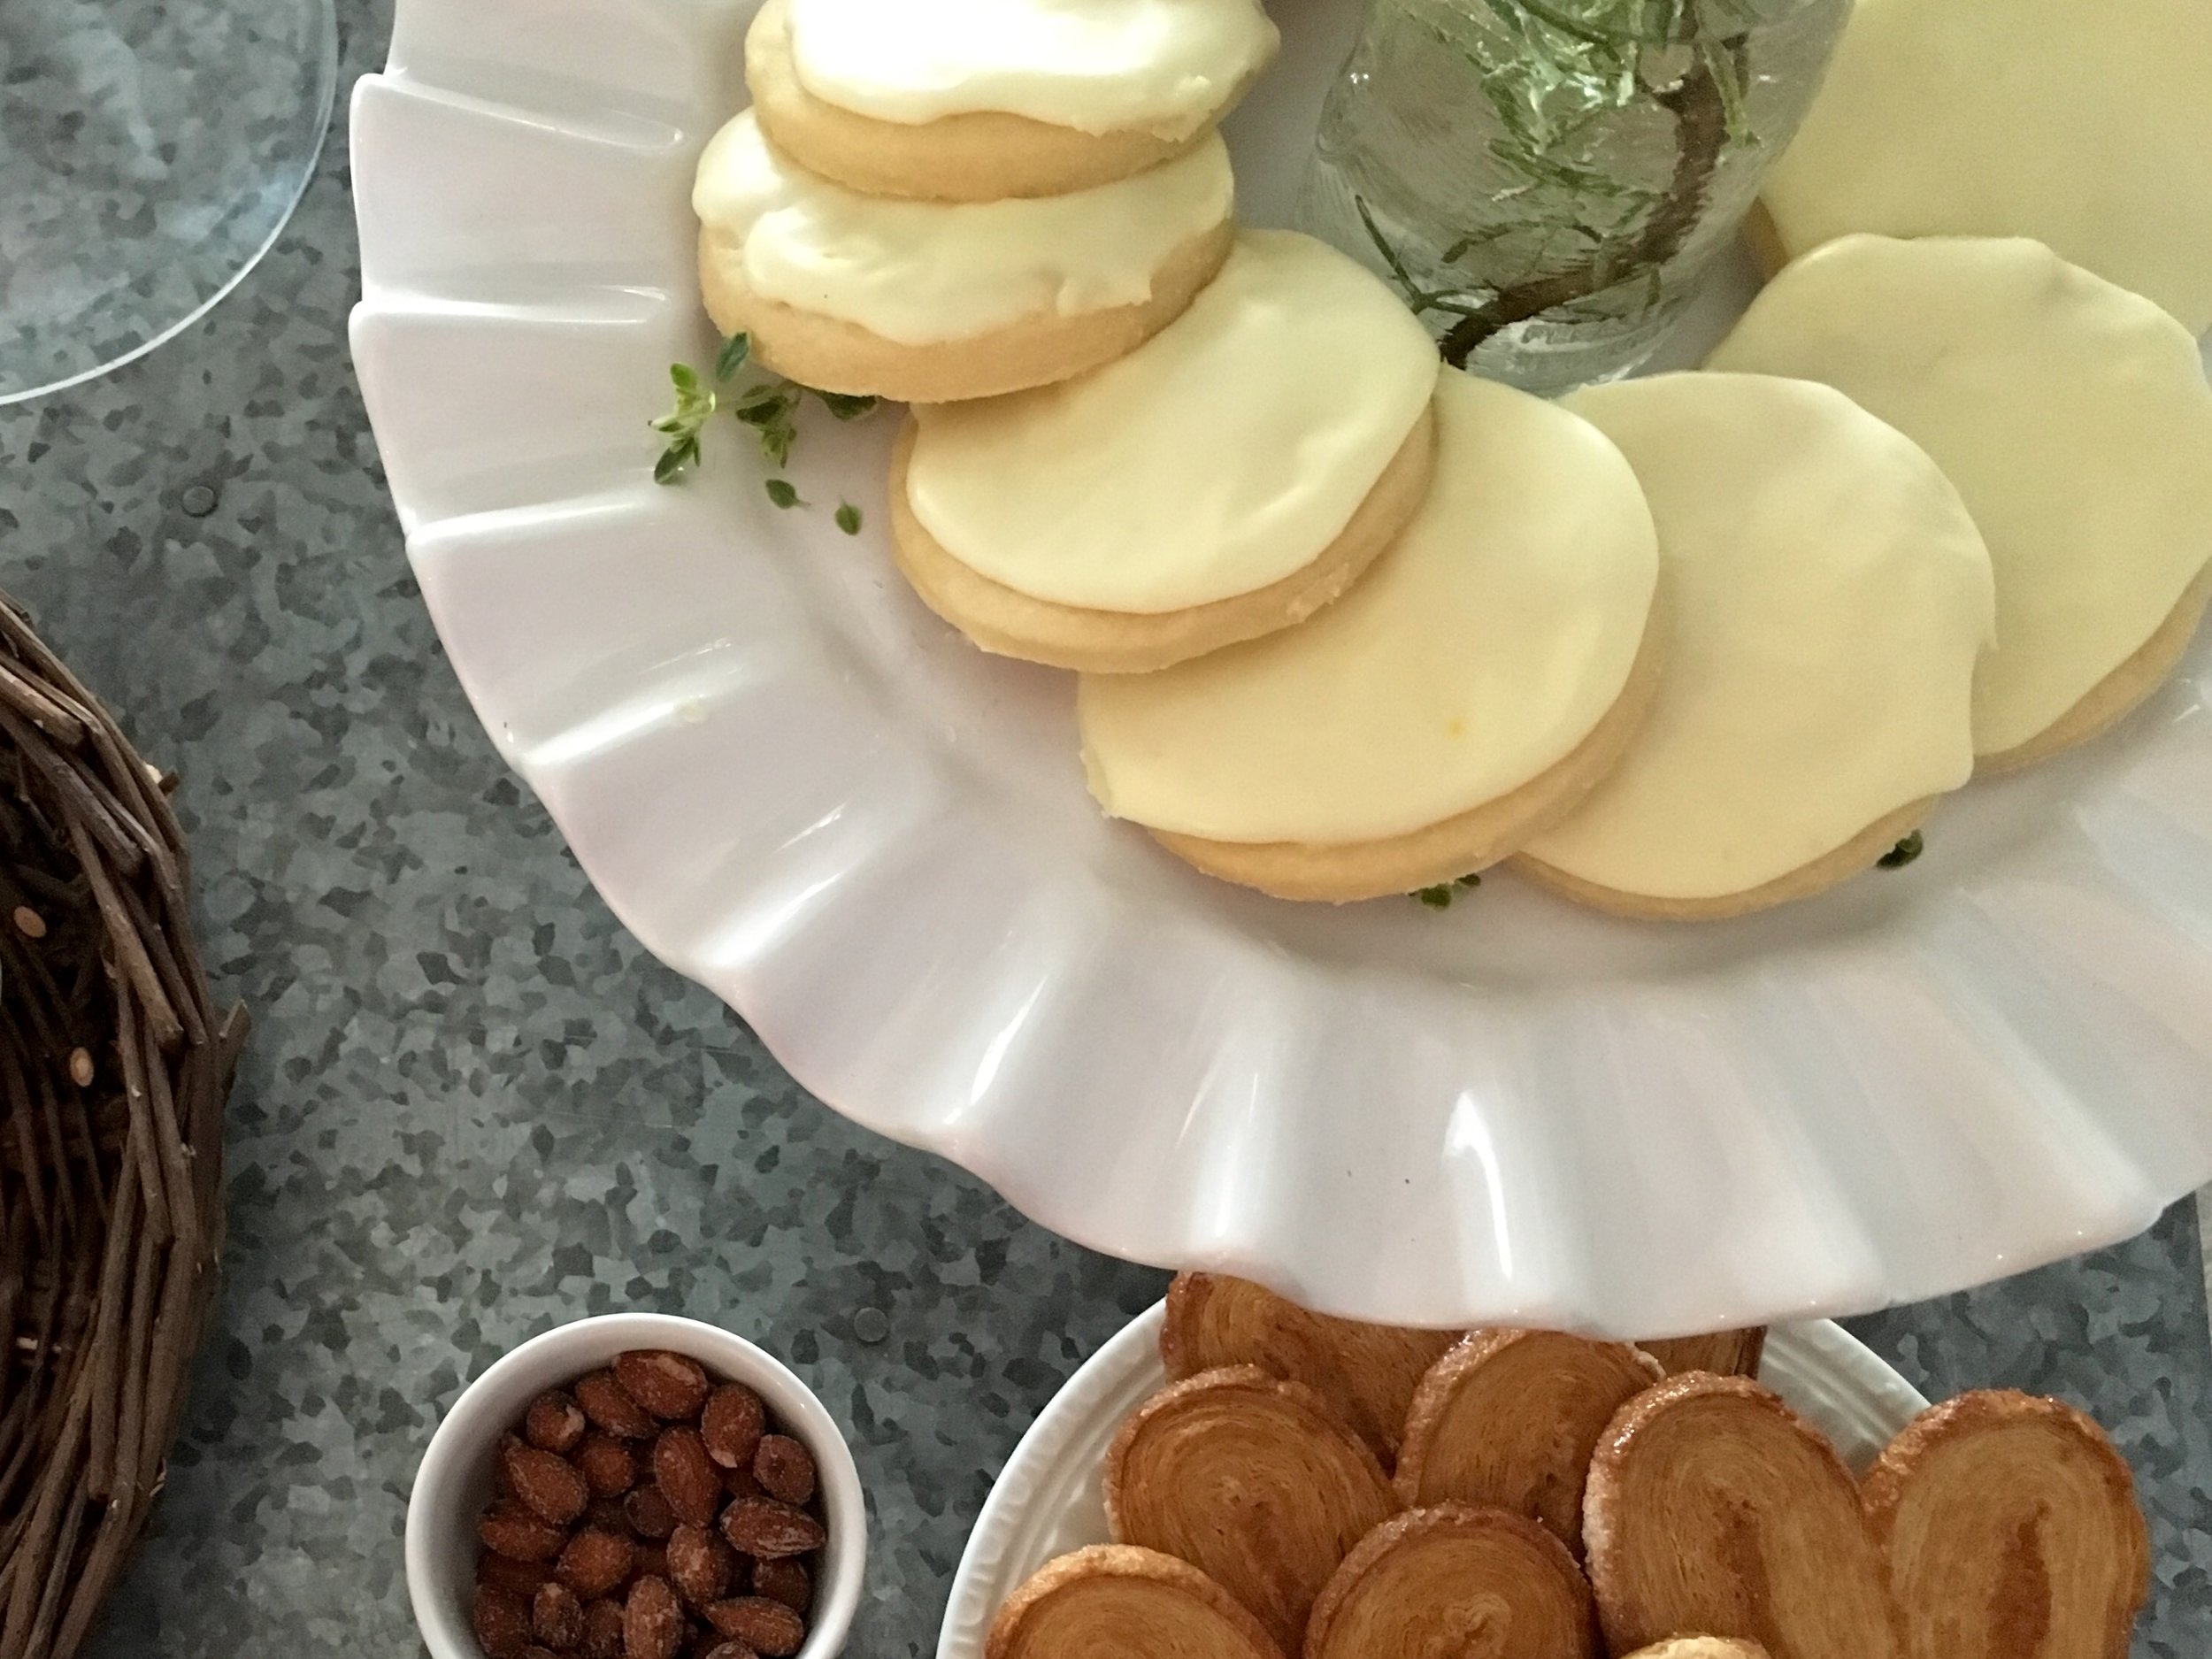
The lemon thyme shortbread cookie were so good!  Something about the hint of sweetness with the lemon thyme.....yummy!  I thought I would share the recipe!  And FYI, I made a double batch so that we could enjoy some at home and they freeze beautifully.

cookies

Lemon Thyme Shortbread Cookies

Ingredients 2 c All-purpose flour 1 c Butter, unsalted, room temp. ½ c Powdered sugar 1 Tbsp Thyme, finely chopped 1 Tbsp Lemon zest ½ tsp Vanilla extract ½ tsp Lemon extract ¼ tsp Salt Lemon Icing 1 lbs Powdered Sugar 2.5 Tbsp Meringue powder 1 - 2 tsp Lemon extract ¼ - ½ c Water 3 - 4 drops Yellow food coloring Get Ingredients Instructions Lemon Thyme Shortbread Cookies Preheat oven to 350 °F. In your mixing bowl beat room temperature butter until it is creamy. Add the sugar and mix thoroughly. Add thyme, lemon zest, vanilla extract, lemon extract, and salt and continue to mix until ingredients combine. Add the flour 1 cup at a time until the mixture just starts to come together. Create a ball of dough and flatten it slightly before wrapping it in plastic wrap and chilling it for 1 hour. Remove dough from refrigerator. Lightly flour your surface and roll the dough out to ¼ inch thick. Use cookie cutter to cut out cookies. Place cookie cut-outs on a parchment paper covered baking sheet. Place cookies in the refrigerator for 20 minutes. Remove from refrigerator and bake for 8 - 10 minutes, or until cookies are golden brown. Let the cookies cool completely and then ice them. Let icing harden before serving. Lemon Icing In a mixer combine powdered sugar, meringue powder, and slowly add water while mixer is on low until you reach the consistency you want. Add lemon extract and food coloring and mix thoroughly. recipe from www.homemadeinterest.com

Enjoy!!!

opening the shop || MD HANEY & CO. H O M E

My sweet hubby has been working his tail off to get the new shop space ready for business!  You may remember the BEFORE pictures, the space was dated, dirty and dark.  Now it's light, bright and airy with a lot of really fun features.  I will post soon on some of the work that we did! Anyways, last week was L O N G and we worked H A R D but come Saturday morning, all of the hard work paid off.  I was so incredibly blessed by everyone who came to support us!!!  A sweet friend from church snapped some photos shortly after we opened on Wednesday morning and I think she did a fabulous job!

door

blopic10

blogpic12

We installed new hard wood flooring and Matt added moldings, beams and some really fun architectural features!

blogpic11

blopic9

My sweet hubby also built these fabulous shelves!  We didn't want to block off the windows, the natural lighting in this part of the shop is amazing.  He built these shelves so the view is not blocked from the inside or outside, and I can pile high the inventory!

blogpic8

blogpic7

blogpic6

blogpic3

blogpic2

blogpic1

12924586_506070569580339_6331897073095198959_n

12924586_506070666246996_718204940644928592_n

12794468_506070706246992_2306516969841779869_n

12898395_506070922913637_2483261664671281246_o

Can you believe these walls?!?  That wood is original to the house!  The guys started removing drywall and found this wood.  It's really amazing!  We found it throughout the house.  Again, I will do another post soon on what we did to the building.  We still have a lot to do, but we were able to get enough done to open our doors last weekend.

Thanks again for all of the encouragement and support!  Such a blessing!!  God is good and His timing is always perfect!  The new shop hours are WEDNESDAY - SATURDAY, 10am-5pm.  The address is 636 NE Baker Street, McMinnville.

PROGRESS || an update on the custom cabinetry job

For those of you that I talk to on a weekly bases, or even "here or there", you know that Matt has been working on a HUGE custom cabinetry job for the past six months.  The clients are the kindest, sweetest people and they have really good taste!  I thought I would post some progress photos of the cabinetry. bittner2

Can you believe the kitchen hood?  Matt came up with the design and I thinks it's amazing!  He had the metal fabricated and he made the corbels from the same reclaimed beam that he used to trim out the bottom of the hood.

bittner

These built-ins are in the dining room.  It's hard to tell from the picture, but the glass is seeded and the wood paneling in the black cabinet is all reclaimed wood.

1934442_929100643853414_6630606144380343841_n

This kitchen is truly stunning!  Matt made the kitchen island in two pieces, it's made out of reclaimed wood {or course ;-} and finished with four coats of sealer.

mantel

Matt made this mantel from a reclaimed beam.  This is in their living room and it will get cabinetry on both sides of the fireplace.

12400457_926537860776359_6252045796921532522_n

This guest bathroom vanity is one of my favorite pieces!  It's so simple and yet so classy!!  It's made out of...you guessed it....reclaimed wood!

12552818_926175304145948_6735735982390669500_n

Here is a shot of one of the kitchen walls.  The view out that kitchen window is amazing!!

I hope to get some photos of the finished space within the next month of so.  Matt still has some hardware and shelves to install, and then he will start work on the custom cabinetry in the office and a custom dining room table.  I promise to post pictures soon.....it's a beauty, that's for sure!!

Valentine's Day and a BEFORE video

Hello and Happy New Year!!  I hope you enjoyed your holiday season.  Ours was filled with family, friends, fun and some good doses of rest too! Last week, we closed escrow on a commercial building in downtown McMinnville.  We are super excited to move the studio downtown and expand the retail side of the business!!  I will share more as the shop space progresses, but I shot this little video right after we picked up the keys.  As you can see, the building needs a little help, but we love a good Fixer Upper!

[embed]https://www.youtube.com/watch?v=bcgjxYT2c_Q&feature=share[/embed]

The girls are at such a fun age.  I have enjoyed every season, but I am really enjoying all of the activities that we can do together!!  Yesterday we baked some brownies and decided to cut them into heart shapes and decorate them for Valentine's Day.  Such a simple activity but we had so much fun....then of course we had a little 'milk and brownie' movie night and enjoyed our sweets.

IMG_6583

IMG_6586

IMG_6587

IMG_6590

The brownies were a box mix, my favorite!  So easy, and so good!  Once the brownies cooled, we just used a heart shaped cookie cutter, sprayed it with oil and cute our hearts.  We sprinkled on a little powdered sugar and the girl decorated their hearts with these sweet little heart shaped candies.  Cold milk with cute straws and we were ready to cozy in and watch a few episodes of Madeline ;-)

And that cute tea towel in photo, that's one of the many cute tea towels I will have for sale at the new shop.  I just received my shipment and they are all DARLING.   I now have one of each color in my kitchen ;-)

Have a lovely weekend, and go bake some brownies!!!  Your family will love you (even more) for it!!!

painted metal chairs || CHALK PAINT® decorative paint

I have received a lot of emails and some FB messages about my painted metal dining room chairs.  I thought I would post just a short "how to"!

2015-11-19 01.57.29

I had purchased four metal chairs from Overstock last year.  I like that they are durable, inexpensive and I just like the look.  When we refinished our "new" table, I purchased four new chairs as this table can seat 10.  As soon as Mr. UPS delivered the chairs, I realized the brown color wasn't working for me in the new dining area.

2015-11-26 02.07.45

Here is a photo of the brown chairs for the kiddos table at Thanksgiving.

2015-12-04 02.05.13

Here is a photo of the chairs painted.  One of the many reasons I love, and use Chalk Paint® decorative paint, is that it goes over virtually any surface.  If you have ever tried spray painting metal chairs, you know what a pain that can be!!  The Chalk Paint® works beautifully on metal!

  1.  Scuff metal using fine grit sandpaper (I used 220) or steel wool.
  2. Clean metal with warm soapy water, rinse with warm water and dry completely.
  3. Apply two coats of paint, I used OLD WHITE.
  4. If you want a distressed look - once the paint is dry, distress the paint by sanding the edges and places where the chair would naturally wear.
  5. Apply two coats of Annie Sloan lacquer to seal and protect.

I love the look, in this dining room, better with the white chairs.  I will probably paint them again in the future, and that's just another reason I love this paint :-)

STENCILING A CONCRETE FLOOR || our dining room

We have been in our home for almost two years now.  The time sure does fly!!  We have some fun remodeling plans in the future and one space we would like to remodel is the dining room.  However, that won't be happening for a few years, so we decided to spruce the room up until we save up enough money to do our major renovations.

IMG_6282

This room is right off of the kitchen.  It was a sunken living room and we have decided to turn it into our dining room.  Eventually, we would like to tile the kitchen and dining room space and add French doors to open to the outside.  Until then, paint is our best friend!

IMG_6307

After painting the walls, we scraped, patched and cleaned the concrete floor.  I have always wanted to try to stencil,  I thought this would be a great time to try!

2015-12-04 02.04.13

2015-12-04 02.03.50

2015-12-04 02.04.59

2015-12-04 02.05.13

Here are the details on stenciling the concrete floor...

-We scraped, patched and cleaned the concrete floors before painting.

-We applied (with a roller) two coats of Chalk Paint® decorative paint, the color is OLD WHITE.

-We purchased the stencil from RoyalDesignStudio.com.  We opted for the "professional" size and I am so glad we did!  The stencil was easy to clean and very easy to use!!  I highly recommend their stencils.  They have some beautiful designs.

-We used Chalk Paint® for the stencil paint as well, the color is PARIS GREY.

-We applied (with a roller) two coats of Annie Sloan lacquer.  It's a water based lacquer with a matte finish.  It seals the floors beautifully and makes cleaning the floors very easy.

Overall, I am very happy with the results.  With less than $400 worth of supplies, some time and a lot of elbow grease, we transformed our concrete floor.   The space feels cozy and clean and now I am contemplating painting and stenciling my ceramic tile in the laundry room.  ;-)

Chalk Paint® decorative paint || FRENCH LINEN side tables

I often don't take the time to take pictures of spaces I have helped design, or custom painting I do for customers.  When it's my own house and my own painting projects, I can take the time to take pictures while the girls are playing or napping.  At this stage in my life, it's just more convenient to take pictures of my own projects!  However, I painted these sweet little side tables for a customer and it was easy to bring them into my home and snap a few photos!

2015-11-19 21.04.03

The side tables were in really good shape.  They belonged to my customer's Grandmother.  They mean a lot to her and she wants to keep them, just update them a bit with paint.

2015-11-25 04.46.35

2015-11-25 04.48.27

2015-11-25 04.48.57

I painted these little cuties with Chalk Paint® by Annie Sloan.  I used the color French Linen, lightly distressed the edges, sealed the sides with clear wax and sealed the top with Annie Sloan lacquer.  I antiqued the tables with a small amount of dark wax, put the existing hardware back on and packaged up care instructions with a sample of clear wax for my customer to take home.

I hope she enjoys these little tables for years to come!

PUMPKIN CHOCOLATE CHIP COOKIES || a sweet treat recipe

Since pumpkin is the go-to ingredient right now, we are baking anything and everything pumpkin!  Last night the girls and I made a batch of pumpkin chocolate chip cookies.  They were so soft and cake like, I had to share the recipe!!

2015-11-19 05.00.19

2015-11-19 05.04.20

2015-11-19 21.01.17

2015-11-19 21.01.39

My girls love to bake.  It always takes a little longer, and they make a bigger mess than I might, but I love that time that we have together!  Plus, it's created this desire in them to want to create and experiment in the kitchen.

Ingredients
  • 1 cup butter, softened
  • 3/4 cup sugar
  • 3/4 cup packed brown sugar
  • 1 egg
  • 1 teaspoon vanilla extract
  • 2 cups all-purpose flour
  • 1 cup quick-cooking oats
  • 1 teaspoon baking soda
  • 1 teaspoon ground cinnamon
  • 1 cup canned pumpkin
  • 1-1/2 cups semisweet chocolate chips
  • 1/2 cup chopped walnuts

Directions

  1. In a bowl, cream butter and sugars until light and fluffy. Beat in egg and vanilla. Combine the flour, oats, baking soda and cinnamon; stir into creamed mixture alternately with pumpkin. Fold in chocolate chips. 
  2. Drop by tablespoonfuls onto greased baking sheets. Bake at 350° for 12-13 minutes or until lightly browned. Remove to wire racks to cool. Yield: 4 dozen. 
*This recipe is adapted from Taste of Living

painted side tables || Miss Mustard Seed Milk Paint + Annie Sloan Chalk Paint®

I bought two night stands years ago at a garage sale.  I used them in the girl's bedroom for a while and then for the past few years they have been sitting in the garage.  I finally decided to paint these little guys....

2015-10-27 01.37.58

The blue color is BERGERE {Miss Mustard Seed Milk Paint} and the white detailing is OLD WHITE {Chalk Paint® decorative paint}.  I distressed the piece and then waxed it with Miss Mustard Seed Antiquing wax.

2015-10-27 01.33.39

2015-10-27 01.37.21

2015-10-27 01.35.21

2015-10-27 01.36.11

I priced them and plan on taking them to La Bella Casa.  However, I brought them into the living room to photograph them and now I kind of love them in the space.  They might stay here for a while....we shall see ;-)

PUMPKIN CHOCOLATE CHIP BREAD || a sweet recipe

bloggirls

The other day the girls "got" to join me for a color consultation.  Typically they play with Grandma when I meet with clients, but that wasn't going to work, so they tagged along.  My client was SO sweet.  She turned what could have been a totally draining morning (shushing and nagging little girls while trying to be professional and have a meeting) and turned it into a fun and productive time.  A great reminder of how I want to treat those around me!  When we headed out into the alley way to look at all of the different colors she had tried painting on the building, she started to snap some photos of the girls.  This one is my favorite!

That evening, the girls and I decided to do some baking.  It seems fitting to bake all things pumpkin in October, so we started our baking spree off with pumpkin chocolate chip bread.

2015-10-22 00.07.49

This is a new recipe (to me) and the bread turned out so good!

CHOCOLATE CHIP PUMPKIN BREAD

2 loaves

3 cups flour 
2 tsp cinnamon 
1 tsp salt 
1 tsp baking soda 
1 tsp baking soda 
4 eggs 
2 cups sugar 
2 cups canned pumpkin 
1 1/2 cups canola oil

Preheat oven to 350. 
In stand-up mixer, beat eggs, sugar, pumpkin and oil. Gradually add in dry ingredients until just combined.  Pour in chocolate chips. 
Pour evenly into two greased loaf pans (4x8). Bake for 60 minutes or until a toothpick inserted comes out clean. Cool on wire racks. 
Slice and serve.  It also freezes really well!

2015-10-22 00.09.53

 Enjoy!!

SEASONS CHANGE

I know I am not alone in this....but I LOVE Fall!  The cooler weather, the Fall colors, the desire to make my home warm and cozy, the list goes on and on!  This is the view out our bedroom and living room window.... 2015-10-08 00.59.26

aren't those trees amazing?  It's inspired us to plant some maple trees along the new pasture fence.  We need a little Fall color down there!

IMG_6044

In 'family' news, my sweet pea started Pre-School this year!  She is going two mornings a week and she loves it!  I am really cherishing this time with my girls....2 1/2 and 4 1/2, it's such a fun age.  They wear me out but they soften my heart every day!

In 'work' news, in less than two years, we have already out grown our work spaces on our property!  Matt builds cabinetry in the barn,  and he turned what was going to be my studio space into a spray booth.  This is what the front of the barn looks like....

2015-10-08 00.59.42multiple trucks and trailers as he moves cabinetry form the workshop area to the spray booth area and then up to the garage when they are finished.  And here is how my garage looks now....

2015-10-08 01.00.53

full of finished cabinetry, furniture pieces waiting to be painted and custom pieces that are finished and waiting to be picked up.  I am definitely not complaining, just amazed at how we continue to grow!

Over the past year, we have been looking for a commercial spot in downtown McMinnville to move the retail and design side of the business.  Nothing was a good fit and I wanted to stay working from home to be with my girls.  Well, the perfect spot became available!  It even has a huge basement that we can use for storage and a huge play room/creative area for the girls!  It's just darling!  Escrow closes January 5th.  We plan on about one month worth of renovations, and plan on opening February 2016!  I can't wait to share the plans we have for the space!

In "home" news, not much has been happening in the way of projects.  Matt has been working 14-16 hour days, 6 days a week.  Since he is the "brawn and talent", not a lot has been happening!  He did finish the screen on the basement cabinetry and I love that it's finished! ;-)

2015-10-01 00.47.48

I have also started to slowly tackle the laundry room and basement bathroom.  It will be a slow process because, big surprise, I need Matt's help.

But, over the past 6 months I have found contentment in my home.  It's not finished, and we have a lot of projects that we want to do.  But, it's a warm, cozy and beautiful place to raise a family, share life with friends and make memories.  And that's what's important to me, the rest is just the icing on the cake!!

painted oak vanity || Chalk Paint® by Annie Sloan

We haven't been working on too many projects at home lately.  Work has been extremely busy, which is good but makes for very little time to do anything else!!  We did sneak away to Pacific City for the day to celebrate my father-in-law's birthday.  We love Pacific City because we can drive right down on the beach and just camp out for the day!

2015-09-13 03.57.13

2015-09-13 03.55.06

At home, we have put together a plan to try to finish the basement space this winter.  We have to make my office space and finish the laundry room.  Mostly cosmetic and a lot of fun!  It's just finding the time to do it!

IMG_6042

We have a small bathroom down in the laundry room.  It's the 4th bathroom in the house and it has served as a storage room for me every since we moved in ;-)  I finally cleaned it out and decided it's time to spruce it up!!

2015-09-13 21.31.33

Here is the vanity cabinet after one coat of Old White Chalk Paint.  Before I started painting, I  wiped the cabinet down with warm soapy water, scuffed it with 180 grit sand paper, and started painting.

2015-09-16 05.21.03

2015-09-16 05.21.46

2015-09-16 05.21.18

I painted two coats of Old White Chalk Paint®, lightly distressed the edges and applied one coat of Annie Sloan clear wax.  It was such an easy change and it really lightened the room!  I have some more projects for this space and hopefully with the weather changing I will have a chance to get to them ;-)

M & M monster cookies || a sweet recipe

IMG_6003

We go through a lot of cookies in our home!  I love to bake them and we all love to eat them ;-)  Plus, I love having them on hand to give away! I usually default to making chocolate chip cookies, but I do love a good monster cookie!  I have posted my monster cookie recipe before, and I love that you can throw any treat into the dough and they taste yummy!  Today we added mini M & M's and chocolate chips...yummy!!

IMG_5994

MONSTER COOKIE RECIPE::
Pre-heat oven to 325.
Mix 1 cup butter softened, 1 cup sugar, and 1 cup packed brown sugar.
Add 2 eggs and 1 ½ tsp vanilla, mix blend.
In separate bowl: mix 2 cups flour, 1 tsp baking soda, 1 tsp salt.
Combine all ingredients and then ADD:
2 cups choc chips, 2 cups mini M & M's, and 3 cups quick oatmeal.
Mix all ingredients by hand and drop large, rounded spoonfuls onto baking sheets.
Bake at 325 for 10-12 minutes.
Take them out before they fully cooked.
Enjoy!!
IMG_5997

a customer's paint projects || BEFORE + AFTER

A couple of months ago I meant the cutest little paint customer.  She had just moved back to Oregon from Arkansas and was frantically trying to get her kitchen painted before the movers delivered everything.  She is just a cute little bundle of energy, and she has four kiddos to keep up with!!  You won't believe the transformation!

BEFORE:

blogbeforekitchen


AFTER:


blogkitchen


blogcabinet

Isn't it darling?  She painted with Annie Sloan Chalk Paint® and then waxed with the soft wax.  I want to move in, it's just darling!!

BEFORE:

blogbeforefp

AFTER:

blogfppainted

blogfp

blog2light

She even made this light fixture!  Darling, right?!?

I love, love, love getting pictures from customers!  These pictures made me want to move right on in!!  She is probably a great cook too!

Next week I will have pictures from the Dayton renovation.  Everything has to be wrapped up in two weeks which is CRAZY.  My poor hubby is working around the clock to get this job finished in time.  Next week I will be working on the job site, honestly, I haven't done any jobs 'on site' since having kids (4.5 years ago!)  I think all of Matt's subcontractors will agree with this statement...."if Matt's not happy, nobody is happy".  Wish me luck ;-)

Have a fabulous weekend!

growing girls and a newly painted hutch

IMG_5830

I feel so blessed to be able to stay at home with my girls.  Most of my work can be done early in the mornings, at nap time or when the girls play at Grandma's.

The other day, the girls and I were headed to the garden and Addilyn started the conversation…."my heart is so full right now. Savanna, do you love God with all of your heart, or just part of your heart?"  To which Savanna proudly replied "all of my heart."  Addilyn was pleased with her answer and replied "me too, that's why we have happy hearts.  Because we love God and He loves us even more".

The little conversation melted my heart and was the little piece of encouragement I needed.  I LOVE my work!  I could work all day long, every day of the week.  It can be a challenging balance to work (especially self-employed) and be with the kiddos, but for us, in this season we are in, it is so worth being home with the girls.  The girls even helped me paint this hutch…..

IMG_5842

IMG_5846

IMG_5848

IMG_5850

The top is painted with Annie Sloan Chalk Paint® (GRAPHITE) and waxed with two coats of clear wax and one coat of dark wax.  The inside is painted with Chalk Paint® (CREAM) and the bottom is painted with Miss Mustard Seed Milk Paint (BERGERE) and waxed with one coat of clear wax and one coat of dark wax.  This little beauty is headed to La Bella Casa this weekend so I can make room in the studio for more treasures!

Enjoy your weekend!  And your little ones!!

outside || our home

Oh I know it's been a while since I last posted!  Since summer is upon us in all of it's sunny, warm glory, I thought I would post a few pictures of little projects I have been working on outside.  Matt has been so busy with work (like he wakes up at 3:30am to start working, comes home for dinner around 6/6:30, and then some evenings even goes back to work in the barn!) that we haven't done any projects around our house.  But our 'to-do' list continues to grow, so hopefully this winter we can start back up on some of our own projects! IMG_5599

Our 'back yard' is were the girls play ride bikes and kick the soccer ball around.  We had this long stretch of artificial turf from when the previous owners had a batting cage.  I have been stumped as to what to do with this space!  We thought about a big play structure, but we couldn't find one that would fit right.  We thought about a soccer field, trampoline, the list goes on and on.  I finally figured an herb garden could be great there and go with our overall outdoor plan!  Plus, with artificial turf, I wouldn't have to mow the grass or worry about weeds ;-)

IMG_5666

We measured and laid out the beds.  I started cutting holes into the artificial turf and filling it with compost and soil, it took a while!

IMG_5805

IMG_5809

IMG_5811


I still have a lot of work to do, and eventually Matt will build a fence around it.  But for now, I enjoy having my herbs so close and a pretty view out my kitchen window.

IMG_5812

IMG_5815

We still have a lot of work to do on the barn this Fall!  Matt needs to build a barn door for the front entrance.

IMG_5817

He also needs to build a large barn door for the bottom entrance.  You can also see we need to get the retaining walls and gravel in before the rain starts!

IMG_5820

The girls and I have been enjoying the garden this year!  The girls wanted their own cutting garden so they could have fresh flowers in their bedrooms.  These girls crack me up!  Anyways, the zinnias and sunflowers are just starting to bloom...

IMG_5821

IMG_5822

IMG_5799

The girls and I just made our first batch of home made cucumbers!  Can't wait to try them!!  Have a lovely weekend!

PAINTED HUTCH || painted with Chalk Paint®

I often forget to take pictures of different pieces I am working on.  I guess I just get side tracked, or I am just ready to move onto the next project ;-)  However, I did remember so here are a few pictures on a small hutch I finished last week….

IMG_5769

The top is has three different colors/layers (all Chalk Paint®)…..French Linen, Old White, and the top layer is Pure White.  The bottom is painted with Paris Gray.  I lightly distressed the entire piece and then sealed it with Annie Sloan's soft wax.  After applying two coats of soft wax, I applied Miss Mustard Seed's white wax in areas and allowed it to build up, giving the piece a bit of a bleached look.

IMG_5774

IMG_5775

IMG_5778

I added new knobs, painted the interior and called it 'good'.  It's a darling little hutch and it will soon be on it's way to La Bella Casa!

IMG_5784

Enjoy your week and happy painting!!!

painting a new door + making it look old

One of the many things I love about our home, is the potential to never run out of projects!  In the next couple of years, we hope to do an extensive kitchen remodel.  Until then, when the 'itch' hits to change something up in the kitchen, I usually resort to paint ;-) We have a fir door in our kitchen, it's in pretty good shape (except for where the dog scratches when he wants to go out to play…..)  When we remodel, I would love to replace the current door with a dutch door, similar to this...

dutchdoor

For now, paint will have to do!

IMG_5702


IMG_5706

IMG_5708-001

(first coat ~ FLOW BLUE)

IMG_5725

IMG_5728

IMG_5734

I used Miss Mustard Seed Milk Paint for this project.  I applied one coat of FLOW BLUE (no bonding agent).  After the first coat of paint dried, I rubbed corners with vaseline.  The vaseline causes the next coat of paint to resist, it makes for great distressing!  I then applied two coats of SHUTTER GREY.  I distressed the door and finished it off with two coats of clear wax.  The picture isn't a very good representation, I feel it looks much better in person!

Just a fun and easy project that I was able to complete in an afternoon!

I hope to have a lot more pictures to post soon!!  Matt and I have both been super busy with work and I often forget to take pictures. ;-)  Plus, I am soaking up every summer minute with my girls, 2 and 4 years old is such a fun (and exhausting) age, I don't want to miss a second of it!!

CHIPPY VANITY || a painted vanity

I have this sweet little vanity that I got about 5 years ago.  I originally painted it for Addilyn's nursery.  I used milk paint (I was super pregnant and wanted something safe to work with) and painted it a sweet shade of light green.  I have always loved this little vanity, and had no intention of selling it!  However, I just don't have a place for it and I need furniture for my little space at La Bella Casa!  So, it got a makeover and will be headed to the shop next week….

IMG_5648  IMG_5654 IMG_5659 IMG_5651

IMG_5650

It was originally painted with a blue paint (probably lead based, the piece is very old).  When I got it, Matt completely sanded it down for me. I layered several milk paint colors and love the chippy, old look.  I sealed it with wax, added some pretty knobs, now she is all set for a new home!

hand made growth charts

It must be the time of year, a few weeks ago I received requests for 4 custom growth charts, all within a two days.  The last time I made a growth chart was at least 4 months ago, it's so funny how things ebb and flow!

I know that there are a gazillion growth chart tutorials online, but I thought I would share the way that I make them, and hopefully inspire someone to make their own growth chart!  They take a few hours to complete, but I break mine up into stages and the results are so worth it!!

IMG_5629

IMG_5634

IMG_5636

IMG_5638

IMG_5640

IMG_5645

Supplies Needed:

~ 6' pine board, (the width can be whatever size you prefer)

~ paint and wax (I used Annie Sloan Chalk Paint® for the white growth charts (Pure White) and Miss Mustard Seed Milk Paint for the dark growth charts (Curio).  I used Annie Sloan clear wax for both growth charts.

~ black paint pen

~ ruler 

~ saw tooth hooks

1. Paint the board, both sides.  Wax with clear wax.  

2. Using a sharp pencil and a ruler, mark the side of the board every inch.  The pine is soft enough that you can press the pencil into the wood and it will mark.  (I lay my board on the work table/counter, it's best to do this with the board horizontal.)   Once the inches are marked, go back with your straight edge and make a line at every inch.  I use the marks on my ruler as a guide.

3. Use a paint pen and a straight edge to go back over the pencil marks.  The paint pen gives crisp, bold marks.

4. Print off numbers 1-6 in your preferred font, I use TIMES NEW ROMAN.  Trace the numbers with a pencil.  Again, the pine is so soft that you will easily see your tracing line.

5. Color in the numbers with the paint pen.

6. Attach the saw tooth hook to the back and your growth chart is finished!

This would make a fun baby shower gift, new mama gift or just a gift to yourself ;-)  One of these days I am going to make some in fun colors!  What color would you choose?