CHOCOLATE OATMEAL NO BAKE BARS AND CHRISTMAS AT THE STUDIO

I started decorating the front porch of the design studio the weekend after Thanksgiving.  Of course I had my two little helpers, so I wanted to keep it really simple.

IMG_3578

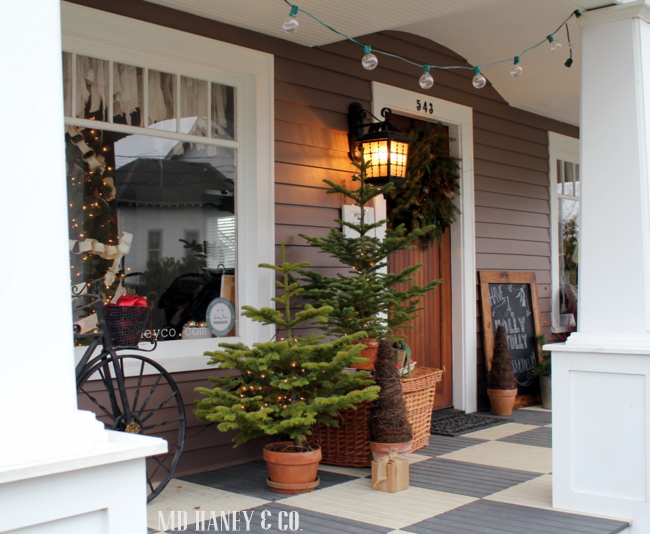
I had 3 objectives…..decorate quickly, use what I already have,  make it pretty!

IMG_3573

I filled old buckets with various fresh cut greens.

I love using fresh greens!  They smell amazing, they are naturally beautiful, and most of the time they are free!

IMG_3579

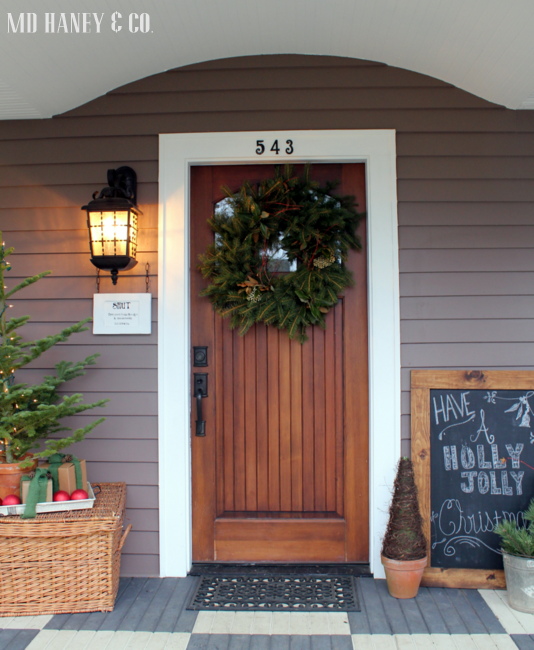
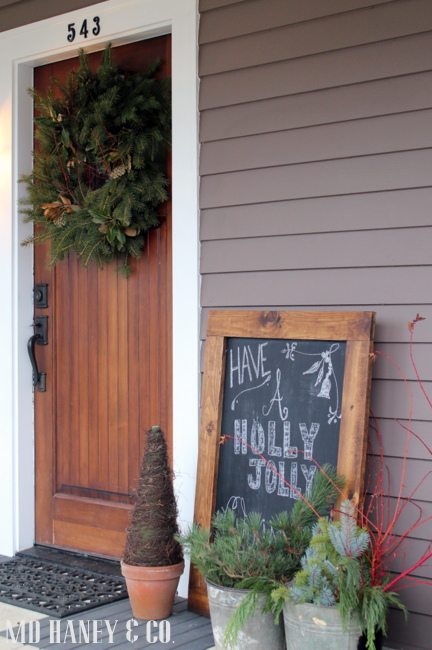
I made the wreath with fir and cedar branches from the back garden.

IMG_3570

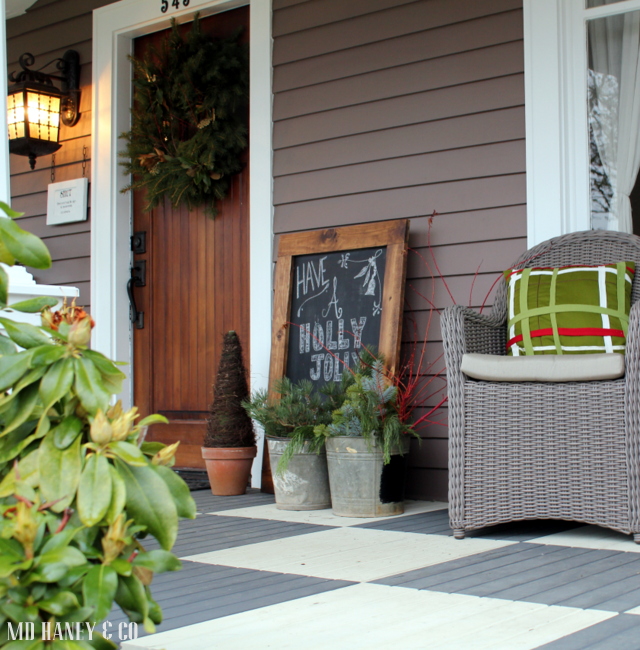
I love using Chalk Boards to decorate with!  A simple little Christmas message on the Chalk Board and we are set.

IMG_3568

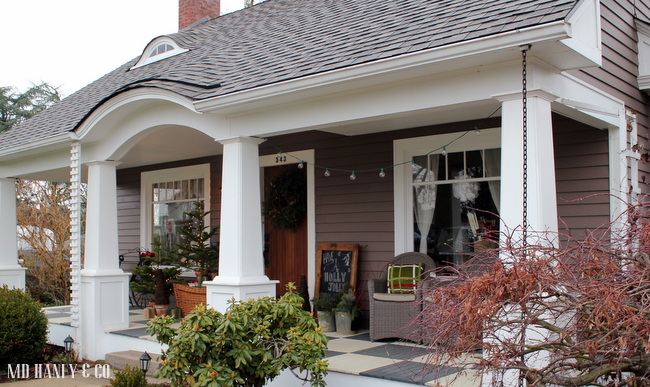
I forgot to turn on the market lights for the picture!  They are so fun at night.

IMG_3581

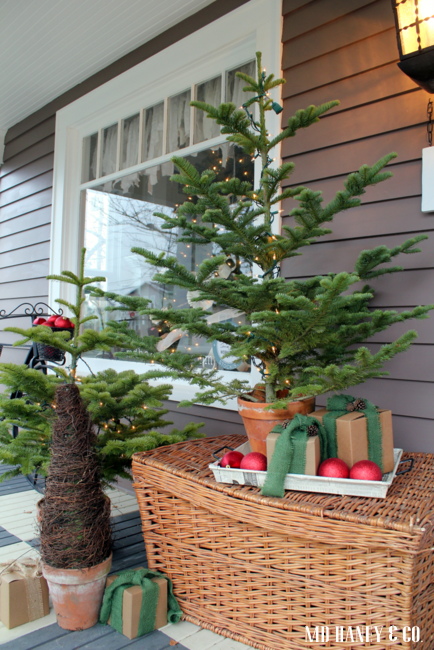
Two freshly cut trees, boxes with burlap ribbon and pine cones and a few red ornaments….all things I had laying around.  Well, not the freshly cut trees, but you know what I mean ;-)  I bought the large basket from my dear neighbor a few months ago, it provided just the right amount of height for one of the trees.

It's simple but festive.

****

The other day I 'pinned' NO BAKE CHOCOLATE OATMEAL BARS.

I love 'no bake' because they hardly take any effort.

If you are in the mood for an easy chocolate treat, you have got to make these!

IMG_3562

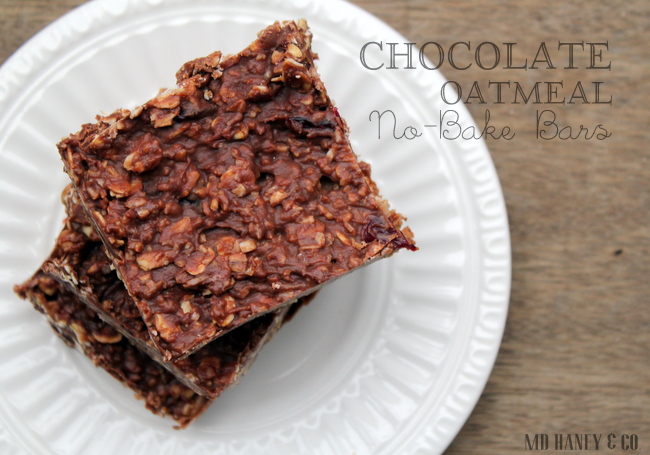
Best Ever Chocolate Oatmeal No-Bake Bars

  • 1 cup peanut butter
  • 1/2 cup honey
  • 1/2 cup coconut oil (you could also substitute butter)
  • 2 cups old fashioned oats
  • 1 cup shredded coconut
  • 1/2 cup chopped nuts, raisins, or dried cranberries
  • 1 1/4 cups dark chocolate chips (or regular semi-sweet chocolate chips, if you prefer)
  • 1 teaspoon vanilla extract

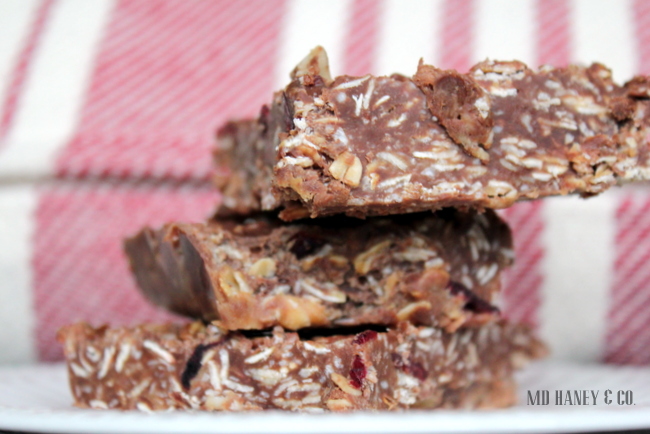
Melt the peanut butter, honey, and coconut oil over medium-low heat in a saucepan on the stove. {Watch this closely. Mine started to burn!}

Remove from heat once it’s melted together and add in the oats, shredded coconut, chocolate chips, nuts/raisins, and vanilla. Stir together until the chocolate is completely melted.

Pour into a greased 9×13 pan and cool in the fridge. If you’d like thicker bars, you can pour the mixture into a smaller pan.

When the mixture is hardened, cut into bars and eat. Store in the refrigerator or freezer.

Recipe adapted slightly from I Hear Exercise Will Kill You.

IMG_3566

Have a great day, and tomorrow I will show you a master bathroom design I am working on for a client!

A LITTLE OF THIS AND THAT

I have been pretty busy with various design jobs, but not really any jobs that make for good 'before and after' photos.  Offices, bathrooms, material selections, etc., spaces or things that just don't photograph well.  Matt has been busy with drawing plans and various jobs that just don't photograph well either! But, in the next few months I will have some great photos to share with you!!

So today, I just have a little of this and that…..

IMG_3532

My goal for the next month is to paint all of the random pieces that I have been collecting, but haven't taken the time to paint.

IMG_3533

I must be craving some blue in my life! This morning I realized that the pieces I have been painting over the last few days are all blue.

IMG_3538

I have also been working on painting cabinet doors with Chalk Paint®.  It really helps to have a big chunk of color when deciding on what color to use for a project!

IMG_3540

My little helper!

IMG_3546

I made Pioneer Woman's pretzel turtles this morning.  They are REALLY good!  Mine don't look as pretty as her's, but they sure taste good!

IMG_3548

They are perfect little treats for delivering with Christmas cards.

IMG_3553

I need to give them away because I am afraid I will eat them all!

Unknown

We carry DASH & ALBERT rugs at the Studio….I love them!

IMG_3556

I am going to use this rug in Addilyn's new bedroom.  I am also going to move the dresser from the master bedroom into her bedroom.  Don't you love the green dresser next to the rug?!? So fun!

IMG_3561

I am going to paint Addilyn's bed and night stand 'SCANDINAVIAN PINK'.  I think it will be a fun pop of color!  Pictures coming soon!

Until then, have a great week!!

ADDILYN'S NEW ROOM :: a toddler's room

Hi friends!

Remember this post I wrote last week?  Well, you won't believe what has transpired in the last 7 days.  I will go into more detail in the next few weeks, but for now, just know it has been pure craziness {in a good way} at the Haney household.  My shift has focused from re-decorating our master bedroom, to cleaning/packing/organizing because we are going to be moving soon!

One of the many things I am excited about, is that the girls will each have their own room.  Now, since my head has been whirling with decorating ideas, I figured it might help calm my crazy mind if I start getting ideas on paper. I thought you might enjoy seeing the ideas too!?!

258921_original

Here is a snap shot of the look I am going for in Addilyn's room.

Bright, fun, bold and a bit eclectic, just like my girl!

IMG_3521

When we moved back into our house {almost 2 years ago} I didn't take the time to decorate Addilyn's room.  I just used what we had, and knew in a few years we would start working on built-ins and really take the time to decorate.

IMG_3518

I love the bright colors in her room now, but I am going to go even brighter!  I think it will fit her bright and bold personality perfectly!

IMG_3526

And, just for kicks, a picture of her darling little Christmas tree.  Please don't mind the tree stand….we found an old pot, filled it with sand and water and it works perfectly ;-)

Next post, ideas for sweet Savanna's room…...


MASTER BEDROOM :: time to give it some style

We bought our little 'fixer' almost 8 years ago.  Wow, time really does fly, it feels like just yesterday!!  After remodeling and living in it for about 3 years, we moved out and turned it into a vacation rental while me moved into another 'fixer' and remodeled it.  We moved back into our house almost 2 years ago.  Anyways, the point being, when we moved back in, I was going to take the time to fix up each room exactly how I wanted it.

Then, I got pregnant with my little sweet pea and was dog sick the entire pregnancy.  Well, now that we are all sleeping a little better in the Haney household, I have a bit more energy to try to tackle decorating some of the rooms in our home.  Also, I have been really busy with work.  I find I need {and crave} my home to be organized and enjoyable, seems to make me a much happier girl!

The first room on my list is going to be our master bedroom, which I am sure will lead into re-decorating our master bathroom. ;-)

bedroom2 copyThe bedroom pictured above is my inspiration photo.

I love so many different styles!  Do you have that problem too?  However, I feel the style of the bedroom pictured goes perfectly with the look/feel/style of the rest of our home.  I am going to have Navy blue as the accent color {instead of green}.  I love the green pictured, but I already have a great blue rug and blue runs through the rest of our home.

IMG_3499

This is the view from our bathroom.  Our bedroom is pretty small, our King size bed takes up a lot of space.  Did you know our master bedroom use to be the kitchen?  And our bathroom use to be the laundry room?  Crazy!!

IMG_3498

The walls are currently a light blue.  I am going to paint the walls white, to match the trim and really lighten the room up.

IMG_3502

I am going to add bamboo blinds {and take away the curtains} and find a different dresser.

IMG_3501

I am going to get new bedding.....I am thinking all white with a couple of bold, blue pillows.

IMG_3504

I am going to re-paint the bathroom white too.

IMG_3503

As you can see, it's a small {and cozy} space.  I am excited to re-do this area!!

Hopefully I can have it finished before Christmas, I will keep you posted!!

BEFORE & AFTER :: the back deck

As you may remember, I showed a few photos of our recently finished back deck.  Matt still had some details to finish, but I was excited to post some photos.  Well, yesterday he finished the back deck!

IMG_2214

See how tall the deck is off of the ground?  Well, for months now, this area has just been open {and ugly}.

IMG_3043

We couldn't put siding back up because it would trap the moisture and just be a big, yucky problem down the road.  We still wanted to be able to use the space for firewood storage, so we needed something accessible, yet pretty to look at.

IMG_3047

Matt built this trellis our of cedar.  It will turn a soft gray as it weathers.  He is going to spread bark dust under the deck, so when you do peek through, you see a nice clean layer of bark.

IMG_3050

When I watch Matt work, he makes everything look so effortless.  This would look awful if I attempted to try it!

IMG_3054

It truly is one of my favorite spots to sit and relax.

IMG_3053

We eat dinner out here almost every night!

IMG_3060

I needed something between the windows so I made these two signs from cabinet doors {we have a few extras laying around}!  Next week I will do a 'non-tutorial' on how I made the signs, they were super easy!

IMG_3062

The garden is growing like crazy!

IMG_3044

And I can't forget to share a photo of my little assistant!

xoxo~Darci